Diving into the world of First-Person View (FPV) drones can be an electrifying adventure, opening doors to not just a new hobby but a deeply immersive flight experience. The thrill of soaring through the skies from a drone’s eye perspective is unparalleled and crafting that perfect FPV drone is an enriching journey that blends technology with artistry. This essay will serve as your comprehensive guide through the intricate process of selecting the optimal components for your FPV drone. We will navigate through the technical maze of frames, motors, Electronic Speed Controllers (ESCs), flight controllers, cameras, and more, ensuring that you emerge with the knowledge to build a drone fine-tuned to your desires. Then, we’ll transition into the hands-on excitement of assembling your bird, piece by piece, solder by solder, until the moment its propellers first whirl in anticipation of takeoff. Finally, we’ll delve into the digital realm of programming and tuning, where software meets hardware, and where precise adjustments make the difference between merely flying and truly piloting with precision.
Selecting FPV Drone Components
Building Your First FPV Drone: Must-Have Components for the Skyward Adventure
Welcome, fellow flyers! Are you ready to delve into the thrilling world of FPV (First Person View) drones? Whether you’re a budding pilot or a seasoned aviator, having a clear understanding of the essential components for your FPV drone build is paramount. Let’s unbox the critical pieces you’ll need to craft your very own eye in the sky!
Frame:
The backbone of your FPV drone, the frame is what holds all your precious components together. Durability is key—you want something that can take a few tumbles without breaking. Frames come in various shapes and sizes, typically categorized by the distance between diagonal motors (measured in millimeters).
Motors:
Without them, you’re going nowhere! These powerful little beasts are what give your drone lift and speed. Typically, you’ll need four motors for a quadcopter. Be sure to match their size and thrust capability to the weight and intended use of your drone.
Electronic Speed Controllers (ESC):
Think of ESCs as the translators between your drone’s battery and motors. They regulate the speed at which your motors spin, and, by extension, the thrust they produce. One for each motor is the standard.
Flight Controller:
The brain of the operation, a flight controller, keeps your drone stable and responsive. It interprets input from your remote control and sensors to make flight adjustments in real-time. Choose one that matches your flying style—whether that’s smooth cinematic movements or acrobatic flips.
Propellers:
Propellers convert your motors’ rotational force into the thrust that lifts your drone. They come in various sizes and pitches—the angle of the blade. Be aware that size and pitch will affect your drone’s thrust, battery life, and responsiveness.
Battery:
The lifeblood of your FPV drone. Lithium Polymer (LiPo) batteries are the most common. Look for a balance between capacity (mAh) and discharge rate (C rating). Remember, a higher capacity battery may keep you in the air longer, but it will also weigh more.
FPV Camera:
The namesake of your build, the FPV camera allows you to see from the drone’s perspective. Camera choice can affect the quality and latency of the video feed—two critical factors in FPV flying.
Video Transmitter (VTx):
This component broadcasts your FPV camera’s live feed to your goggles or monitor. You’ll want to consider its range, power output, and the frequencies on which it can operate. Make sure it’s compatible with your FPV receiver!
FPV Goggles or Monitor:
The screen through which you’ll witness your aerial escapades. Goggles offer an immersive experience, while monitors might be better for those who wear glasses. Try them out to see which you prefer; just ensure they can receive the signal from your VTx.
Antenna:
An underrated yet essential component. A good antenna will enhance the quality and range of your video feed. There are several types, from omnidirectional to directional, each with its usage scenario.
Receiver:
Paired with your remote control, the receiver is what enables you to pilot your drone. The range of control, responsiveness, and fail-safe features are important factors to consider.
Building an FPV drone from scratch is not only a profoundly satisfying experience but also an excellent avenue to gain a deep understanding of the physics and electronics behind these remarkable flying machines. Grab your soldering iron, and let’s get crafting—your next adventure awaits above the clouds!

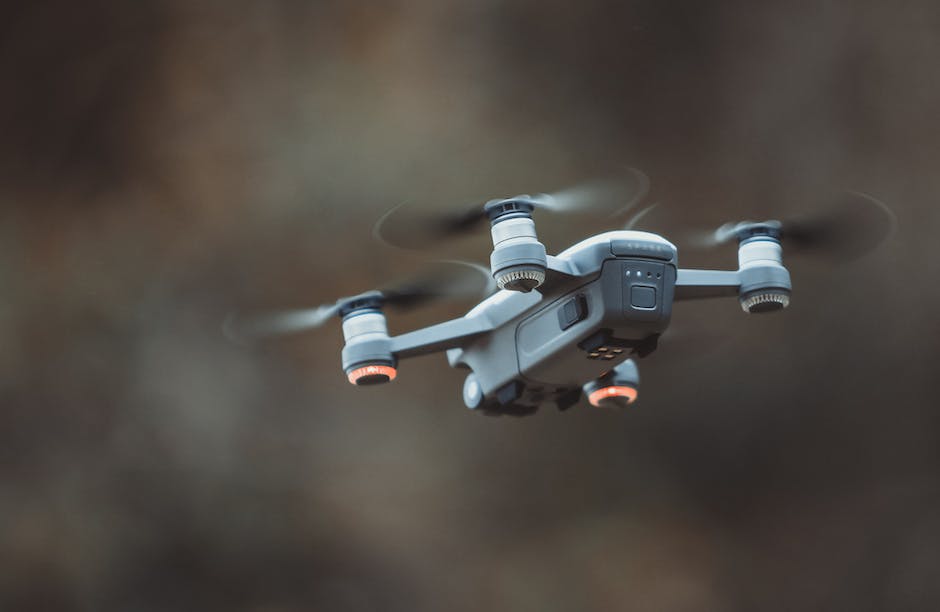
Photo by davidhenrichs on Unsplash
Assembling the Drone
Assembling Your FPV Drone: The Final Touches
Assembling an FPV (First Person View) drone can seem daunting, but with the right steps and a bit of patience, it can be an incredibly rewarding process. Once you’ve got your frame, motors, Electronic Speed Controllers (ESC), flight controller, propellers, battery, FPV camera, video transmitter (VTx), FPV goggles or monitor, antenna, and receiver all picked out, you’re ready to put everything together into a seamless flying machine. Here’s how to connect and secure everything to have your drone ready for its maiden flight.
Step 1: Power Distribution Board (PDB)
Start by attaching your Power Distribution Board to the frame, if it’s not integrated into the frame already. Solder the ESC power leads to the PDB, ensuring positive and negative connections match. The PDB will manage the flow of electricity from the battery to ESCs and other components.
Step 2: Attaching the ESCs
Securely mount your ESCs to the drone frame. It’s common to use electrical tape, heat shrink, or zip ties, but make sure they’re fastened well to minimize vibration and potential disconnections. Solder the motor wires to the ESCs, paying attention to the correct wire order as this determines motor direction. Double-check that all connections are solid and without shorts.
Step 3: Flight Controller (FC)
Next, mount the flight controller. Often, this involves standoff screws that elevate the FC from the frame to reduce vibration. Use clean wiring practices to connect the ESCs to the FC for a tidy and organized build. This connection will allow the flight controller to manage motor speeds for stable flight.
Step 4: FPV System
With the power plant and brain in place, it’s time for the eyes – the FPV camera and Video Transmitter. Mount the camera in the front of the drone frame, commonly on a tilt-able bracket for adjustable field of view. Connect the camera to the VTx, which typically mounts on the rear of the frame to keep a safe distance from interference.
Step 5: Receiver Installation
Install the receiver by connecting it to the flight controller. The receiver allows your drone to communicate with the transmitter (remote control). Position it in a spot where antenna placement will be optimal and away from potential blockage. Make sure to bind it with your transmitter before closing up the drone.
Step 6: Antennas
Properly position your antennas for the VTx and receiver. Keep them as far from each other as possible to avoid interference. VTx antennas often extend off the back or top of the frame, while receiver antennas typically protrude at an angle to ensure good signal reception.
Step 7: Final Checks and Preparation
Once all your components are secure, verify all connections, and ensure there’s no chafing of wires or loose parts. Tighten all screws, and if using a carbon fiber frame, consider using thread-locker to prevent screws from vibrating loose.
Step 8: Software Configuration
Connect your flight controller to your computer and use the FC’s dedicated software to configure settings. You’ll want to set up flight modes, calibrate the ESCs, and ensure the motors are turning in the correct direction. Don’t forget to configure fail-safes for added safety.
Step 9: Propeller Installation
Install the propellers on the motors making sure to match each motor’s rotation – two will be clockwise, and two counter-clockwise. Use a prop wrench to tighten the prop nuts, ensuring they’re secure but be careful not to over-tighten as you may need to remove them in the future.
Step 10: Maiden Flight
With everything in place, it’s practically time for the maiden flight. Choose an open and legal area to fly, perform a pre-flight check, and then, it’s time to take off. Start with simple maneuvers to get a feel for the controls and to confirm everything is working properly. Adjust settings as needed.
Remember, building an FPV drone is a continuous learning experience. Tweaking, tuning, and sometimes repairing are all part of the hobby. Enjoy the process and the satisfaction of a drone built with your own hands and the unique perspective of the world it provides.

Programming and Tuning
Tuning for Top-Notch Performance: The Finer Points of FPV Drones
Alright, speed devils and aerial acrobats, let’s dive into the nitty-gritty of optimizing your FPV (First-Person View) drone for that silky-smooth flight and razor-sharp responsiveness we all crave. You’ve got the basic build down, so now it’s time to roll up those sleeves and tweak your bird for peak performance.
Begin with the Basics: Center of Gravity
Before you start fiddling with software, ensure your drone’s center of gravity (CG) is dead center on both the X and Y axes. Balancing it right affects stability, so adjust the position of your battery and other components until your quad doesn’t lean in any direction when balanced on a rod or your fingertips.
Betaflight for the Win
Assuming you’ve got Betaflight or a similar configuration tool, this is your cockpit for fine-tuning. Connect your flight controller to your computer, fire up the tool, and let’s get configuring.
PID Parameters: The Heart of Your Drone
The PID (Proportional, Integral, Derivative) loop is the control system tuning your drone’s performance. Here’s a basic rundown:
- Proportional (P): Stabilizes the drone. Too high, and you’ll get oscillations. Too low, and your drone is a sluggish beast.
- Integral (I): Eliminates drifts in steady flight and helps maintain altitude. Get it wrong, and it’s wobble city or slow to react.
- Derivative (D): Damps the P-term to prevent those wicked oscillations. It’s what gives your craft that crisp, responsive feel.
Start with stock PID settings and gradually adjust. Use the in-built tuning wizards if available—they’re gold for newcomers. Flight in a controlled, safe environment, and tweak your PID settings in small increments – patience is your ally.
Rates and Expo Settings
Fine-tuning your rates dictates how snappy or gentle your drone responds to stick inputs. Adding expo softens the response around the stick’s center, giving smoother control for precision flying. For racing or freestyle, higher rates with an exponential curve blend agility with finesse.
Filtering Out the Noise
Vibrations can wreak havoc with your drone’s gyros. Betaflight’s filters help clean up that noise, preventing the dreaded “death roll.” Enable dynamic filtering, and tune the gyro and D-term filters for crisp response without the shakes.
ESC Calibration and Motor Directions
Don’t overlook calibrating your ESCs through the configurator. These unsung heroes need to sing in harmony for that perfect pitch (pun very much intended). While you’re at it, check your motor directions within Betaflight. They must match your propeller orientation, or you’re not going anywhere.
Throttle and Endpoint Adjustments
For pinpoint control, calibrate your transmitter’s throttle and endpoints to ensure you’re using the full range of your sticks. This ensures you don’t run out of throttle on a punch-out or lack swagger in your spins and rolls.
OSD Customization
Customize your On-Screen Display (OSD) for vital flight data at a glance. It’s like your drone’s dashboard – don’t let it become a distraction, but tailor it with the essentials: battery voltage, timer, and signal strength are your watchwords.
Failsafes: Your Safety Net
This is your “oh no” plan. Configure your failsafe settings to determine what happens if your drone loses signal. It’s all about minimizing damage and keeping safety as priority one. Decide whether you want it to drop, hover, or return (if GPS is equipped), and test it – better safe than sorry!
Now, with these pointers in tow, the sky is no longer the limit—it’s your playground. Remember, the art of tuning is a journey, not a destination. Each flight is a test, each adjustment a refinement. So go ahead, give your FPV drone the tuning it deserves, and revel in the rush of a bird tailored to your touch, ready to soar.
As our exploration of FPV drone building approaches its end, we pause to reflect on the journey undertaken. We started with individual parts, seemingly incongruent, and through careful selection, detailed assembly, and meticulous programming, we’ve brought to life a machine that epitomizes the custom nature of FPV drone creation. This process is as much about personal growth as it is about technological accomplishment – every solder joint, every flight test, every tweak in the tuning has added to your repertoire of skills. As your FPV drone takes its final form, ready to slice through the air, remember that each challenge surmounted has paved the way to becoming a skilled pilot and builder. May your future flights embody the spirit of innovation and the joy of flight that has driven aviators throughout history. Keep your goggles clear and your rotors spinning; the sky is now your playground.