Embark on a mesmerizing journey into the world of northern lights photography, where the night sky comes alive with dazzling displays of color and shape. In this comprehensive guide, we will delve into the captivating science behind the aurora borealis, as well as share invaluable tips for selecting the right gear, scouting locations, mastering composition, shooting in challenging conditions, and honing your post-processing skills. By the end of this exploration, you’ll be well on your way to capturing your very own breathtaking images of the northern lights and building a stunning portfolio to showcase your work.
Understanding the Science of Northern Lights
Introduction:
The northern lights, or aurora borealis, are an enchanting natural phenomenon that occurs when charged particles from the sun interact with Earth’s magnetic field. To capture stunning photographs of this spectacular display, it’s essential to understand the science behind the lights, the ideal conditions for viewing them, and the best photography techniques.
Section 1: The Science of Northern Lights
- Causes of aurora borealis:
- Charged particles (protons and electrons) emitted by the sun, known as solar wind, travel toward Earth.
- When these particles reach Earth, they interact with our planet’s magnetic field, causing it to weaken momentarily.
- This allows some particles to enter Earth’s atmosphere and collide with gas molecules (mostly oxygen and nitrogen).
- These collisions excite the gas molecules, causing them to emit light in various colors, creating the mesmerizing aurora borealis.
- Factors affecting the intensity of northern lights:
- Solar activity: High solar activity leads to more intense and frequent auroras.
- Earth’s magnetic field: Changes in Earth’s magnetic field can cause the northern lights to be visible at lower latitudes.
Section 2: Ideal Conditions for Viewing Northern Lights
- Location: Aim for areas with little light pollution, clear skies, and a high latitude (closer to the North Pole).
- Time of year: The northern lights are most active during the equinoxes (March and September) and less active during the solstices (June and December).
- Solar activity: Monitor websites and apps that provide updates on solar activity and aurora forecasts. High solar activity will increase the likelihood of seeing the northern lights.
- Weather: Clear, cloudless skies are necessary for the best viewing experience.
Section 3: Northern Lights Photography Techniques
- Camera equipment: Use a DSLR or mirrorless camera with manual mode, a wide-angle lens (preferably with a fast aperture), a sturdy tripod, and a remote shutter release.
- Camera settings:
- Switch to manual mode (M)
- Set the ISO to a high value (1600-3200) to capture more light
- Use a wide aperture (lowest f-number) for maximum light intake
- Set a slow shutter speed (15-25 seconds) to allow enough time for the light to be captured
- Adjust the focus to infinity, or use live view to focus on a distant star or object
- Composition and framing:
- Look for interesting foreground elements (trees, rocks, water) to create depth in your images
- Position the northern lights in the upper third of the frame, using the rule of thirds
- Capture the reflection of the northern lights in water for a unique perspective
- Post-processing:
- Adjust the exposure, contrast, and white balance to enhance the colors of the northern lights
- Increase clarity and reduce noise for a sharper image
- Experiment with different color grading techniques to bring out the vibrant hues of the aurora
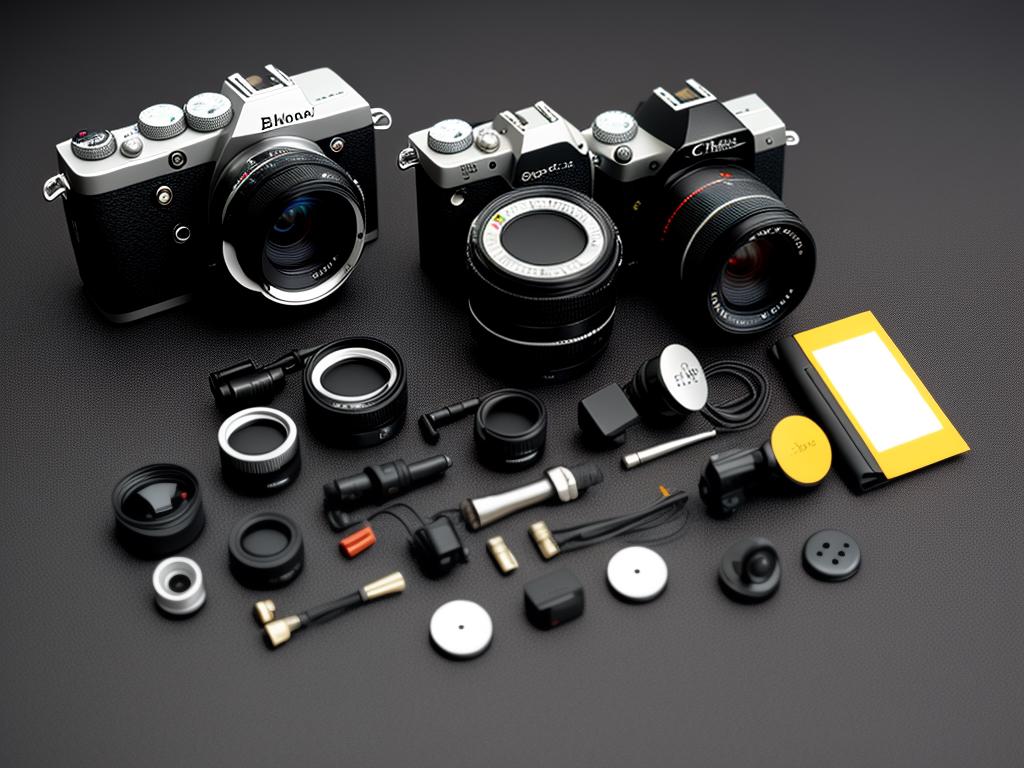
Selecting the Right Gear and Camera Settings
Title: Northern Lights Photography: Selecting the Right Gear and Camera Settings for Beginners
Introduction: The northern lights, or aurora borealis, is a spectacular natural phenomenon that can create some incredible photographs. If you’re interested in capturing this breathtaking sight, it’s essential to have the right gear and familiarize yourself with ideal camera settings. In this guide, we’ll introduce you to the necessary equipment and optimal settings for photographing the northern lights.
1. Choosing the right gear
- Camera: You’ll need a DSLR or mirrorless camera that allows manual control over ISO, aperture, and shutter speed settings. This is crucial for capturing the dim, fast-moving lights of the northern lights. Look for a camera with excellent low-light performance.
- Lens: A wide-angle lens with a fast aperture (f/2.8 or lower) is ideal for capturing the expanse of the sky and allowing more light to reach your camera’s sensor. A lens offering a focal length of 14-24mm is considered suitable for northern lights photography.
- Tripod: A sturdy and reliable tripod is essential to keep your camera stable during long exposures, helping you avoid blurry images.
- Additional accessories:
- Remote shutter release: This is useful to prevent camera shake when pressing the shutter button, ensuring sharp images.
- Extra batteries: Northern lights photography often involves being outdoors in cold temperatures, which can drain your batteries quickly. Bring extra fully charged batteries with you.
2. Optimal camera settings
- Focus: Set your lens to manual focus and use the live view feature to focus on a bright star or distant light in the scene. This will ensure proper focus for capturing the northern lights in sharp detail.
- Aperture: Use the lowest possible f-stop (largest aperture) for your lens, typically f/2.8 or lower, to allow as much light as possible to be captured by the camera sensor.
- Shutter speed: Start with a shutter speed of around 15-25 seconds, and adjust as necessary depending on the brightness and movement of the aurora. Longer exposure times will capture more details and colors of the northern lights, but may result in blurry or overexposed images if the lights are too bright or fast-moving.
- ISO: Set your camera’s ISO to a range of 1600-3200, depending on your camera’s low-light performance capabilities. Higher ISO settings will capture more light and detail in your photos but may introduce more digital noise.
- White balance: Set your white balance to the “daylight” or “sunny” preset, or manually adjust it to around 4000K to 5000K, to achieve the most accurate colors.
- Image format: Shoot in RAW format, if possible, to allow for greater flexibility in post-processing and adjustments.
Conclusion: Capturing the beauty of the northern lights can be a bit challenging, but with the right gear and camera settings, you can create jaw-dropping images. Familiarize yourself with your equipment and these settings, and practice in the field to gain hands-on experience in photographing the northern lights. Happy shooting!
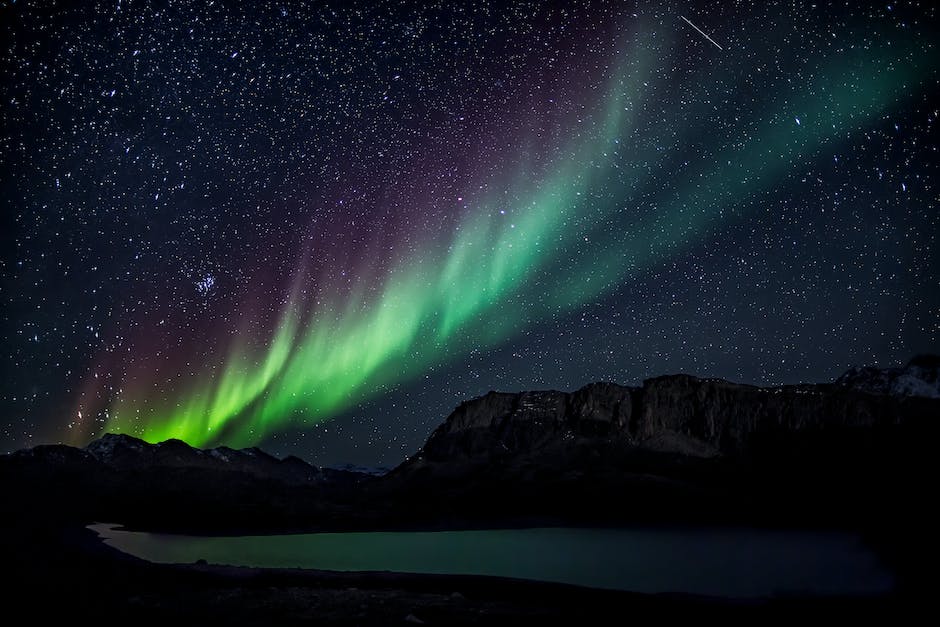
Scouting Locations and Timing Your Trip
Title: Scouting Locations and Timing Your Trip for Northern Lights Photography
Introduction: Northern lights photography, also known as aurora borealis photography, captures one of the world’s most stunning natural phenomena. To capture the best images, it is essential to scout the right location and time your trip correctly. This guide will provide you with steps for choosing the best locations for northern lights photography and provide tips on when to witness this spectacular sight.
Step 1: Research the Best Countries for Viewing the Northern Lights
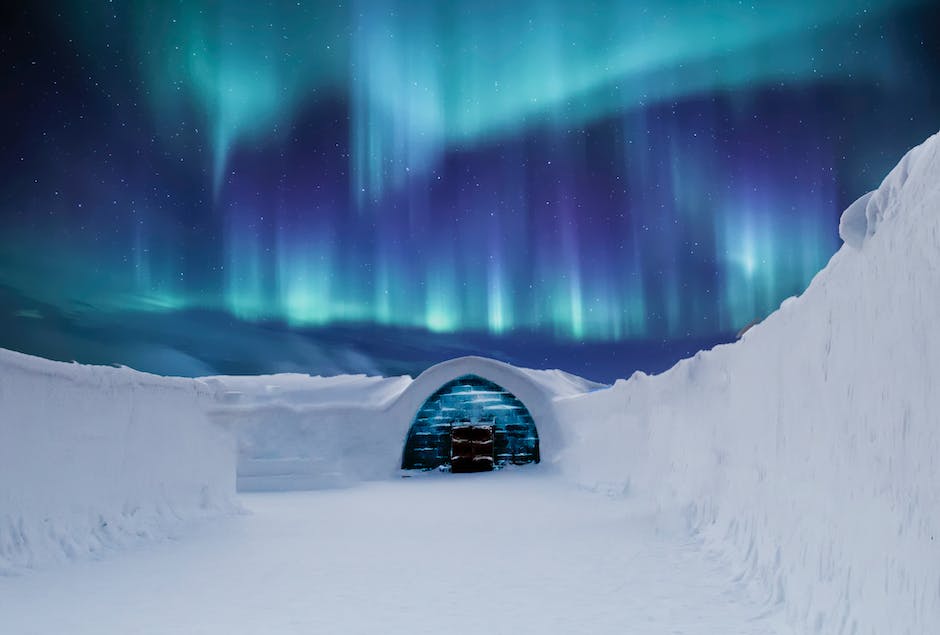
The northern lights are typically visible in countries located near the Arctic Circle, such as Norway, Iceland, Sweden, Finland, and Canada. Begin your research by identifying which countries offer optimal viewing conditions and then focus on specific locations within those countries.
Step 2: Choose a Remote Location with Minimal Light Pollution
To get the best photographs, you will need an area with minimal light pollution, which usually means going to rural or remote areas. National parks, small villages, and secluded cabins are great options. Do some research online or use apps such as “Dark Site Finder” to identify areas with the least amount of light pollution.
Step 3: Look for Clear Skies and Unobstructed Views
Clear skies are essential for capturing the northern lights, so research the weather patterns in your chosen location ahead of time. You will also want a location with an unobstructed view of the northern horizon, as this is where the aurora will be most visible. Keep in mind that mountainous regions can sometimes block the view, so opt for locations with open fields or coastal areas.
Step 4: Time Your Trip According to the Season
The best time to see the northern lights typically falls between September and March. During this period, the nights are longer and darker, providing a greater opportunity to see and photograph the aurora. While it’s impossible to predict the exact dates when the northern lights will be at their most active, you can increase your chances by planning a trip within this time frame.
Step 5: Check the Aurora Forecast
There are several websites and apps, such as “Aurora Watch” and “Aurora Service,” which provide aurora forecasts, indicating when and where the northern lights are likely to be most visible. These forecasts are based on solar activity and weather conditions and can be useful in helping you plan the specific days of your trip to optimize your chances of seeing the aurora.
Step 6: Be Prepared for Flexibility in Your Schedule
Even with thorough planning, there’s always a chance that the weather may not cooperate or the aurora may be less active than anticipated. Be prepared to adjust your schedule, extend your trip, or revisit your chosen location on different nights to increase your chances of capturing stunning northern lights photographs.
Conclusion:
Successfully photographing the northern lights requires ample planning and research to identify the best locations and ideal times for viewing the aurora. By following these steps and being prepared to adapt to changing conditions, you’re setting yourself up for a fantastic northern lights photography experience. Remember to bring along patience and a sense of adventure, and you’ll be well on your way to capturing breathtaking images of this mesmerizing natural phenomenon.
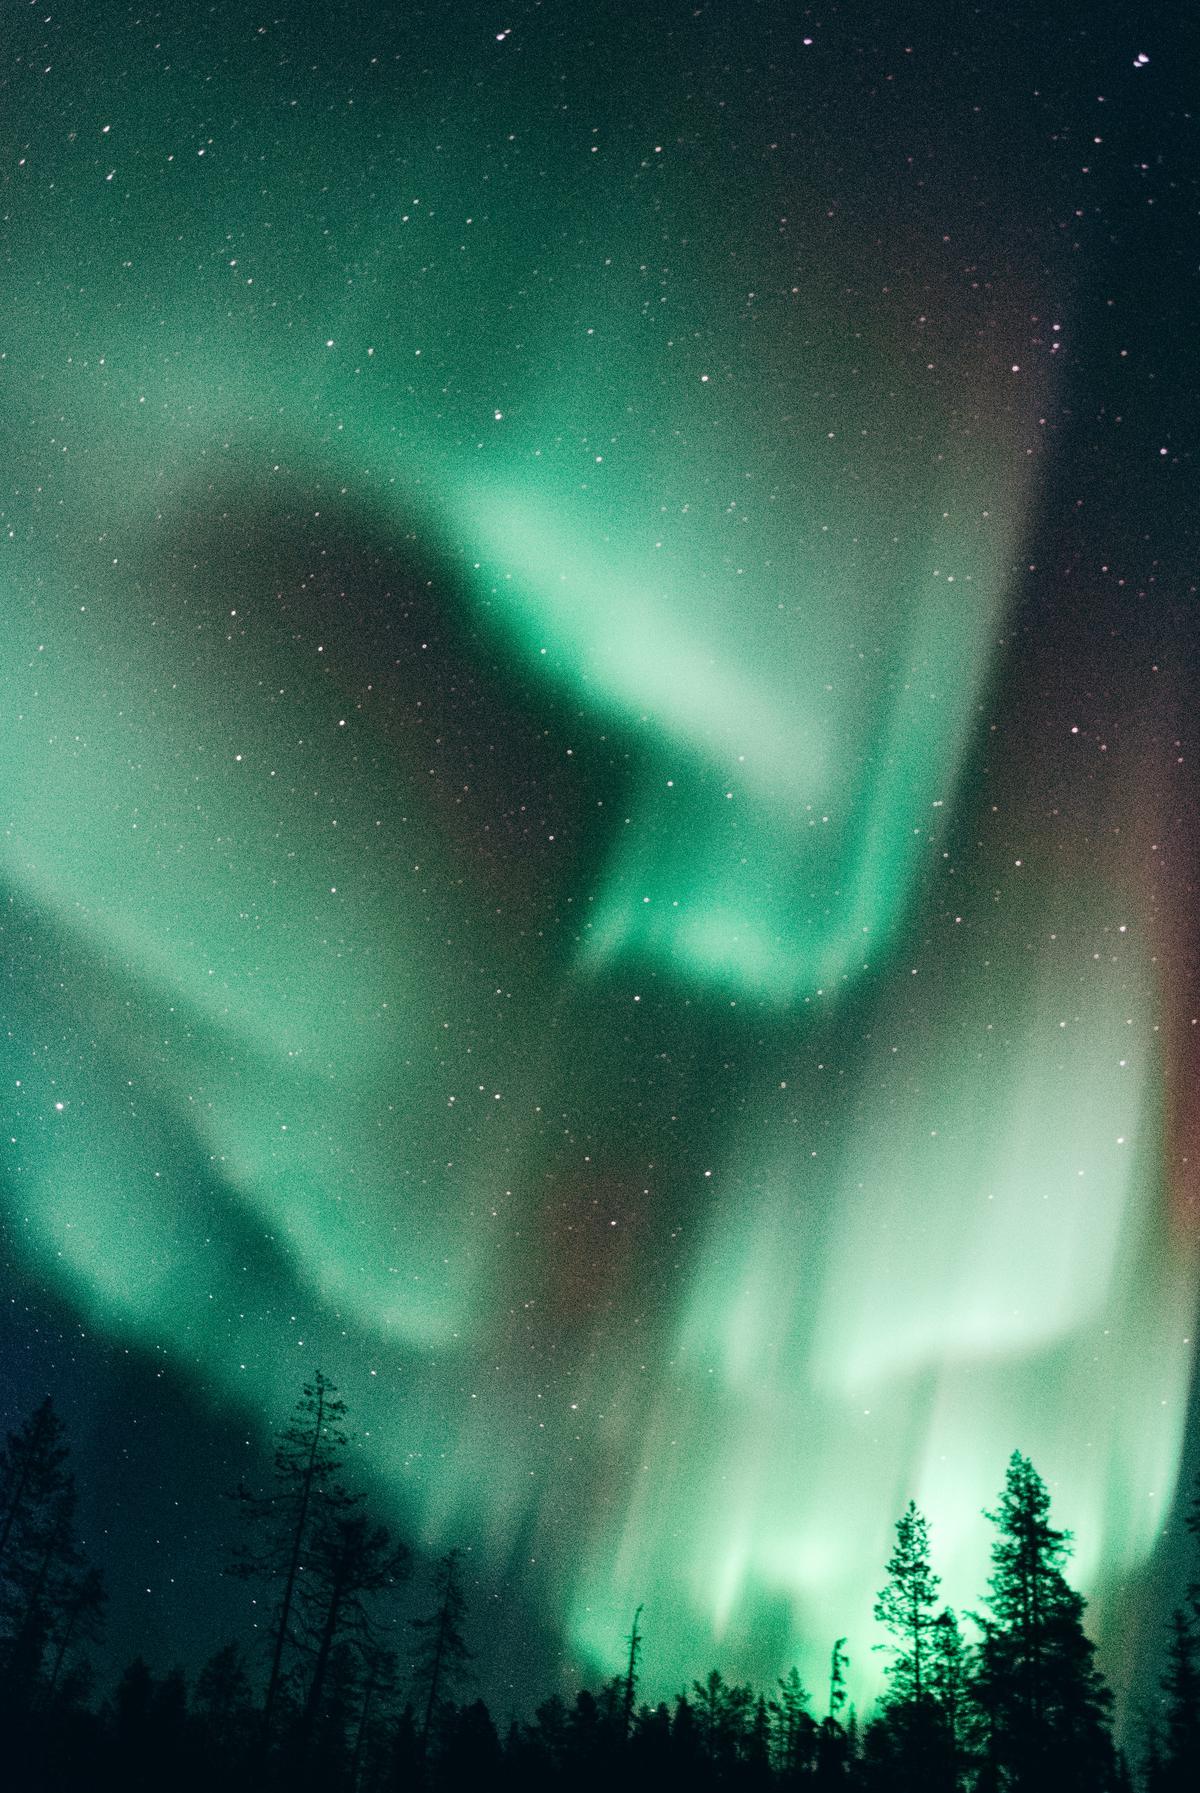
Photo by lucasmarcomini on Unsplash
Composition and Framing Techniques
Title: Composition and Framing Techniques for Northern Lights PhotographyIntroduction: Northern lights, also known as auroras, are a breathtaking natural phenomenon that many photographers aspire to capture. Mastering the art of composition and framing is crucial to creating visually captivating images of the northern lights. In this guide, we will explore various techniques that will help you elevate your aurora photography skills and produce stunning results.1. Rule of Thirds
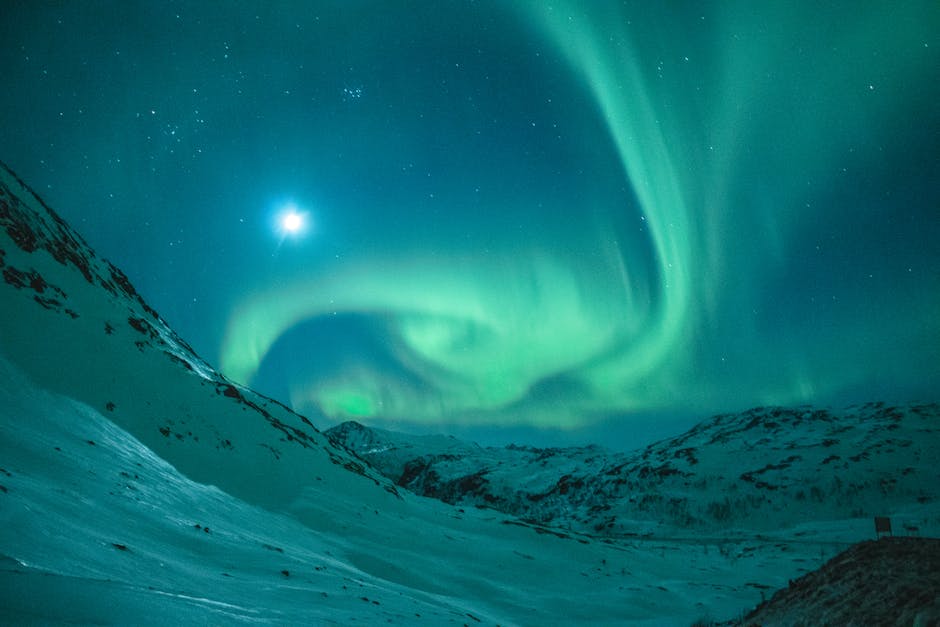
An essential technique for composing any photograph is the rule of thirds. Divide your frame into a grid of nine equal rectangles (3×3) and align your subjects or key elements along these lines or at their intersections. When capturing the northern lights, placing the horizon on the lower or upper third line can create a more dynamic and visually interesting image. Similarly, try aligning the most vibrant parts of the aurora along the grid lines or intersections.2. Foreground Interest
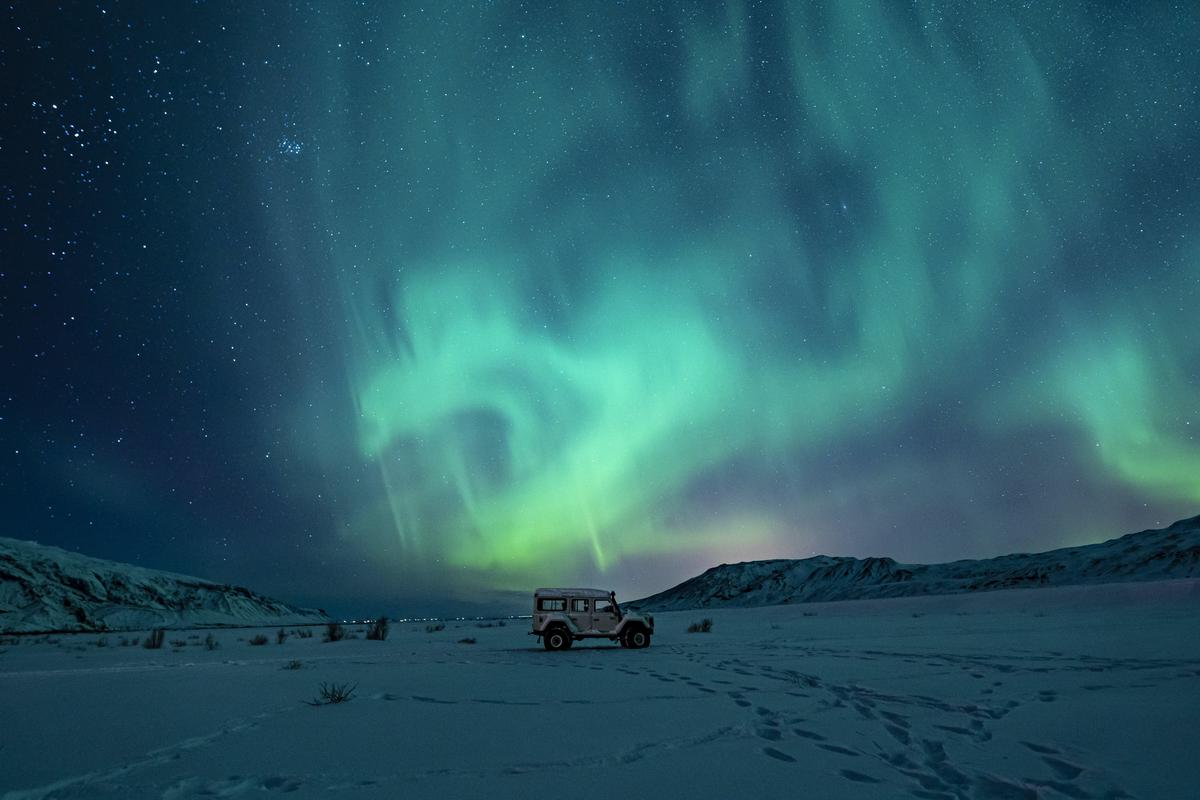
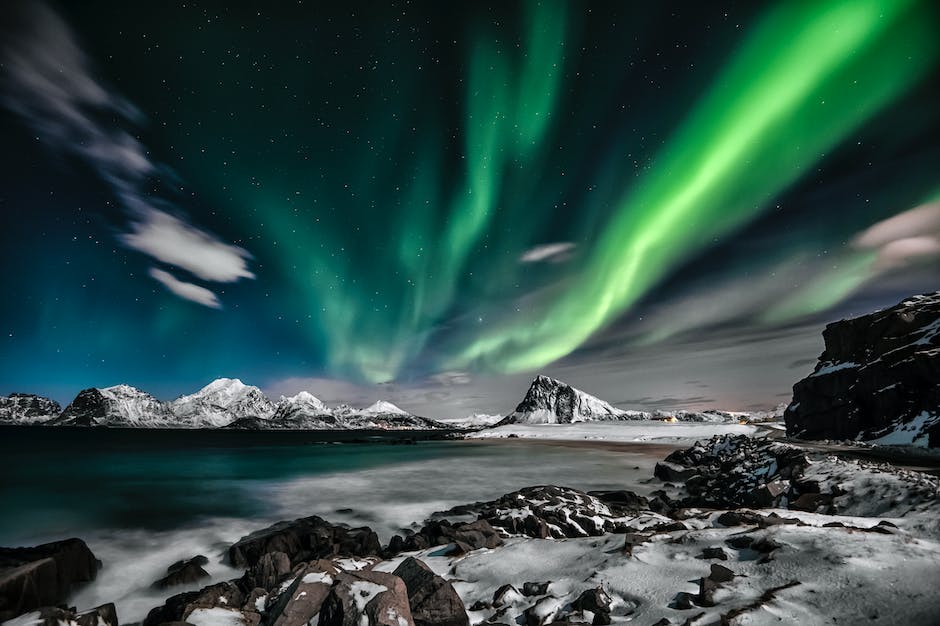
Adding a strong foreground element can provide context and depth to your northern lights photographs. Look for natural or man-made features such as trees, rocks, buildings, or even a person to create a captivating silhouette or focal point. Ensure these elements are adequately spaced and not too cluttered to maintain visual balance within the frame.3. Reflections
Utilizing reflections in bodies of water like lakes, ponds, or even wet sand can infuse your image with a sense of symmetry and add an extra layer of visual interest. Position your camera close to the water’s edge and experiment with different angles to capture the perfect reflection of the auroras.4. Leading Lines
Incorporating leading lines in your composition helps guide the viewer’s eye through the image and towards the main subject, in this case, the northern lights. Natural formations like rivers, roads, or mountain ridges can serve as powerful leading lines, creating a sense of depth and perspective.5. Vertical Orientation
The northern lights often extend from the horizon into the sky, making vertical orientation an excellent choice for framing your shots. A vertical frame can accentuate the height of the aurora, capturing its vastness and grandeur. Be mindful of your composition and the placement of your elements within the frame when shooting vertically.6. Experiment with Panoramas
Wide panoramic shots can create a breathtaking and immersive experience, allowing viewers to fully appreciate the scale and beauty of the northern lights. To achieve this, capture a series of overlapping images and stitch them together using photo editing software. Ensure your camera remains level while panning to avoid distortion.7. Sky versus Landscape Balance
Striking the right balance between the sky and landscape is crucial for capturing the perfect aurora shot. Too much emphasis on the sky can make the image appear empty, while too much focus on the landscape may overshadow the aurora itself. Experiment with various proportions to find the balance that best highlights the northern lights and complements the scenery.Conclusion: Capturing beautiful images of the northern lights is a rewarding challenge for any photographer. By mastering composition and framing techniques, you can elevate your aurora photography and create visually captivating images that showcase the full beauty of this mesmerizing natural phenomenon. Practice, explore different styles, and, most importantly, enjoy the process of honing your skills as you embark on your journey to photograph the northern lights.
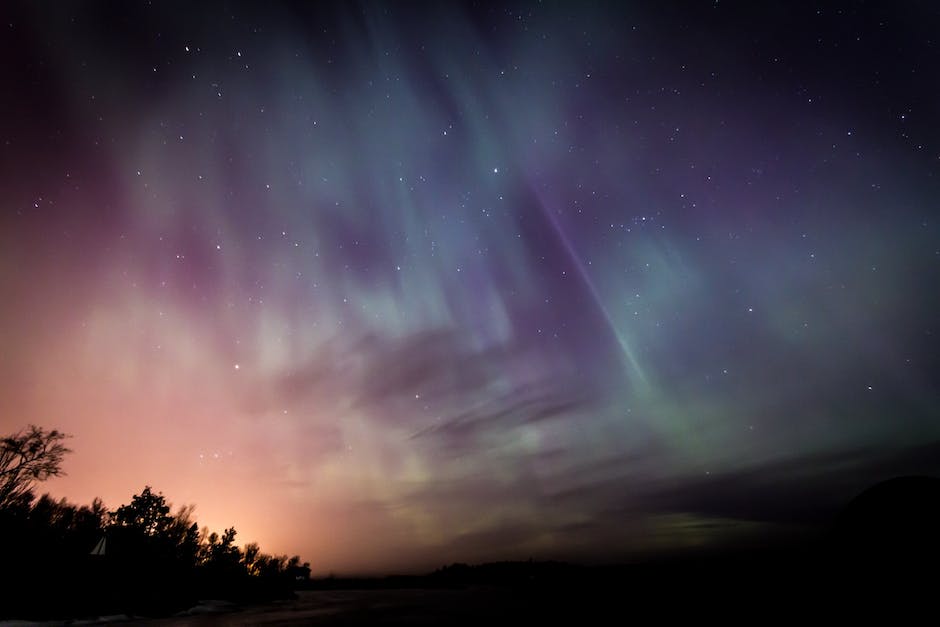
Shooting in Dark and Challenging Conditions
Title: Northern Lights Photography: Shooting in Dark and Challenging Conditions
The northern lights, or aurora borealis, are a spectacular natural phenomenon, creating a breathtaking display of colors in the night sky. Capturing this beauty through photography may be on the bucket list of many professionals and enthusiasts. However, shooting in the dark and challenging weather conditions typical during aurora-chasing trips can be tricky. This guide will cover techniques for taking stunning northern lights photographs in such circumstances.
Materials needed:
- DSLR or mirrorless camera with manual settings
- Sturdy tripod
- Wide-angle lens, preferably with a large aperture of f/2.8 or lower
- Remote shutter release or self-timer
- Warm clothing
- Headlamp or flashlight with red light setting
Step 1: Research and planning
- Determine the best time and location to capture the northern lights. This usually occurs during winter months in regions closer to the north pole, such as Canada, Alaska, Scandinavia, and Siberia. Aurora forecasts can help predict activity levels.
- Plan your shooting location based on the aurora forecast and local landmarks. Choose a spot with minimal light pollution, and consider any interesting foreground elements, such as trees or reflections on water.
Step 2: Camera settings
- Set your camera to manual mode.
- Use the widest aperture on your lens, such as f/2.8 or lower. A larger aperture allows more light into the camera, which is crucial in low-light conditions.
- Adjust the ISO setting to a high value, typically between 1600 and 3200. This increases the camera’s sensitivity to light but may introduce noise or grain. Be cautious not to set the ISO too high, as it may result in a loss of image quality.
- Set your shutter speed between 5 and 25 seconds. This allows enough time for your camera to capture the northern lights but not too long to prevent star trails or blurry images from the movement of the aurora.
- Set your lens focus to manual and, if possible, focus on infinity. Alternatively, you can use a bright star or distant light source to auto-focus before switching to manual focus. Do not rely on auto-focus, as it may have difficulty finding a focus point in the dark.
Step 3: Composition and preparation
- Set up your sturdy tripod to ensure camera stability during the long exposure.
- Compose your shot, ideally with a wide-angle lens, encompassing both the northern lights and any interesting foreground elements.
- Use a headlamp with a red light setting to keep your night vision intact as you set up your equipment and navigate the area in the dark.
Step 4: Capturing the northern lights
- Use a remote shutter release or your camera’s self-timer function to avoid camera shake when pressing the shutter button.
- Review your test shots and make any necessary adjustments to aperture, ISO, and shutter speed until you achieve the desired exposure.
- Be flexible and adapt your technique as the aurora’s intensity and movement change throughout the night.
Step 5: Post-processing
- Import your raw images into photo editing software, such as Adobe Lightroom or Photoshop.
- Adjust white balance, exposure, contrast, and other settings to enhance the colors and overall aesthetics of your northern lights photographs.
Conclusion: Capturing the beauty of the northern lights in challenging conditions can be a rewarding and exhilarating experience for photographers. By following these steps and being prepared for the dark and unpredictable weather, you can create stunning images of this spectacular natural phenomenon. Remember to be patient and persistent, as conditions can change rapidly, and the perfect shot may not materialize on your first attempt. Happy aurora chasing!
Post-Processing and Editing Tips
Title: Post-Processing and Editing Tips for Northern Lights Photography
Introduction:
Capturing the magical display of northern lights, or aurora borealis, is a dream for many photographers. But sometimes, despite all the right camera settings and composition, the captured images may not do justice to the jaw-dropping beauty of the phenomenon. That’s where post-processing and editing come to the rescue. In this guide, we will introduce you to some essential post-processing techniques that will help you enhance your northern lights photos and make them truly stand out.
1. Use RAW format:
The first piece of advice for northern lights photography is to shoot in RAW format. RAW files contain more data and details, which allow for greater control and flexibility during the editing process. This is particularly useful for adjusting exposure, color balance, and recovering highlights or shadows in your images.
2. Choose the right editing software:
Use a powerful and versatile editing software like Adobe Lightroom, Adobe Photoshop, or Capture One. These programs provide a wide range of tools and features that will help you get the most out of your northern lights photos.
3. Adjust white balance:
Northern lights photos often end up with a strong green or blue color cast, depending on the specific conditions and settings used during the shoot. To counteract this, adjust the white balance in your editing software. You can use the eyedropper tool to pick a neutral tone within the image or manually tweak the temperature and tint sliders for a more precise adjustment.
4. Enhance contrast and saturation:
Increase the contrast in your image to make the aurora and night sky pop. Be careful not to overdo it, as this can lead to unnatural-looking results. Boosting the saturation will intensify the colors of the aurora, making them more vibrant and eye-catching. However, avoid pushing the saturation too far, as it can result in color clipping and loss of detail.
5. Fine-tune exposure and shadows:
If your image is too dark, use the exposure slider to brighten it up. Be cautious not to overexpose the image, as this can cause the northern lights to look washed out. If the foreground elements are too dark, consider using the shadows slider or local adjustment tools to selectively brighten specific areas of your photo.
6. Sharpen your image:
To give your northern lights photo a crisp, detailed appearance, use the sharpening tools in your editing software. Keep in mind that over-sharpening can lead to noise and artifacts, so proceed with caution. You can also utilize noise reduction tools to minimize any unwanted noise without compromising the sharpness of your image.
7. Remove unwanted elements:
Use healing or cloning tools to remove any distracting elements in your photo, such as sensor spots, plane trails, or lens flares. Ensure to maintain a natural appearance by carefully blending the surrounding areas.
8. Enhance the sky with local adjustments:
Consider using gradient tools or other local adjustment options to apply different settings to the sky and the foreground. For instance, you can darken the sky or increase its contrast, while retaining the detail and exposure of the foreground elements.
9. Experiment with creative effects:
Don’t be afraid to experiment with filters, blending modes, or other creative effects in your editing software. These can help to create a unique, atmospheric look for your northern lights photos. Just be sure that the effects don’t overpower the natural beauty of the aurora.
10. Save your edits and export:
Finally, once you are satisfied with your post-processing adjustments, save your work and export your enhanced northern lights photo in the desired format for sharing or printing.
Conclusion:
With these post-processing and editing tips, you’ll be able to transform your northern lights photos from good to truly spectacular. Remember, practice makes perfect, so keep experimenting with different editing techniques to develop your own unique style and create breathtaking images of the aurora borealis.
Sharing Your Work and Building Your Portfolio
Title: Sharing Your Work and Building Your Portfolio: Northern Lights Photography
Introduction: Capturing the breathtaking beauty of the northern lights is a bucket list achievement for any photographer. Showcasing these images effectively can enhance your portfolio and broaden your professional opportunities. In this guide, we will discuss how to share your work and build a stunning portfolio with your northern lights photography.
1. Get organized:
- Sort your photos: Go through all your images and select the most impressive and captivating shots to feature in your portfolio.
- Categorize your images: Classify your northern lights images by factors such as color, location, or composition. This will make it easier to showcase your photos according to themes or stories.
- Edit your images: Use photo editing software to enhance the visual aspects of your photos, such as brightness, contrast, and color balance. This will ensure that your images look professional and polished.
2. Create a professional website:
- Choose a platform: Select a website-building platform that offers customizable templates and user-friendly tools. Platforms like Squarespace, Wix, and WordPress are excellent options for beginners.
- Design your website: Create a visually appealing and easy-to-navigate website that showcases your northern lights photography. Feature high-resolution images and organize them into galleries or collections.
- Optimize for mobile: Ensure that your website is mobile-responsive, as many potential clients and viewers now access portfolios on-the-go through their smartphones.
3. Utilize social media:
- Research popular platforms: Determine which social media platforms are most popular among photographers and your target audience. Instagram, Facebook, and Pinterest are highly recommended for sharing visual content.
- Share your work: Regularly post your northern lights photos on social media, accompanied by engaging captions and relevant hashtags.
- Network within the photography community: Follow and engage with other photographers on social media to forge connections and expand your reach.
4. Join photography communities and forums:
- Sign up for photography websites and forums: Websites such as 500px, Flickr, and ViewBug provide platforms for photographers to showcase and discuss their work.
- Participate in discussions: Become active within these communities by commenting on others’ work, participating in discussions, and asking for constructive feedback on your own images.
- Enter photography contests: Many photography websites host regular contests and challenges. Submit your northern lights images for a chance to gain exposure and recognition.
5. Print and display your work:
- Choose high-quality prints: Invest in high-quality printing options, such as canvas prints or photo books, to display your work professionally and attractively.
- Display at local venues: Partner with local venues, such as cafes, galleries, and community centers, to showcase your northern lights photography to a local audience.
- Offer prints for sale: Make your northern lights images available for purchase online or at art shows and exhibits. This enables your work to reach a wider audience and generates income.
Conclusion: Showcasing your northern lights photography effectively is crucial in building a strong portfolio and advancing your professional prospects. By creating a captivating website, engaging in social media, participating in photography communities, and displaying your images in various formats, you can share your work, attract the attention of potential clients, and elevate your career as a photographer.
As we culminate this illuminating journey of northern lights photography, it is our hope that you are now equipped with the knowledge and skills needed to venture into the night and immortalize the beauty of this celestial phenomenon. With the right gear, proper planning, and diligent practice, you can transform your passion for the aurora borealis into a striking body of work that captures the essence of this awe-inspiring spectacle. May the allure of the dancing lights guide your creative vision and inspire you to reach new heights in your photographic endeavors.
Originally posted 2023-05-25 21:17:48.