Welcome to the fascinating world of astrophotography, where you have the opportunity to capture stunning images of celestial objects and events that occur beyond our planet’s atmosphere. This comprehensive guide will help you learn the basics of astrophotography, choose the right equipment, and develop specific techniques to create awe-inspiring images of the night sky. Let’s embark on this mesmerizing journey of exploring and photographing the cosmos.
Introduction to Astrophotography
Introduction:
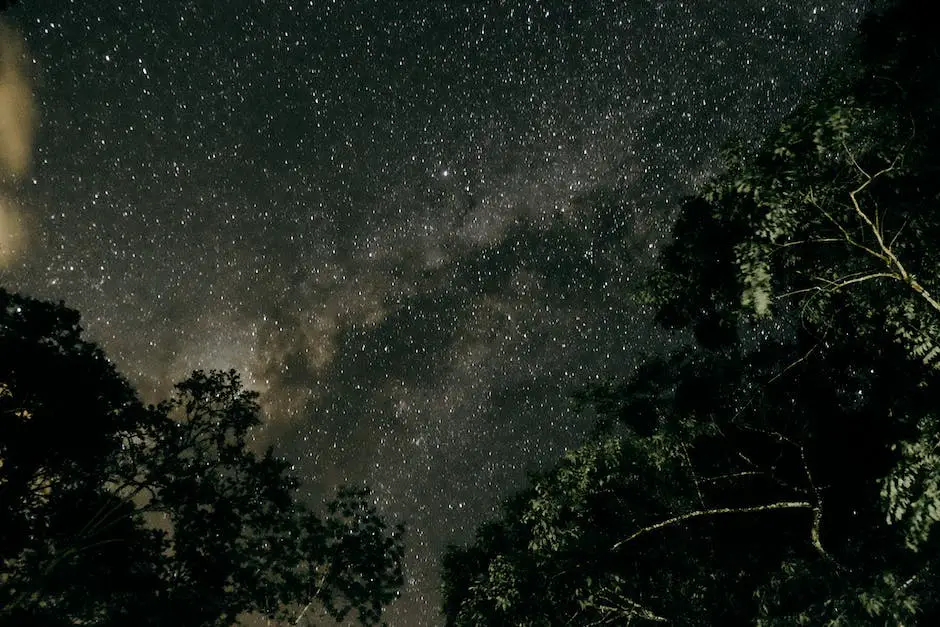
Astrophotography is the art and technique of photographing the wonders of the universe. From capturing the breathtaking beauty of the Milky Way to immortalizing the details of distant galaxies, astrophotography brings the night sky to life. Whether you are a beginner or a seasoned professional, understanding the basics of astrophotography and the various types of celestial objects you can photograph will help you create stunning images. In this guide, we will review the essential equipment, techniques, and types of celestial objects you can capture through astrophotography.
1. Equipment for Astrophotography:
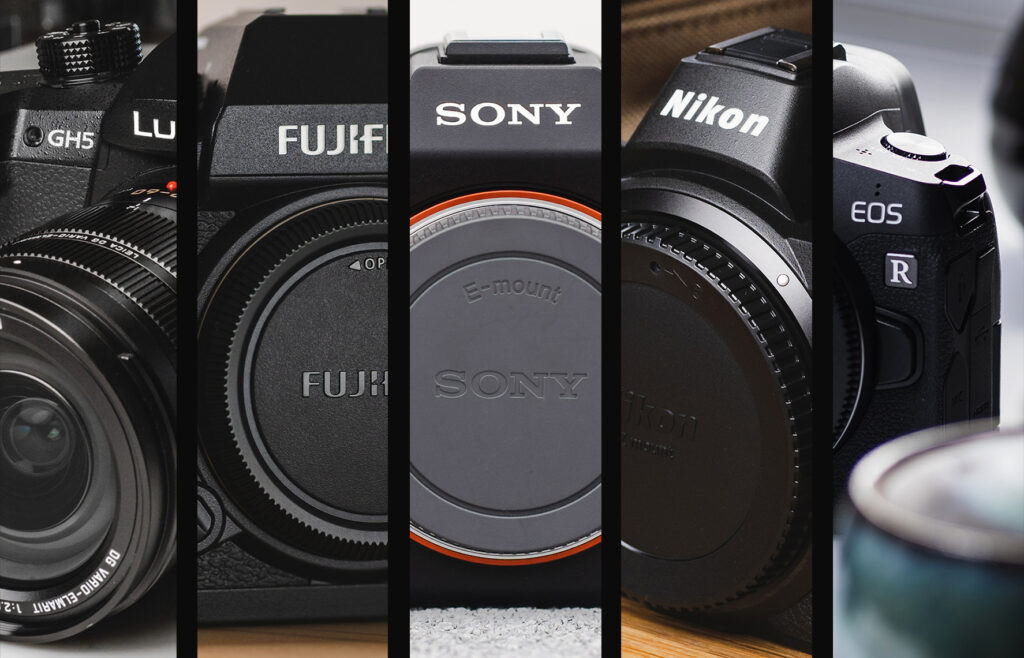
- Camera: A DSLR (Digital Single-Lens Reflex) or mirrorless camera is recommended for astrophotography due to their high-quality image sensors and manual settings. Look for a camera with a good low-light performance and low noise at high ISO settings.
- Lenses: Choose a fast lens (with a low f-number such as f/2.8 or lower) and a wide-angle focal length (14-24mm) to capture a larger field of view and more light. Opt for lenses with minimal distortion and chromatic aberration.
- Tripod: A sturdy and stable tripod is crucial to minimize vibrations and ensure sharp images at long exposures.
- Remote Shutter Release: A remote shutter release, either wired or wireless, will help you avoid camera shake while pressing the shutter button.
- Equatorial Mount (optional): An equatorial mount tracks the movement of the stars and can be useful for long exposure and deep-sky astrophotography. A cheaper alternative is a ‘star tracker,’ which provides basic tracking capabilities.
2. Basic Astrophotography Techniques:
- Focus: Set your lens to manual focus, and use ‘live view’ on your camera to focus on a bright star by magnifying it and adjusting the focus ring until the star appears sharp and small.
- Exposure: Start with the ‘500 Rule’ – divide 500 by the focal length of your lens to find the maximum exposure time before star trails become visible. For example, with a 20mm lens, the rule suggests an exposure of 25 seconds (500/20 = 25).
- Aperture: Use the lowest f-number (widest aperture) your lens allows to capture as much light as possible.
- ISO: Begin with ISO 1600 or 3200, and adjust based on the amount of light pollution and your camera’s low-light performance.
- Image Stacking: Take multiple shots of the same scene and stack them in post-processing to reduce noise and improve image quality.
3. Types of Celestial Objects for Astrophotography:
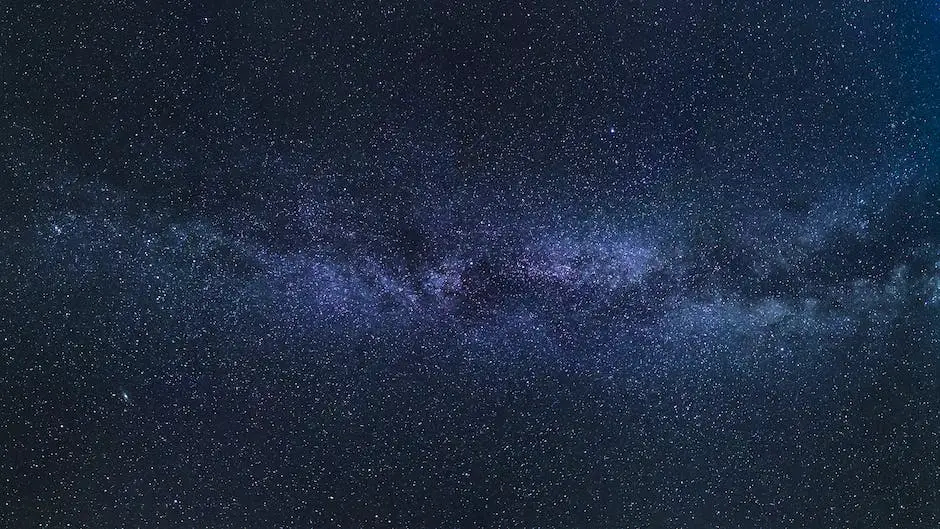
- The Milky Way: Photographing the arching band of our galaxy is a popular choice among astrophotographers. The best time to photograph the Milky Way is during new moon periods and at higher elevations, away from light pollution.
- Star Trails: Create stunning images by capturing the movement of stars as the Earth rotates. Using long exposures or stacking multiple shots, star trails can be captured as circular patterns around the North or South celestial pole.
- Moon and Planets: The moon, with its different phases and details, makes for a fascinating subject. Planets like Jupiter and Saturn, with their moons and features, can be photographed using a telescope and a camera adapter.
- Deep Sky Objects: Nebulae, galaxies, and star clusters comprise deep sky objects. They require an equatorial mount, long exposures, and often a telescope for optimal results.
Conclusion:
Astrophotography is an amazing and rewarding hobby that allows you to explore the beauty of the night sky through photography. With the right equipment, techniques, and a bit of patience, you’ll be on your way to capturing stunning images of celestial objects. The universe is waiting – grab your camera and reach for the stars!
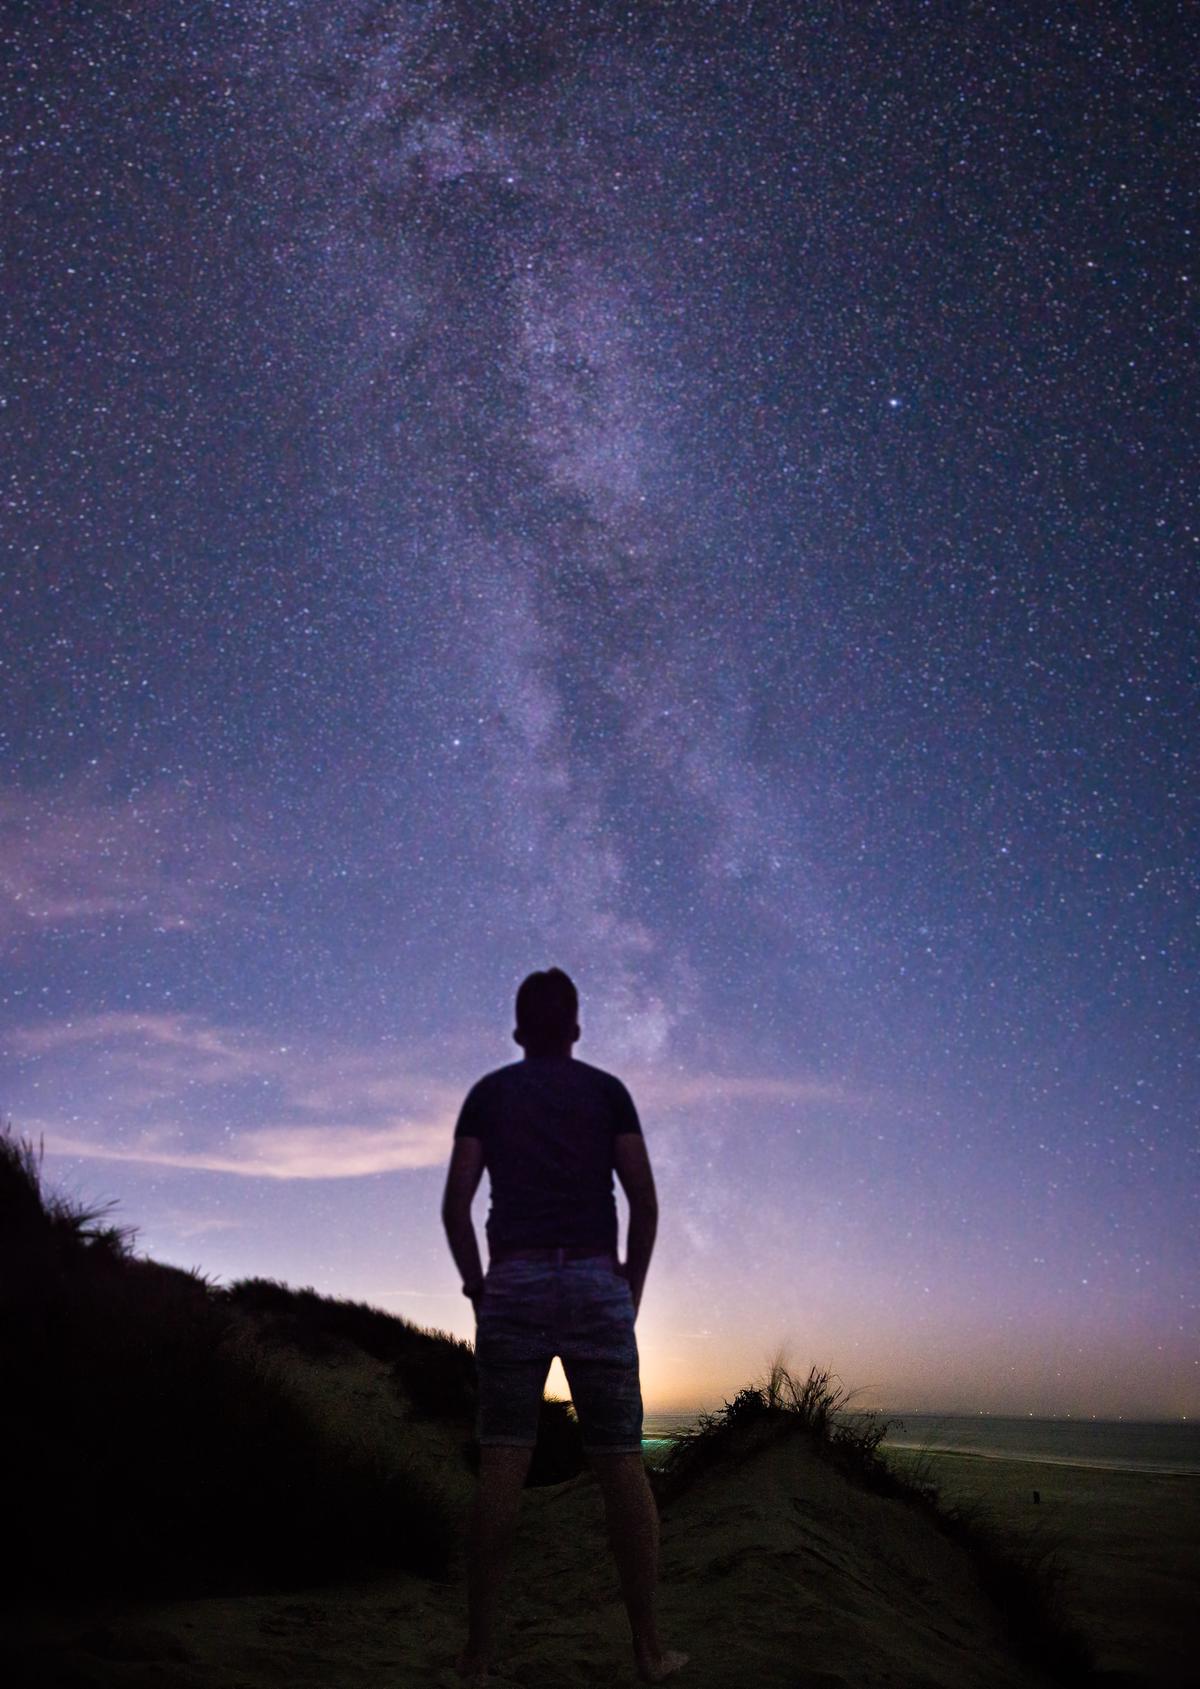
Photo by joranquinten on Unsplash
Choosing the Right Equipment
Title: Choosing the Right Astrophotography Equipment: Essential Gear for Capturing the Night Sky
Introduction:
Astrophotography is the art of capturing celestial objects and phenomena in the night sky, and it requires a specific set of equipment to achieve breathtaking results. This guide will help you understand and choose the essential astrophotography equipment, including telescopes, mounts, cameras, and lenses.
1. Telescopes:
When choosing a telescope for astrophotography, you will want to consider the following factors:
- a. Aperture: A larger aperture allows more light to enter the telescope, which helps capture fainter celestial objects. However, a larger aperture also requires a bigger, more stable mount, and can be more challenging to transport and set up.
- b. Focal Length: A longer focal length provides more magnification, which can be beneficial for capturing smaller objects such as planets and distant galaxies. However, it also narrows the field of view, making it more challenging to align and track objects.
- c. Optical Design: There are several types of telescopes, including reflectors, refractors, and compound or catadioptric models. Refractors are preferred for astrophotography due to their sharp images and absence of secondary mirror obstruction. However, reflectors, and compound telescopes can still produce quality images but might require more maintenance.
2. Mounts:
An essential piece of equipment for astrophotography is a stable and accurate mount. There are two types of mounts: alt-azimuth and equatorial.
- a. Alt-Azimuth Mounts: These mounts are designed for general observing and are not suitable for long-exposure astrophotography due to field rotation. However, they can be used for planetary and lunar photography with the appropriate camera.
- b. Equatorial Mounts: These mounts are designed to follow the rotation of the Earth, allowing for long-exposure photography without field rotation. An accurate and sturdy equatorial mount with motorized tracking is essential for successful deep-sky astrophotography.
3. Cameras:
Choosing the right camera for astrophotography depends on your specific needs and budget. You have two main options: DSLR cameras (digital single-lens reflex) and dedicated astronomy cameras.
- a. DSLR Cameras: These cameras are versatile and user-friendly, making them a popular choice for beginners in astrophotography. They can be used with a variety of lenses, as well as telescopes, providing flexibility in your imaging setup.
- b. Dedicated Astronomy Cameras: These cameras are specifically designed for astrophotography and often offer higher sensitivity, better cooling, and lower noise than DSLR cameras. They can either be monochrome or color and may require additional accessories, such as a filter wheel, to capture specific targets or wavelengths.
4. Lenses:
If you opt for a DSLR camera, you will need to choose the right lens or lenses for your astrophotography needs. Consider the following factors when selecting a lens:
- a. Focal Length: A lens with a longer focal length will provide more magnification but a narrower field of view. Wide-angle lenses are great for capturing large areas of the night sky, while telephoto lenses are suited for smaller, more specific targets.
- b. Aperture: A larger aperture (lower f-number) allows more light to enter the lens, which is critical for capturing dim celestial objects. Look for lenses with fast apertures, such as f/2.8, f/4, or even faster, if budget permits.
- c. Image Quality: Sharpness, chromatic aberration, and vignetting all impact the overall image quality. Research reviews and samples from experienced astrophotographers to determine which lenses perform well for astrophotography.
Conclusion:
Choosing the right equipment for astrophotography is essential to capturing stunning images of the night sky. By considering the factors mentioned above, you can select the best telescope, mount, camera, and lenses for your needs and budget, setting yourself up for success in your astrophotography endeavors.”
Understanding Camera Settings
Understanding Camera Settings for Astrophotography
Astrophotography involves capturing images of celestial objects like stars, planets, and galaxies. To produce stunning and clear images, it’s necessary to understand and use the optimal camera settings for astrophotography. In this guide, you will learn about ISO, aperture, shutter speed, and white balance, and how to use them effectively in astrophotography.
1. ISO
ISO is the measure of your camera’s sensitivity to light. Higher ISO values make your camera more sensitive to light, allowing you to capture images in low-light conditions without increasing the exposure time. However, a higher ISO also introduces more noise into your images.
For astrophotography, balancing the ISO value is crucial. Generally, you should use an ISO value between 800 and 3200, depending on your camera’s capabilities. A more advanced camera can handle higher ISO values without producing too much noise.
- Start with an ISO value of 1600 and adjust it based on your camera’s performance.
- Experiment with different ISO values to find the setting that works best for your camera and specific astrophotography requirements.
2. Aperture
Aperture refers to the size of the opening in the lens that allows light to enter the camera. A larger aperture (lower f-stop number) allows more light to enter the camera, which is essential for astrophotography where there’s limited available light.
- Use the largest possible aperture or the lowest f-stop number your lens allows.
- Ideally, use a lens with an aperture of at least f/2.8. Faster lenses (with lower f-stop numbers) will provide even better results.
3. Shutter Speed
Shutter speed (also known as exposure time) determines how long the camera’s sensor is exposed to light. In astrophotography, you need long exposures to capture dim celestial objects, but using too long of an exposure will result in star trails due to the Earth’s rotation.
- Use the “500 Rule” to determine the optimal shutter speed. Divide 500 by the focal length of your lens (in millimeters) to calculate the maximum number of seconds you can keep the shutter open without experiencing visible star trails. For example, if your lens has a focal length of 24mm, you would use a shutter speed of 500 / 24 = 20.8 seconds.
- Experiment with different shutter speeds to find the right balance between capturing enough light and avoiding star trails.
4. White Balance
White balance adjusts the colors in your images, ensuring that white areas appear truly white. Incorrect white balance can cause a color cast, making your images look unnatural. Astrophotography often requires manual adjustments to the white balance settings to achieve accurate color representation of the night sky.
- Use the daylight or sunlight white balance preset, as it generally provides the most natural color balance for the night sky.
- You can also set a custom white balance by using a temperature value between 3500K and 5000K. Higher values will make the sky appear cooler (bluish) and lower values will produce a warmer (orangish) result.
- Fine-tune the white balance during post-processing for the most accurate and visually pleasing results.
In conclusion, understanding and mastering camera settings such as ISO, aperture, shutter speed, and white balance is crucial for successful astrophotography. Experiment with different settings to find the optimal combination for your specific camera and night-sky conditions. Don’t forget to use a sturdy tripod and a remote shutter release to avoid any camera movement during long exposures. Good luck and happy astrophotography!
Astrophotography Tracking and Mounts
Title: Astrophotography Tracking and Mounts: Ensuring Sharp Images
Astrophotography is an incredible way to capture the beauty and grandeur of the cosmos. To ensure sharp images, it’s essential to have a proper understanding of tracking techniques and the different types of astrophotography mounts. This guide will explore the importance of tracking and introduce you to various mounts so that you can elevate your astrophotography skills.
The Importance of Tracking
Tracking is crucial in astrophotography because the Earth is constantly rotating, causing the stars and other celestial objects to appear to move across the sky. When attempting long exposure photography, this movement can lead to blurred or trailed images. Tracking involves carefully following these objects with your camera, maintaining their positions in the frame and allowing for clear and detailed images.
Types of Astrophotography Mounts
- Altitude-Azimuth (Alt-Az) Mounts
- Alt-Az mounts are designed with two axes: altitude (up and down) and azimuth (left and right). They are an excellent choice for beginners and visual observers due to their ease of use. However, they are not ideal for astrophotography as they don’t follow the celestial object’s arc across the sky, leading to rotation issues during long exposures.
- Equatorial Mounts
- Equatorial mounts are an improvement upon Alt-Az mounts because they have one axis aligned with Earth’s polar axis. This alignment allows them to track celestial objects more accurately, making them much better suited for astrophotography. There are two types of equatorial mounts: German equatorial mounts (GEM) and fork mounts.
- German Equatorial Mounts (GEM)
- GEM mounts feature a counterweight system to balance the telescope’s weight and a motor-driven worm gear system to help track objects smoothly. They can support a range of optical tubes and are well-suited for long exposure astrophotography. However, GEMs tend to be heavier and require more time for polar alignment compared to other mounts.
- Fork Mounts
- Fork mounts are another category of equatorial mounts, typically used with Schmidt-Cassegrain telescopes. They consist of a fork-shaped arm that holds the telescope’s optical tube, allowing for a more compact and lightweight setup. Fork mounts may require an equatorial wedge to achieve proper polar alignment, which is necessary for accurate tracking during long exposures.
- Tracking Platforms and Star Trackers
- Tracking platforms and star trackers are portable devices that can be attached to a regular tripod or other mounting systems. These devices are designed specifically for astrophotography, allowing your camera or telescope to track celestial objects accurately. Tracking platforms are usually more affordable than full equatorial mounts and are suitable for DSLR cameras and small telescopes.
Conclusion
Having a solid understanding of astrophotography tracking and the various types of mounts available is essential to capturing sharp, detailed images of the cosmos. Equatorial mounts, particularly German equatorial mounts, are the top choice for serious astrophotographers. However, tracking platforms and star trackers offer affordable and portable options for those looking to get started. Regardless of your experience and equipment, learning the importance of tracking and finding the right mount for your needs will significantly enhance your astrophotography experience.
![]()
Framing and Composition
Title: Framing and Composition for Astrophotography
Astrophotography allows you to capture the breathtaking beauty of the cosmos, including celestial objects and the night sky’s stunning patterns. Framing and composition play a significant role in determining the quality and impact of your astrophotography images. In this guide, we will discuss techniques for framing and composition to create astounding images of the Milky Way, star trails, and more.
1. Plan Ahead:
Before heading out to take astrophotography images, it’s important to scout your location and plan your shoot during clear skies and minimal light pollution. Using apps such as Stellarium, Star Walk, or PhotoPills can help identify the position and timing of the celestial objects of your interest.
2. Choose a Focal Point:
In any photograph, a clear focal point or subject is crucial to draw the viewer’s attention. In astrophotography, common focal points include the Milky Way, specific constellations, or celestial events such as meteor showers or lunar eclipses. Also, consider including a foreground object such as a mountain, a tree, or an interesting structure to add depth and scale to your composition.
3. Rule of Thirds:
The rule of thirds is a fundamental photography principle that can be applied to astrophotography composition. Divide your frame into nine equal rectangles by drawing imaginary lines vertically and horizontally spaced equally apart. Place your focal point or main subject at the intersection points of these lines for a balanced and engaging composition.
4. Use a Wide-Angle Lens:
A wide-angle lens allows you to capture a larger portion of the night sky, while also including interesting foreground elements. This helps create a sense of scale, making celestial objects like the Milky Way even more breathtaking. Most astrophotography enthusiasts use a lens between 14mm and 24mm to capture wide scenes without distorting the image.
5. Star Trails:
For star trail photography where you create a circular pattern of the stars, identify the North or South Celestial Pole as your focal point. Using apps or a compass, locate the exact position of the pole and align your camera to capture the movement of stars around that central point. Including a silhouette of a foreground object can add an aesthetic element to your composition.
6. The Milky Way:
When capturing the Milky Way, it is helpful to choose a location with minimal light pollution and an interesting silhouette or foreground object. Position the Milky Way as your focal point or leading line that guides the viewer’s eye through the image. You can also use reflections in a body of water or positioning the Earth’s horizon to add more depth and interest to your photograph.
7. Experiment with Different Perspectives:
Astrophotography offers endless opportunities for creativity. Experiment with various angles, elevations or perspectives by shooting from high vantage points or ground level, and tilting your camera to capture diagonal shots.
8. Panoramas and Stacking Images:
Consider creating a panorama by taking multiple overlapping shots and merging them in post-processing to display an expansive, detailed image of the night sky. Additionally, stacking multiple exposures can help you reduce image noise, enhance the detail in the stars or nebula and create impressive visuals.
Conclusion:
Astrophotography is an art that requires patience, dedication, and experimentation. By mastering framing and composition techniques, you will be well on your way to capturing the grandeur of the cosmos that will stand the test of time. Remember, practice makes perfect; so keep shooting and refining your skills. Soon, your compositions will leave viewers in awe of the beauty of our universe.
Astrophotography Techniques for Different Celestial Objects
Astrophotography Techniques for Different Celestial Objects
Astrophotography is a hobby that captures the beauty of celestial objects in the night sky. There are several techniques for photographing different astronomical subjects, including star clusters, galaxies, and nebulas. This guide will provide you with specific techniques for capturing these captivating celestial objects.1. Star Clusters
Star clusters are groups of stars that appear close together in the sky. There are two types: open clusters, which are loosely-bound collections of stars, and globular clusters, which are densely-packed groups. Follow these steps to photograph star clusters:
a. Equipment: You’ll need a DSLR or mirrorless camera, a telescope or telephoto lens (200mm or longer), a sturdy tripod, and a remote shutter release.
b. Camera settings: Set your camera’s ISO to 1600-3200, use a wide aperture (f/2.8-f/4), and start with a 30-second exposure. Adjust these settings as needed to capture a well-exposed image without overexposing the stars.
c. Focus: Use manual focus, and set your lens to infinity. Use a bright star or a distant light source to ensure sharp focus.
d. Framing: Align your camera with the star cluster and take test shots to fine-tune your composition.
e. Stacking: Take multiple exposures and use stacking software to improve your image quality by reducing noise and enhancing the details of the star cluster.2. Galaxies
Galaxies are enormous systems composed of billions of stars, gas, and dust that appear as faint smudges in the sky. These are the steps to photograph galaxies:
a. Equipment: Use a DSLR or mirrorless camera, a telescope (preferably with a focal length of 1000mm or longer), an equatorial mount (to track the movement of the skies), and a remote shutter release.
b. Camera settings: Set your camera’s ISO to 800-1600, use the widest aperture available, and start with a 1-2 minute exposure. Adjust these settings as needed based on your test shots.
c. Focus: Just like photographing star clusters, use manual focus, and set your lens to infinity. Find a bright star to ensure sharp focus.
d. Framing: Point your telescope at the galaxy, adjust the eyepiece to center it in your frame, and lock your mount to prevent movement.
e. Guiding: To capture clear images of galaxies, you’ll need to use an autoguider to correct for any tracking errors in your mount.
f. Stacking: Take several long exposures and use stacking software to reduce noise and enhance the details of the galaxy.3. Nebulas
Nebulas are interstellar clouds of gas and dust that can produce colorful and intricate patterns in astrophotography. Here’s how to photograph nebulas:
a. Equipment: You’ll need a DSLR or mirrorless camera, a telescope or a telephoto lens, an equatorial mount, a remote shutter release, and an optional filter (a narrowband filter or a light pollution filter, depending on your observing conditions).
b. Camera settings: Set your camera’s ISO to 800-3200, use a wide aperture (f/2.8-f/4), and expose for 1-5 minutes. Adjust these settings based on your test shots.
c. Focus: As before, use manual focus, and set your lens to infinity. Choose a bright star to achieve sharp focus.
d. Framing: Point your telescope at the nebula, adjust the eyepiece to center it in your frame, and lock your mount to prevent accidental movement.
e. Guiding: Use an autoguider to correct for tracking errors and ensure sharp images.
f. Stacking: Capture several long exposures and stack them with software to reduce noise and enhance the details of the nebula.With practice and patience, you can master these astrophotography techniques and capture stunning images of celestial objects that will be sure to impress. Clear skies and happy shooting!
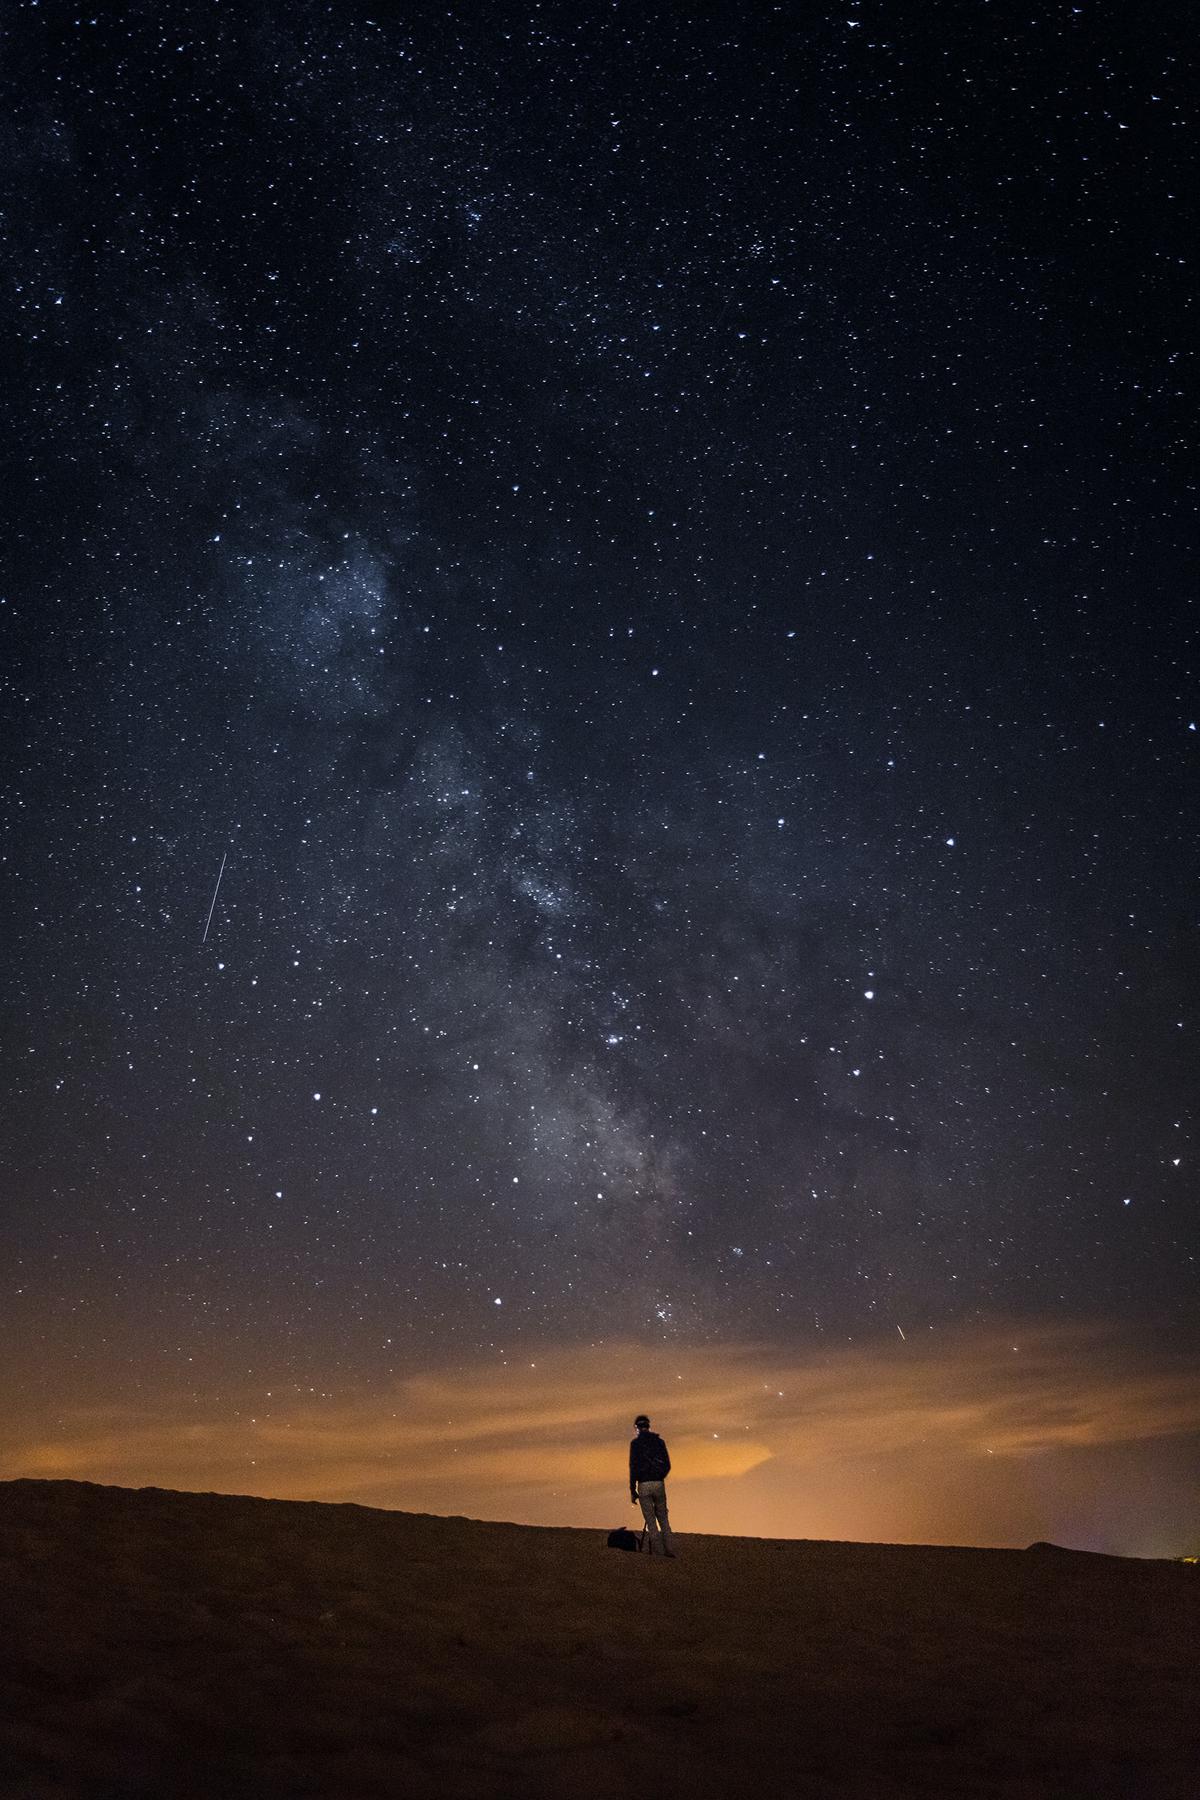
Image Stacking and Noise Reduction
Title: Image Stacking and Noise Reduction in Astrophotography: Techniques and Processes
Introduction:
Astrophotography allows you to capture stunning images of celestial bodies and astronomical events. To achieve high-quality results, it’s essential to understand and implement image stacking and noise reduction techniques. In this guide, we will discuss the processes and methods for image stacking and noise reduction to help you produce captivating astrophotography images.
Part 1: Image Stacking
Image stacking is the process of combining multiple photos captured at the same focal length and exposure settings to create a single, high-quality image. This technique helps in reducing noise, increasing the signal-to-noise ratio, and improving the overall details in your astrophotography images. Follow these steps to stack your images:
- Capture multiple exposures: To begin, take multiple photos of the astronomical scene you are trying to capture. The more photos you have, the better your final image will be. It’s recommended to capture between 30-50 images for optimal results.
- Align images: Once you have captured all of your images, you will need to align them. This can be done using software such as DeepSkyStacker or RegiStax, which automatically aligns your images based on star locations.
- Stack images: Now it’s time to stack your images together. The software will calculate the median for each pixel across all of your aligned images, and then combine these values to create a single stacked image. This process helps significantly reduce noise and improve image quality.
- Process the final image: After stacking, further improve your image by applying post-processing techniques. These can include adjusting levels, curves, and saturation, as well as sharpening the image to bring out the fine details.
Part 2: Noise Reduction
Noise reduction is essential in astrophotography, as it ensures that your images have a clean, clear, and professional appearance. Noise can be caused by a range of factors, including high ISO settings, long exposures, and sensor heat. Follow these steps to reduce noise in your astrophotography images:
- Shoot at a low ISO setting: While higher ISO settings may allow you to capture more light, they also result in more noise. Use the lowest ISO setting necessary to gather enough light for a usable exposure.
- Use dark frames: Dark frames help to identify and reduce the sensor noise in your images. To create a dark frame, simply capture an image of the same exposure length and ISO setting as your primary images, but with your camera’s lens cap on. Subtract the dark frame from your primary image using photo editing software to reduce noise caused by sensor heat.
- Use flat frames: Flat frames help to even out the illumination across the image, addressing any dust, optical imperfections, or vignetting. To create a flat frame, point your camera at an evenly lit surface (such as a white poster board) and capture an image at the same aperture and ISO settings you used for your primary images. Divide your primary image by the flat frame using photo editing software to correct for any uneven illumination.
- Apply noise reduction software: Use noise reduction software (such as Topaz DeNoise AI or Noise Ninja) to further reduce noise in your images. These tools analyze your images and apply algorithms to reduce noise while minimizing the loss of detail.
Conclusion:
Using image stacking and noise reduction techniques allows you to create sharp, impressive astrophotography images by maximizing detail and minimizing noise. By taking the time to learn and implement these methods, you will notice a significant improvement in the quality of your photos. Practice these techniques, experiment with different settings and equipment, and soon you’ll be capturing the beauty of the cosmos like a pro.”

Post-processing Techniques
Title: Enhance Your Astrophotography Images with Post-Processing Techniques in Adobe Lightroom and Photoshop
Introduction:
Astrophotography captures the beauty of the night sky and celestial objects. To get the best out of your astrophotography images, post-processing is essential. In this guide, we will explore various post-processing techniques using Adobe Lightroom and Photoshop to enhance your astrophotography images and bring out incredible details in the stars and galaxies.
Part 1: Preparation and Importing Images into Adobe Lightroom
- Shoot images in RAW format: To capture maximum detail in your astrophotography images, always shoot in RAW format. RAW files are uncompressed and contain more data, allowing you to have greater control in post-processing.
- Import RAW files into Adobe Lightroom: Drag and drop your RAW files into the Library module in Lightroom to import them. You can also use the Import button at the bottom left corner.
Part 2: Basic Adjustments in Adobe Lightroom
- Adjust the White Balance: In the Develop module, use the White Balance selector tool to choose a neutral point in your image. This may be a dark area of the sky or a gray or white astronomical object. Adjusting the white balance helps to give your image accurate colors.
- Adjust the Exposure and Contrast: Increase the exposure to brighten the image. Be careful not to overexpose the image, as it will result in loss of detail. Adjust the contrast slider to add more depth to the image.
- Set the Black and White Points: Hold down the Alt/Option key while adjusting the Blacks and Whites sliders. As you slide, a black or white overlay will appear, showing areas that are pure black or white. Set the black and white points so that there are only a few areas of pure black and white, maintaining details in the shadows and highlights.
- Adjust the Highlights, Shadows, Clarity, and Vibrance: Play with these sliders to further enhance the details of your image. Decreasing highlights can help recover details in brighter areas, whereas increasing shadows can reveal details in darker regions. Increasing clarity can bring out details like the texture and edges of celestial objects. Boosting vibrance can add more color to your image without oversaturating.
- Apply Noise Reduction and Sharpening: In the Detail panel, apply noise reduction to reduce the graininess of your image. Be careful not to overdo it, as too much noise reduction can result in loss of detail. Apply sharpening to enhance the details of the celestial objects.
Part 3: Advanced Techniques in Adobe Photoshop
- Stack and Align Images: To reduce noise and boost the signal-to-noise ratio (SNR) in your images, you can stack multiple exposures of the same subject. Use software like DeepSkyStacker or Astro Pixel Processor to align and stack your images. Then, open the stacked image in Photoshop.
- Create a Star Mask: Duplicate the background layer and create a star mask. The star mask will help you to isolate the stars from the rest of the image, allowing you to make adjustments to the stars without affecting the rest of the image.
- Apply Color Balance and Saturation Adjustments: Create adjustment layers for color balance and saturation. Adjust the color balance to bring out the natural colors of the stars, and increase the saturation to emphasize the colors.
- Enhance Contrast with Levels and Curves: Use the Levels and Curves adjustment layers to further enhance the contrast in your image. These adjustments will help to bring out the details in your celestial objects and background sky.
- Use High Pass Filter for Additional Sharpening: Duplicate the background layer and apply a High Pass filter to add extra sharpening to your image. Set the blend mode of this layer to Overlay or Soft Light and adjust the opacity as needed.
- Final Touches: Flatten your image and save it in your desired format. Make any final adjustments in Lightroom, such as cropping, rotation, or additional exposure and contrast adjustments.
Conclusion:
By following these post-processing techniques, you can greatly enhance your astrophotography images in Adobe Lightroom and Photoshop. Remember that practice makes perfect, so keep experimenting with different adjustments to find the best results for your images. Enjoy the process and soon you will be creating stunning images of the night sky!
Advanced Techniques and Tips
Title: Advanced Astrophotography Techniques and Tips
Introduction:
Astrophotography is a fascinating and rewarding hobby that allows you to capture the beauty of the night sky, from celestial events to breathtaking deep-sky objects. As your astrophotography skills grow, you’ll want to explore advanced techniques like time-lapse photography, high dynamic range imaging, and panorama stitching to elevate your night sky images to the next level. This guide will help you explore these advanced techniques and provide tips to make the most of your astrophotography sessions.
1. Time-lapse Astrophotography
Time-lapse photography is a technique that involves taking multiple images of the same scene over a period of time, then combining them into a video to show motion or change. In astrophotography, this is particularly useful for capturing celestial events, such as star trails or the movement of the Milky Way across the sky.
To create a time-lapse:
a. Mount your camera on a sturdy tripod or an equatorial mount for better tracking.
b. Set your camera to manual mode, and adjust the ISO, aperture, and exposure time settings to achieve a proper exposure for the night sky.
c. Enable interval shooting on your camera or use an external intervalometer to set the interval between shots (e.g., 30 seconds or a minute).
d. Take a series of images over the desired time period. For example, if you want to create a 30-second time-lapse video at 24 frames per second, you’ll need 720 images.
e. Import the images into a video editing software, then adjust the duration of each image to match your desired frame rate.
f. Render and export your time-lapse video to share your stunning night sky motion.
2. High Dynamic Range (HDR) Astrophotography
HDR imaging is a technique that involves taking multiple images at different exposure levels and combining them to create an image with a higher dynamic range, allowing you to capture more detail in both highlights and shadows. This is particularly useful for astrophotography when photographing the Moon or other objects with varying brightness levels.
To create an HDR image:
a. Mount your camera on a sturdy tripod or an equatorial mount.
b. Set your camera to aperture priority or manual mode, and set a base exposure that captures the scene without overexposing the highlights.
c. Take a series of images, bracketing your exposures in increments of 1 or 2 stops (e.g., -2, 0, +2 stops).
d. Load the images into an HDR software (such as Photomatix or Adobe Lightroom), then merge the exposures to create a single HDR image. Adjust the settings to achieve your desired tonal balance.
e. Save and export your final HDR image.
3. Panorama Stitching in Astrophotography
Panorama stitching is a technique that involves capturing multiple overlapping images of a scene and merging them into a single, seamless image. This is particularly useful for wide-field astrophotography when you want to capture a larger area of the night sky than your camera and lens can accommodate.
To create a panoramic astrophotograph:
a. Mount your camera on a sturdy tripod or equatorial mount with a panorama head.
b. Set your camera to manual mode and adjust the ISO, aperture, and exposure time settings for a proper exposure of the night sky.
c. Determine the amount of overlap between images – typically 30-50% – then take a series of images, rotating the camera between shots to ensure proper coverage of your desired scene.
d. Import the images into a panorama stitching software (such as PTGui or Adobe Lightroom) and align the images to create a seamless panorama.
e. Adjust the settings and projection type to achieve your desired panorama result, then render and export your final image.
Conclusion:
As you continue your journey into astrophotography, experimenting with advanced techniques like time-lapse photography, HDR imaging, and panorama stitching can help you capture stunning and unique celestial images. Practicing these techniques will not only improve your skills as an astrophotographer but also allow you to create captivating and visually striking images that truly showcase the beauty of the night sky.
By following these guidelines, you’ll be well-equipped to embark on your astrophotography journey, capturing the breathtaking beauty of the universe. Mastering the art of astrophotography takes time and practice. However, with dedication, patience, and continuous improvement, you can create remarkable records of the boundless beauty above us. Happy stargazing and never stop exploring the wonders of the cosmos through your lens.
Originally posted 2023-05-25 18:42:28.