
Underwater photography not only brings the mysteries and beauty of the deep sea to the surface but also challenges the photographer in innumerable ways. While the captivating undersea world brims with unique scenes and breathtaking creatures, capturing them all in an image requires a certain degree of skill, knowledge, and the right equipment. This explorative journey will take you through the equipment essentials you’d require to take a plunge into underwater photography, help you master the art of tuning your underwater camera settings, share the underwater composition techniques, and guide you through the process of post-processing your underwater photographs.
Equipment Essentials for Underwater Photography
Underwater Photography Equipment Basics
Delving into the depths of underwater photography requires intimate knowledge of the equipment you’ll need. Waterproof cameras, underwater housings, lenses, lighting equipment, and other accessories are all crucial parts of the diver-photographer’s toolkit. Understanding the benefits, limitations, and considerations of each forms the foundation upon which you’ll build your underwater photography skills.
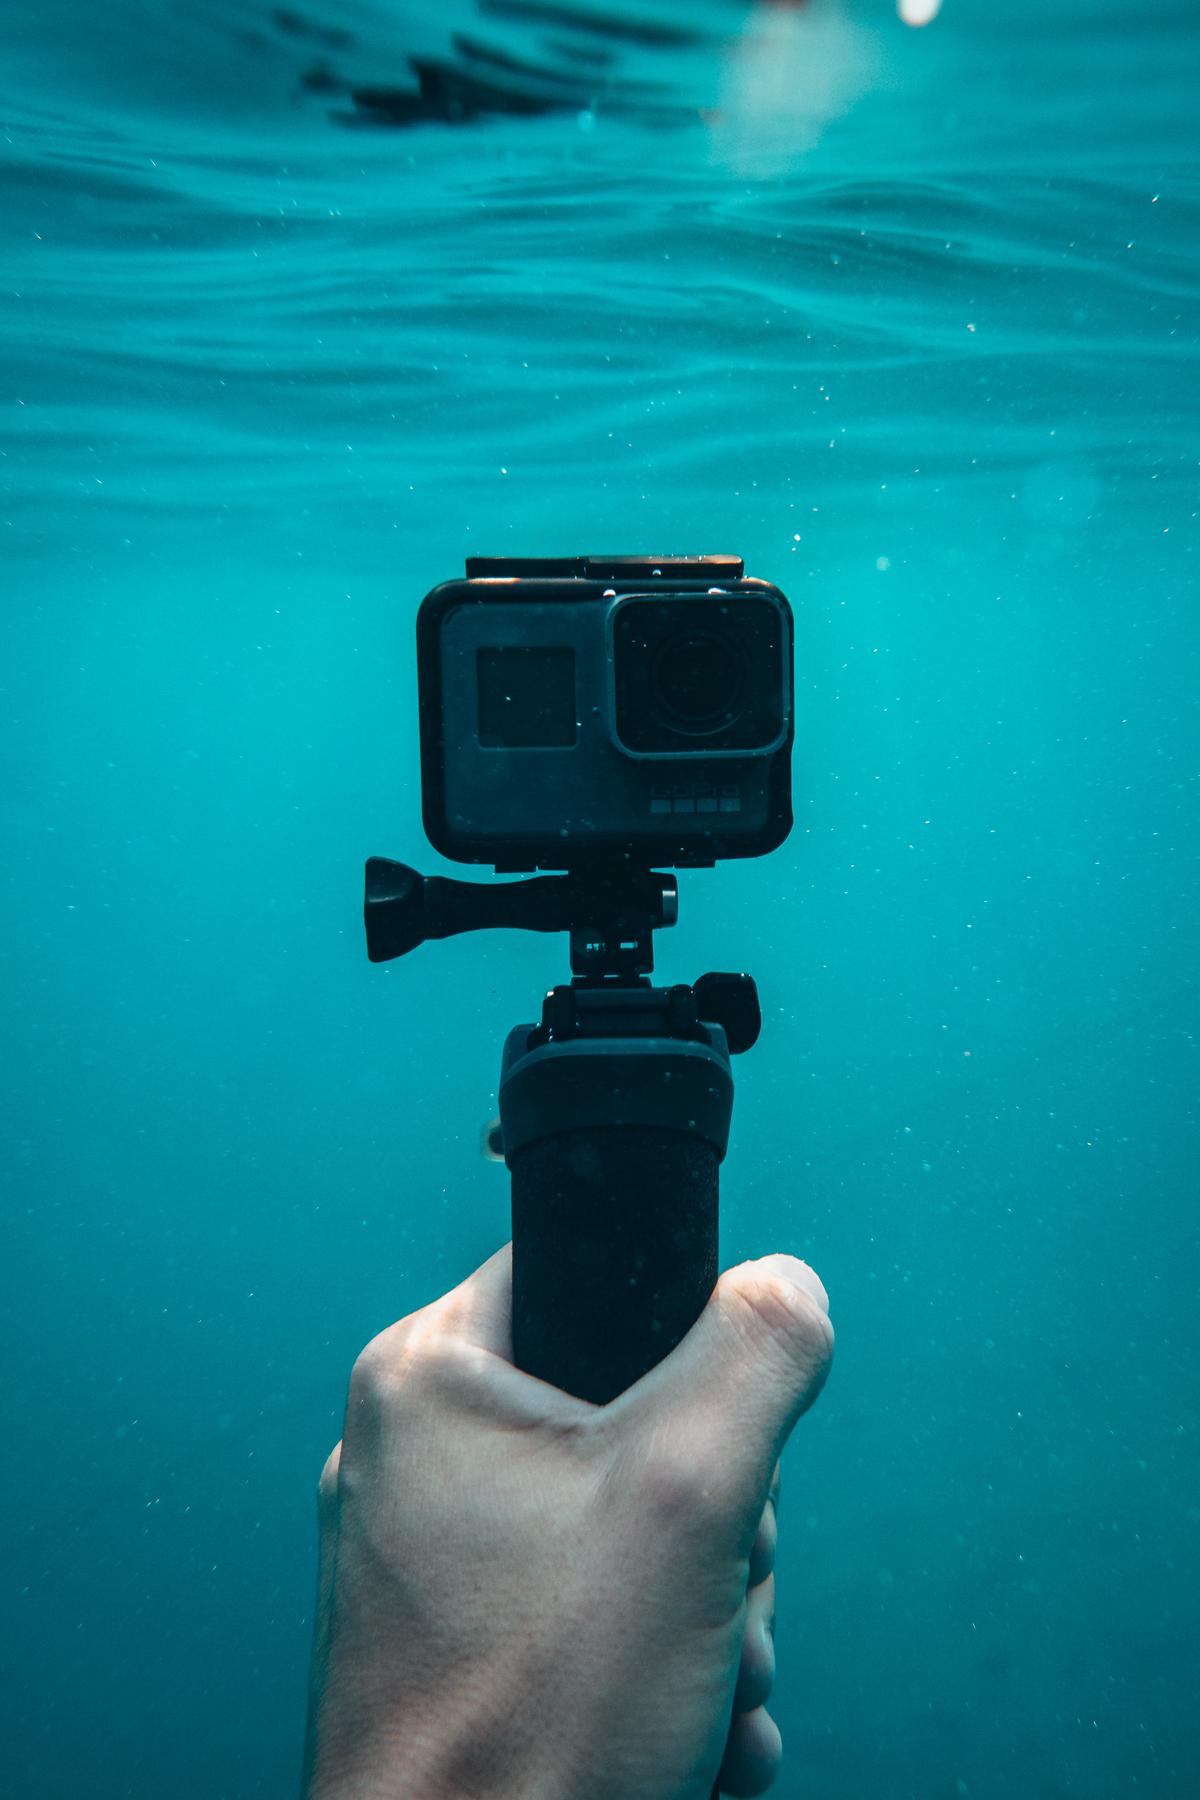
Waterproof Cameras
The cornerstone of underwater photography, the waterproof camera must be robust enough to withstand increased pressure and moisture while still delivering high-quality images. Some cameras, such as the Olympus TG series and the Nikon Coolpix W300, come with built-in underwater shooting modes that adjust color balance and sensitivity to perform well in underwater conditions. However, these cameras also have depth limits, beyond which they cannot operate, which varies typically between 30ft to 100ft depending upon the model. A professional diver seeking deep-water shots will need to use specific diving cameras or housings for regular cameras.
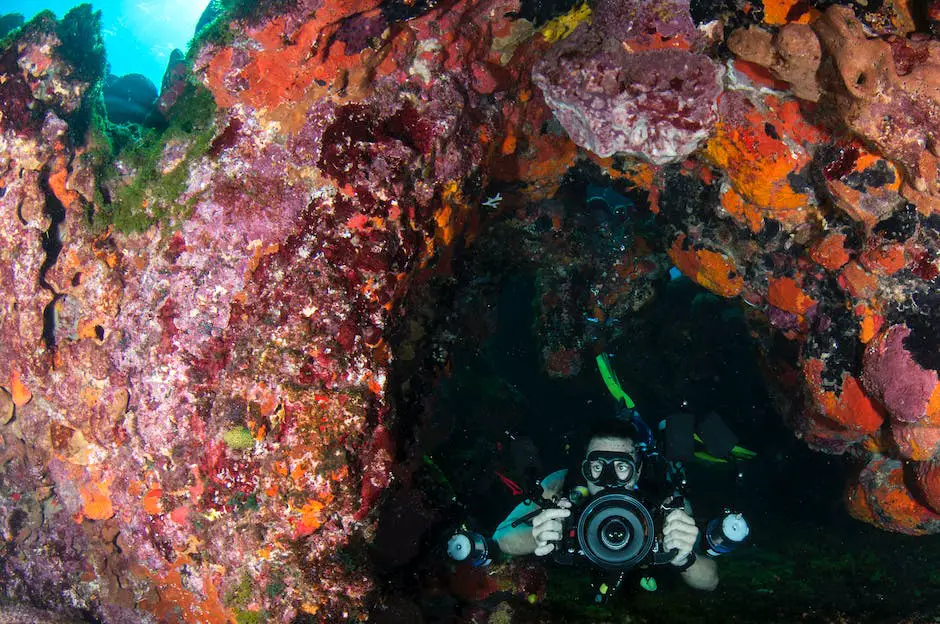
Underwater Housings
Underwater housings protect cameras not specifically designed for water use, allowing them to be used for underwater photography. Made from polycarbonate plastic or aluminum alloy, they offer full-frame or mirrorless cameras a chance to capture underwater beauty. These robust structures seal off the camera completely, preventing any water intrusion. Simultaneously, they provide a clear view through the lens, permit user control over the camera functions, and can endure depths of over 100 feet. The key considerations while selecting a housing are the compatibility with your camera model, the durability, and the control accessibility.
Lenses for Underwater Photography
The lens you use can dramatically affect your underwater photography. Due to refraction, objects underwater appear 25% larger and closer than they are, which causes lenses to behave differently underwater than on land. Generally, underwater photographers mostly use wide-angle or fisheye lenses and macro lenses. Wide-angle lenses, including fisheyes, are excellent for capturing expansive underwater landscapes and large sea creatures. Macro lenses, on the other hand, are perfect for photographing small marine life in detailed close-ups.
Lighting Equipment
Proper lighting is essential in underwater photography due to the absorption and scattering of light by water. As a result, you’ll need to provide your own light sources to maintain color and visibility. Strobes and video lights are the most common light sources, providing intense, momentary lighting for still photography and continuous illumination for video shooting, respectively. Consider light power, beam angle, recycle time, battery life, and depth rating when choosing your lighting equipment.
Other Accessories
Various other accessories can enhance your underwater photography experience and the resulting images. These may include color correction filters to balance out the blue or green tint caused by water, dome ports to correct distortion caused by flat housing windows, or buoyancy arms to help offset the weight of the rig and provide additional mounting points for accessories. Each piece of equipment is essential in its way, and careful consideration of your photography needs and environment will help you curate the perfect toolkit.
Diving into the realm of underwater photography is both exciting and slightly daunting, but with the right tools and comprehension of how to effectively use them, you’ll be prepared to capture the enchanting allure of marine life.
Mastering Underwater Camera Settings
Getting a Grip on Underwater Camera Settings
It’s noteworthy that what sets underwater photography apart from other forms is the requirement for unique gear and a deep understanding of various camera settings, meticulously tailored to the individual water conditions you may come across.
Identifying Underwater Conditions
Underwater lighting conditions can be shifted drastically by factors such as depth, time of day, water clarity, and weather. These factors make it crucial for underwater photographers to be skilled in adjusting their camera settings on the fly. Each situation may call for different settings, so building a familiarity with your equipment under various conditions is key.
Elements of Underwater Camera Settings
One of the most important settings to adjust underwater is the white balance. This is due to the fact that water absorbs colors differently, with red being absorbed quickly, followed by orange, yellow, green, and finally blue. Consequently, underwater photos often have a blue or green tinge. By manually setting your white balance, you can compensate for this loss of color and capture the true colors of your subjects.
Likewise, managing the aperture is essential for underwater photography. The aperture controls the amount of light that enters your camera. A larger aperture opening (represented by a smaller f-stop number) will let in more light, while a smaller opening will let in less. By adjusting the aperture, you can control the depth of field in your photo. A large aperture provides a shallow depth of field, focusing on close subjects and blurring the background. Contrastingly, a small aperture will bring everything from near to far into focus.
Shutter speed adjustments can also be instrumental in capturing moving subjects underwater, such as fish, without blur. The faster the shutter speed, the sharper the image of the moving subject will be. Slow shutter speeds can create a stylish, flowing effect for stationary subjects in moving water.
ISO, which regulates camera sensitivity to light, can be managed to tackle low light scenarios underwater. A higher ISO will make your camera more sensitive to light, suitable for darker environments, although it may also increase graininess or noise in the photo.
Underwater Focusing
Focusing accurately underwater can be challenging due to particles in the water, known as backscatter. Auto-focus can sometimes be fooled by these particles, focusing on them instead of the intended subject. Therefore, mastering manual focus or using autofocus lock can help to ensure sharp, clear underwater photographs.
Mastering the Art of Underwater Photography
Perfecting the subtle balance of underwater photography requires a deep comprehension of camera settings and how they impact your final image. Before embarking on a critical dive, always ensure to test your equipment to verify that it is in working order. It’s also beneficial to use different settings across multiple shots as finding the optimal choice often involves some degree of trial and error. Regularly reviewing your captured images while underwater can reveal whether adjustments are required, thereby allowing you to enhance elements such as exposure or colour balance to boost image quality.
While the task of mastering underwater camera settings might seem intimidating at first, remember that with time, patience, practice, and continuous learning, you’ll eventually master the art of capturing the mesmerizing allure of marine life with a blend of accuracy and artistic flair.
Underwater Composition Techniques
Utilizing the Rule of Thirds in Underwater Photography
A quintessential tool in any visual artist’s toolkit, the rule of thirds, can dramatically elevate the overall aesthetics of your underwater photos. Practically, this technique involves mentally dividing your shot into nine equal parts by visualizing two horizontal and two vertical lines. The main players in your composition should take positions either along these lines or where they intersect. This technique garners improved visual interest as typically, the viewer’s eye naturally gravitates towards the intersecting points in an image, rather than its direct center.
Leading Lines Underwater
Another effective technique is the use of leading lines. These lines guide your viewer’s eyes through the image and towards the main subject matter. They can be physical lines such as coral reefs, sun rays penetrating water, or even a school of fish. The key is to start your leading line from the edge of the image and ensure it guides the viewer towards your subject.
Framing Your Underwater Shot
Proper framing in underwater photography involves using the natural environment or other marine life to draw attention to your primary subject. Doorways of sunken shipwrecks, underwater caves, or a circle of fish are some elements that can be used as natural frames. By utilizing these, you can encapsulate your subjects, creating a focal point that is distinctive and captivating.
Exploring Color Contrast Underwater
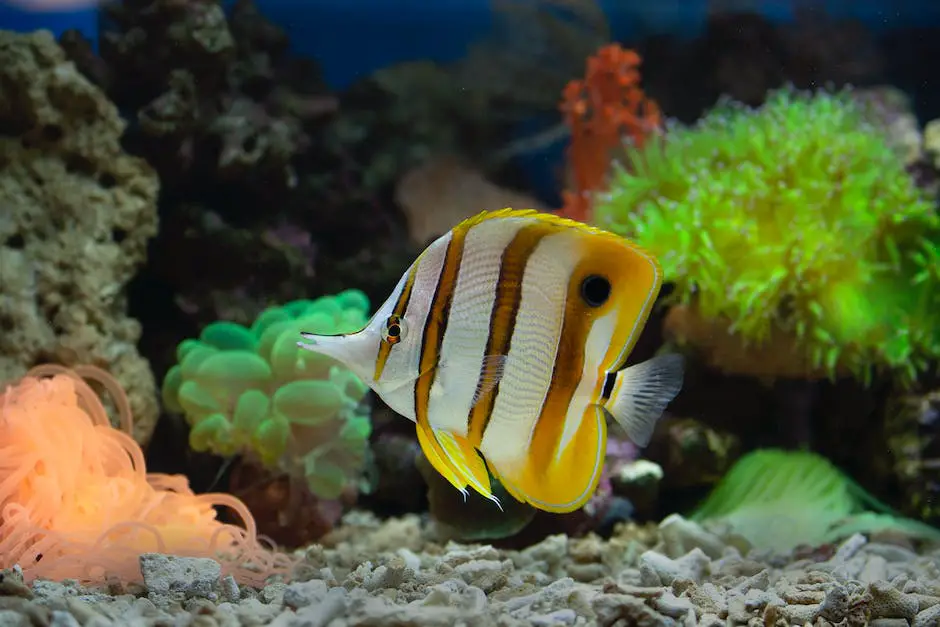
Color contrast becomes even more challenging when underwater, but also potentially more rewarding. Vivid colors stand out in the soft blue or green of seawater. Exploit these opportunities, such as a bright orange clownfish against an azure blue sea, or deploy colored filters to enhance contrast further.
Challenging Floating Particles Underwater
Taking photos underwater comes with its own set of challenges, one of which is handling floating particles, also known as backscatter. These particles usually appear as small white dots and can ruin your otherwise perfect shot. A good practice to combat backscatter is to place your source of light (usually a strobe) away from the lens axis. This decreases the light angle hitting floating particles and reduces their appearance in your photo.
Low Light Challenges Underwater
Another significant challenge in underwater photography is the low light situation. Water absorbs light, and as you dive deeper, less light penetrates, leading to darker and colorless images. You can overcome this by carrying a good artificial light source. Moreover, learning to adjust your camera’s manual settings like ISO, shutter speed, and aperture will also help you capture well-lit photos even in low light conditions.
Final Thoughts
Mastering the art of underwater photography requires precision, an eye for detail, and a strong grasp of composition techniques. The fundamental methods including the rule of thirds, leading lines, color contrasts, and framing can significantly enhance the visual appeal of your underwater shots. Besides this, understanding and handling underwater-specific challenges such as backscatter and low light conditions responsibly can give you a professional edge. Start by learning these basic strategies and keep practicing. Eventually, you’ll discover your unique style of underwater photography.
Post-Processing Underwater Photographs
Diving Deeper: Post-Processing in Underwater Photography
Post-processing involves the modification and retouching of photographs after they’ve been taken and plays an essential role in underwater photography. The unique conditions of underwater shooting like low light, the distortive effect of water particles, and color absorption necessitate this stage of the process. Post-processing can truly bring your underwater photographs to life. That’s where software like Adobe Lightroom and Photoshop become invaluable tools in your journey to becoming an underwater photography expert.
Using Adobe Lightroom for Underwater Photography
Adobe Lightroom is a powerful tool that can greatly enhance your underwater photography game. It’s an all-in-one solution that allows you to import, organize, edit, and share your pictures. For underwater images, Lightroom’s Develop Module is particularly helpful.
Here you can correct the white balance, a key challenge in underwater photography. Typically, the further you go underwater, the more color you lose, starting with red. Lightroom can compensate for this loss by adding red to the image.
In underwater photography, you’ll also have to deal with backscatter, caused by particles in the water reflecting light back to the camera. Lightroom’s Spot Removal Tool allows you to individually select and remove each backscatter spot, cleaning up your photographs.
The Sharpness Tool in Lightroom will help you enhance the details in your underwater images. Increasing clarity can make underwater organisms much more defined.
Harnessing the Power of Adobe Photoshop for Underwater Photos
While Lightroom is great for global adjustments, Adobe Photoshop offers more specialized, local edits. One of the ways it outshines Lightroom for underwater photographers is through Layer Masks, which allow you to apply adjustments to specific portions of your photo.
Photoshop’s Clone Stamp or Healing Tool can aid in removing larger distracting elements or correcting large areas of backscatter that would be time-consuming to fix in Lightroom.
One more powerful Photoshop feature for underwater photographers is its ability to correct lens distortion. Wide angle and fisheye lenses are popular for underwater shots because they let you get close to your subject while still capturing the environment. But these lenses can cause distortion. Photoshop can correct for this and give a more accurate depiction of the underwater world.
Discovering Other Software Options
While Adobe Lightroom and Photoshop are top choices for post-processing underwater photography, they’re not the only options available. Other software, such as Capture One or DxO PhotoLab, may offer features or workflows that fit better with your style of underwater photography.
Conclusion
The key takeaway here is exploration. Spend time understanding the tools and techniques of these software applications and how you can best apply them to enhance your underwater photography skills. It’s through this practice and hands-on manipulation that you’ll see the most improvement in your post-processed images.
In conclusion, post-processing is essential in bringing out the best in your underwater photographs. Even the most professional underwater frames require post-processing to correct colors, remove unwanted particles, and bring sharpness to the image. No matter which software you choose to use, remember that the end goal is to enhance the image without compromising its natural beauty.
With irresistible charm and grandeur, the marine world welcomes photographers to dive in and explore it in all its glory. The knowledge and skills gained from selecting the appropriate equipment to mastering underwater camera settings, leveraging composition techniques, and effectively post-processing the images, will greatly enhance your underwater photography journey. Every time you plunge into this new adventure, remember, each dive brings an opportunity to add a unique chapter to the infinite book of underwater life that is yet to be fully discovered and appreciated.
Originally posted 2023-10-19 22:05:24.


