Delving into the beautiful world of Landscape Photography is an exciting journey that brings together the raw beauty of nature and the immense creative potential within you. As an enthusiast or hobbyist looking to hone your skills in landscape photography, understanding the basics, the essential equipment, composition techniques, post-processing, and practical tips will provide you with a holistic view to transform your passion into breathtaking landscape photos. This immersive guide aims to equip you with a thorough understanding of these pivotal aspects, helping you to capture the intricate beauty of various landscapes, from urban sprawls to tranquil coastlines and rustic rural scenes.
Understanding the Basics of Landscape Photography
Types of Landscape Photography
In landscape photography, a broad category of subject matter is depicted, ranging from coastal and beach scenery to urban landscapes, rural farm scenes and mountain vistas. Each type of landscape requires a different approach and understanding, hence it’s useful to learn the differences.
Coastal or beach scenes
Coastal or beach scenes often revolve around the interaction of water, weather, and land. They necessitate understanding how light reflects off water, how to capture movement of the waves, and how to protect the camera from sand and saltwater spray.
Urban landscape photography
Urban landscape photography involves capturing cities or portions of cities. The focus can be architectural elements, cityscapes, or scenes of urban life. These photos often include people, either as focal points or scenery to give scale or evoke emotion. This type of photography requires a keen awareness of light, perspective, and color.
Rural and pastoral scenes
Rural and pastoral scenes are all about nature and open space. Farmland, barns, big skies, green fields, rolling hills, and seasonal changes are often depicted. The appeal of such images is their tranquility and simplicity, and often involve capturing dramatic skies or golden hour light.
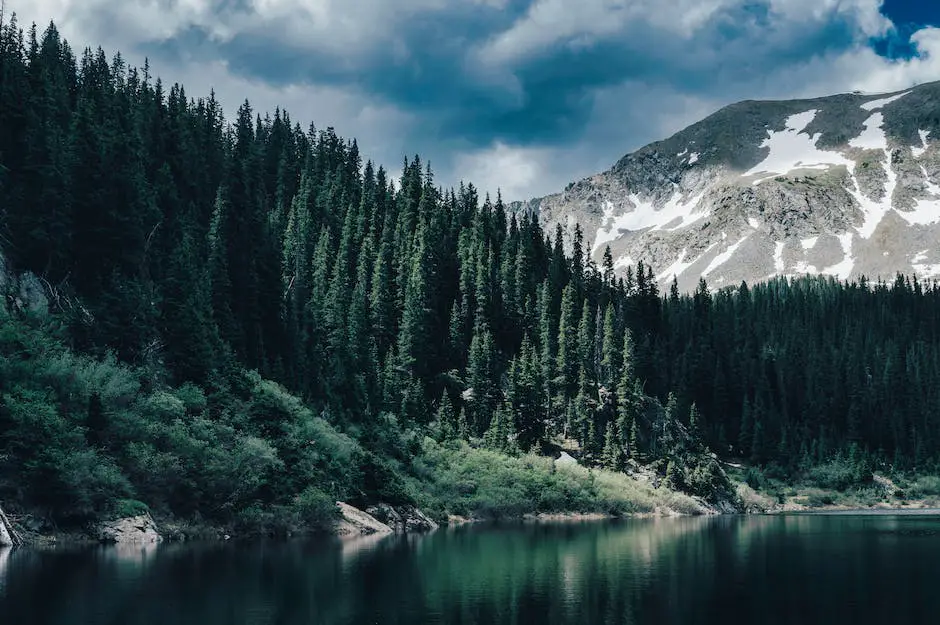
Mountain landscape
Mountain landscape involves capturing beautiful vistas, high altitude landscapes and often involves harsh and quickly changing weather conditions. It requires understanding of high altitude light, working with foreground and background elements and sometimes, requires a good level of physical stamina to reach certain locations.
Understanding Natural Light
Successful landscape photography significantly depends on understanding and manipulating natural light. The color, direction, and quantity of light can change the mood of a photo dramatically.
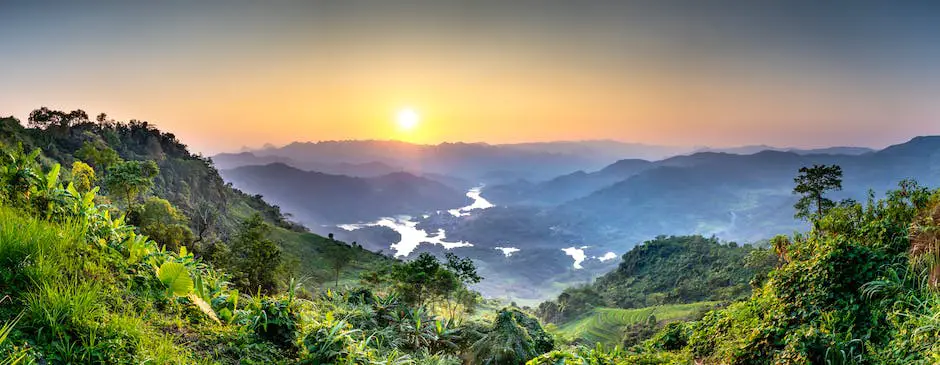
The importance of the “Golden Hour,” which is the first and last hour of sunlight in a day, cannot be overemphasized. The low angle of the sun creates long shadows and soft, warm, side lighting. It also creates depth and texture in images.
Blue hour, which occurs before sunrise and after sunset, provides soft, diffused light, casting a magical blue hue on the landscape, ideal for cityscapes or serene rural scenes. Night photography can also be a part of landscape photography, capturing star trails, or cityscapes illuminated by artificial light.
Understanding how to measure and adjust for the natural light (known as metering) will have a dramatic effect on the final image. A well-exposed image will retain detail in both the darkest and lightest part of the image.
Developing an Eye for Perspective and Composition
In any form of photography, a firm understanding of perspective features as a key principle. Its importance is particularly pronounced in landscape photography where the perspective significantly transforms the viewer’s perception of the scene.
Elements in the foreground invite a sense of depth into landscape compositions, creating an inviting effect for the viewer. Employing tactics such as leading lines or recurrent patterns can effectively guide the viewer’s gaze across the image, culminating at the focal point.
Crucial factors in composition include understanding what elements to incorporate within the frame, how to appropriately frame them, and what should be intentionally left out. Commonly deployed in landscape photography, the rule of thirds presents a helpful guide, but can be creatively deviated from once understood.
Exploring varied angles and viewpoints can lead to unexpected results. Embrace the unconventional by repositioning yourself – whether that be by scaling a hill or laying on the ground. Combine this adventurous spirit with patience and you will discern the difference between a good and a great landscape photograph.

Essential Equipment for Landscape Photography
Equipping Yourself for Success in Landscape Photography
The journey into Landscape Photography necessitates the use of suitable equipment. It’s not merely a matter of the camera and lenses you employ, but also an array of other accessories designed to capture the world’s breath-taking beauty. However, it’s essential to remember that although these resources can greatly enhance your creations, their effectiveness is ultimately determined by the skill with which they are used.
Choosing the Right Camera
Investing in a high-quality camera is the first step towards becoming a skilled landscape photographer. Digital SLR (DSLR) cameras and Mirrorless Interchangeable Lens Cameras (MILCs) are the top choices for professionals and amateurs alike due to their excellent image quality and versatility. Full-frame cameras are often preferred for landscape photography as they provide a wider dynamic range and better low light performance. These cameras allow you to capture images that have a much greater level of detail and richness in color compared to point-and-shoot cameras.
Opting for the Appropriate Lenses
Lenses play a critical role in dictating the perspective and depth of the image. For landscape photography, wide-angle lenses are typically preferred, as they have a larger field of view which helps to capture expansive landscapes. A lens with a short focal length, from 14mm to 35mm, can allow you to capture the breadth of your scene.
Telephoto lenses, on the other hand, can be ideal for capturing distant elements of a landscape or for creating a compressed perspective. A lens with a focal length of around 70-200mm can serve this purpose.
Enhance Your Photographs With Filters
Polarizing filters and neutral density (ND) filters are two common types of filters used in landscape photography. Polarizing filters can enhance the colors in a landscape and cut down on reflections. It can help make blue skies deeper and foliage more vibrant.
ND filters can help create smooth water effects and motion blur in clouds by allowing for longer shutter speeds, even in bright daylight. Graduated ND filters can balance the exposure between the sky and the land, preventing the sky from being overexposed.
The Indispensable Tripod
A sturdy tripod is a crucial piece of equipment for any landscape photographer. It not only ensures stability for your camera, thus preventing blurry images, but also helps in composing the shot. This is very handy, especially when you’re shooting in tricky light conditions or using slow shutter speeds. For those exploring the great outdoors, make sure to choose a lightweight yet sturdy tripod for maximum portability without compromising on stability.
Other Useful Accessories
A remote shutter release can help you take images without physically pressing the camera button, decreasing the chances of camera shake. This is especially useful for long-exposure photographs.
For those looking to explore astrophotography, a star tracker can be a valuable tool. This device moves the camera along with the movement of the stars, allowing you to capture the night sky without star trails.
Lens cleaning equipment and a reliable bag or backpack to carry all your gear are also essentials for the traveling landscape photographer.
Landscape photography, like any other discipline, is honed through practice. Gaining profound knowledge and learning the usage of various tools not only enhances your photographic skills but also enriches your perspective of the majestic sceneries you aim to immortalize. So get out there and start shooting!

Composition Techniques in Landscape Photography
Decoding Composition in Landscape Photography
Imagine yourself standing on the precipice of a cliff, gazing at the awe-inspiring vista of a valley adorned with trees, a serpentine river snaking through it, and a dramatic backdrop of towering mountains. A sight stolen from a dreamscape – one you yearn to capture and share. But how can you transform this extensive panorama into a photograph, granting it the justice it deserves? The key lies in perfecting your handling of composition techniques in landscape photography.
The Rule of Thirds
A fundamental rule in photography, the rule of thirds, makes photos more balanced and engaging. Imagine a grid on your frame that divides it into nine equal parts – two equally-spaced horizontal lines and two equally-spaced vertical lines. The rule of thirds states that you should place your subject or other elements of interest along these lines or at their intersections. Applied to landscape photography, you might place the horizon line along the top or bottom grid line instead of directly in the middle of your frame. Positioning an interesting tree or a mountain peak at an intersection point also draws the viewer’s eye into the image.
Leading Lines
Leading lines guide the viewer’s eye through the image and create a path from the foreground to the background. They generate a sense of depth and can be entirely captivating. A winding river, a trail through the woods, a fence, or even the way the light and shadow play across the landscape can serve as leading lines. These lines percolate your photo with the intrigue of where it might lead, adding an element of story to your landscape.
Framing Your Shot
Another composition technique is to frame the landscape within other elements in the picture. For instance, you might capture a distant mountain range through a gap in the trees, or showcase rolling hills in the silhouette of a cave opening. This method adds depth to your photo, gives a sense of scale, and focuses the viewer’s attention on the subject.
Harnessing the Power of Negative Space
Negative space, the area around your subject, is often as vital as the subject itself in creating a compelling composition. A sprawling, cloud-filled sky above a lone tree; a solitary mountain peak rising from a vast plain; an open sea around a single rock – these provide negative space, creating a sense of scale, context, and dramatic impact. Embracing negative space in your landscape photography can result in minimalist compositions full of depth and emotion.
Improving your photography skills, particularly in landscape composition, requires frequent practice. Over time, mastering these techniques will equip you with an eye for spotting unique opportunities that might go unnoticed by others. Bear in mind, though, these rules serve predominantly as guidelines rather than stringent laws. Disregarding some of these principles might bring out the artist in you and breathe life into your images. Foster trust in your creative instinct and vision, allowing them to shape your perspective and consequently, your click.
Landscape Photography Post-Processing
Understanding the Basics of Post-Processing in Landscape Photography
Transitioning towards the fundamentals, the process of post-editing your landscape photographs typically involves manipulating them through software such as Adobe Lightroom or Photoshop. This encompasses tasks like color correction, exposure and contrast tweaking, and boosting the overall aesthetic appeal of your images. Gaining a thorough understanding of post-processing basics is an invaluable milestone on the exciting path to evolving into an accomplished landscape photographer.
Understanding Adobe Lightroom
Adobe Lightroom is a popular tool for photographers to process and manage their images. Import your images into the program and start by fine-tuning the basic aspects. The ‘Develop’ module is where the magic happens. Access the basic panel on the right-hand side to adjust exposure, contrast, shadows, highlights, whites, and blacks. Remember, the key to good post-processing is balance, avoid swinging emphatically to extremes.
Understanding Adobe Photoshop
Adobe Photoshop allows for a more express and dynamic editing experience compared to Lightroom. It provides greater flexibility for more advanced edits, such as layer masking, blending modes, and pixel-level manipulation. A significant first step to take in Photoshop involves adjusting the Levels and Curves. These two tools, found under the ‘Image’ menu, allow you to intensify contrast and manipulate tonal ranges, providing the image a more profound and perfectly balanced touch.
Colors and Details Magic
Unleashing the vitality of your image lies in enhancing the colors and bringing out the subtle details. Managing the vibrance and saturation sliders in Lightroom can add color intensity to your landscape image. Support these color changes with sharper details through selective sharpening tools. The key here is to remember that subtlety is your ally. Overbearing saturation or sharpness can detract from the beauty of your landscape.
Exposure and Contrast Adjustments
Meticulously fine-tune your exposure and contrast to carve out the mood of your landscape shot. The sliders within your software can help to adjust brightness (exposure) and the difference between light and dark areas (contrast). While exposure slides can brighten or darken your entire photo, contrast changes affect colors and tones. Take it slow, refine as you go, and remember that an overexposed or underexposed image can lose essential details.
Final Image Enhancements
Final image enhancements include vignetting and gradients. A vignette can draw the viewer’s attention to the center of the frame by darkening or lightening the corners of your image, whereas gradients can adjust exposure, contrast, and color across a gradient in any direction. These final touchups can give your image a professional finish and set your work apart.
The Learning Curve
Post-processing your landscape photos can feel overwhelming with the expansive range of tools and settings at your disposal. The learning curve might be steep but remember that patience and practice are crucial. Start with small steps, experimenting with each tool and setting. Remember to seek and learn from constructive criticism. Always strive for balance and harmony in your images because, in landscape photography post-processing, less often is more.
Honing Post-Processing Skills
Becoming proficient at post-processing is an adventure which will involve both successes and learning experiences. Though this mastery might not be achieved instantly, each photograph will help enhance your confidence, perfect your choices, and increase your skills in extracting the finest attributes of your landscape photography. Your commitment to this art will result in sublime images that depict not only the captured landscape but also your artistic talent.
Practical Tips and Tricks for Landscape Photography
Grasping the Art of Landscape Photography
Landscape photography stands as a prominent genre in the field of photography because of its extraordinary capacity to encapsulate the impressive beauty of nature within a frame. Achieving brilliance in landscape photography not only requires high-quality equipment or being at the right place at an opportune time. It’s an intricate art form that calls for a comprehensive understanding of natural light, changing weather conditions, and impeccable timing.
Embracing the Ideal Times for Photo Shoots
The most magical times to capture landscape images are during the golden hours—approximately an hour after sunrise and an hour before sunset. During these times, the low angle of the sun casts long shadows, adding depth and dimension to the landscape. Additionally, the warm glow created by the sunrise or sunset can provide beautiful lighting. That being said, don’t discount the in-between times. Overcast days can provide great lighting for landscape photography, and shooting during the mid-day can yield dramatic shadows.
Dealing with Weather Conditions
Weather can highly impact your photograph’s final look. Always check the weather forecast before heading out to shoot. Clear skies offer a clean, minimalist canvas, while stormy weather can lend drama to your landscape photos. Even rain and fog can provide unique and atmospheric shooting conditions. Always be prepared with necessary protective gear for your equipment, such as plastic bags or waterproof camera cases.
Practicing Patience for the Perfect Shot
A crucial part of landscape photography is the waiting game, as natural light constantly changes. The key to capturing that perfect shot often lies in patience. Getting to your location early and waiting for the perfect light, or waiting for the right moment when the wind sweeps across a field can make all the difference between a forgettable image and a truly spectacular one. Patience really is key when it comes to landscape photography.
Honing Your Composition Skills
Consider employing the rule of thirds when setting up your shot. This rule involves dividing your image into thirds, horizontally and vertically, and placing the important elements of your scene along those lines or at their intersections. It’s also a good idea to include an object of foreground interest, this can be anything from a sizeable tree to small rock formations. They complement and draw attention to your main subject.
Using the Right Tools
Invest in a sturdy tripod. This is specifically useful for long exposure shots, which render running water as a silky blur and blur the movement of clouds across the sky. Filters like polarizing filters or natural density filters can also greatly enhance your landscape images. The polarizing filter will reduce reflections and enhance colors, while the ND filter will let you use longer shutter speeds in bright light.
Practice Makes Perfect
Each photographer has their unique style, and the best way to discover and refine yours is by practicing. Learn from others, take classes, join photography groups in your area or online, and don’t forget to always take your camera with you. The more you practice, the better you’ll become.
Remember, landscape photography is not just about capturing a beautiful scene; it’s about conveying the emotions and experiences of being there. So the next time you head out with your camera, take a moment to intimately connect with the environment; to hear the rustle of leaves, feel the cool breeze, and let nature guide your storytelling. With time and practice, your landscape photos will not only capture the eyes of the viewers, but their hearts as well.
Embarking on this riveting journey in Landscape photography not only equips you with technical skills but also allows you to communicate your unique perspective of the world through your images. Whether it’s mastering the effective usage of light, implementing various composition techniques, understanding your equipment or refining your post-processing skills, every aspect contributes significantly to shaping your identity as a landscape photographer. With practice, patience, and the implementation of the practical tips discussed, you are on the right path to beautifully capturing the world around you, one snapshot at a time.
Originally posted 2023-10-24 22:05:32.