
Disposable cameras offer a fun, convenient, and affordable way to capture memories in a variety of situations. In this guide, you’ll learn about the different types of disposable cameras, their functionality, and how to use them effectively. By mastering the art of disposable camera photography, you’ll be able to create memorable images while embracing the nostalgic appeal of this analogue technology. Dive into the world of disposable cameras and start exploring the creative possibilities they offer.
Understanding Disposable Cameras
Disposable cameras, also known as single-use cameras, are a type of photographic device that can be used and then discarded. They are designed for convenience and to be used in situations where a more expensive or delicate camera might be unsuitable. This guide will help you to understand what disposable cameras are, their components, and how they function. Additionally, we will explore the key differences between disposable cameras, traditional film cameras, and digital cameras.
What are Disposable Cameras?
Disposable cameras are single-use cameras designed to be convenient to use in situations where a more expensive or delicate camera might be unsuitable. They are preloaded with film and have simple plastic lenses, built-in flash, and a shutter button that work together to take photographs. After the camera has been used, the entire camera is taken to a processing center where the film is developed and printed. Common situations where disposable cameras might be used include vacations, parties, or in unusual environments where a more expensive camera may be at risk of damage.
Components and Functionality
The components of a disposable camera include pre-loaded film, plastic lens, built-in flash, and shutter button. These components work together to take a photograph. The film is exposed when the shutter button is pressed, and the built-in flash will activate automatically in low light situations. After pictures have been taken, the entire camera is taken to a processing center where the film is developed and printed.
Differences between Disposable, Film, and Digital Cameras
Comparing Disposable and Film Cameras
Disposable and traditional film cameras are similar in terms of their overall design and functionality. One of the main differences between the two is the ability to reload film in a traditional camera, while a disposable camera is used only once. Disposable cameras are also lower in cost and provide lower picture quality compared to film cameras.
Comparing Disposable and Digital Cameras
Digital cameras use a sensor to capture images electronically, while both disposable and film cameras use film to capture images. Digital cameras generally provide higher resolution images compared to disposable cameras. Digital cameras are also more convenient in providing the instant image access, compared to the wait time for processing disposable camera film. Digital cameras are also eco-friendly as no physical materials are wasted compared to the disposability of disposable cameras.
Using Disposable Cameras – A Step-by-Step Guide
Choosing a Disposable Camera
When choosing a disposable camera, consider the intended purpose, brand, film speed, and the presence or absence of a flash.
Setting Up the Camera
Before taking photographs, make sure to remove any packaging and activate the flash if a flash is present by e.g., sliding a switch or pressing a button.
Taking Photographs with a Disposable Camera
To take proper photographs with a disposable camera, follow these steps:
- Hold the camera steady with both hands.
- Make sure your subject is well lit.
- Framing your subject by fitting within the rectangle-shaped camera view.
- Press down the shutter button.
Developing the Film
The entire camera is taken to a processing center where the film is developed and printed. The expected wait time should be communicated by the processing center. There is an option for receiving the printed photographs or digital copies of the images taken on the camera.
Disposable cameras provide a convenient and affordable alternative to traditional film and digital cameras for certain situations. By understanding their components, functionality, and differences in comparison to other types of cameras, you can make an informed decision about when and how to use a disposable camera to capture memories.
Types of Disposable Cameras
Disposable cameras, also known as single-use cameras, are simple film cameras that are meant to be used once and then have the film processed. These cameras are affordable, easy to use, and perfect for capturing memories that you don’t want to miss, especially when you don’t want to risk damaging your smartphone or expensive camera gear. In this guide, we will discuss various types of disposable cameras and their features, as well as how to use them.
Types of Disposable Cameras:
1. Basic Disposable Cameras
- These cameras typically come with a simple point-and-shoot design with a fixed focus lens and automatic exposure. They are ideal for everyday events, such as parties or family outings. Examples include the Kodak FunSaver and Fujifilm QuickSnap.
2. Waterproof Disposable Cameras
- Waterproof disposable cameras are perfect for capturing memories during water-based activities like swimming, snorkeling, or canoeing. They are designed to be submerged underwater for limited periods and depths. The Kodak Weekend Underwater Disposable Camera and Fujifilm QuickSnap Waterproof are popular options.
3. Disposable Cameras with Specialized Film
- Some disposable cameras use specialized film to create unique effects on your photos. For example, the Ilford XP2 Super Single Use Camera uses black and white film, while the Lomography Simple Use Film Camera offers options like color negative, black and white, and even purple-tinted film.
4. Disposable Cameras with Built-in Flash
- These cameras are great for capturing memories in low-light situations, such as indoor events, weddings, or concerts. You can find built-in flash options in combination with basic, waterproof, or specialized film disposable cameras.
Instructions for Using Disposable Cameras:
- Purchase a disposable camera that suits your needs – consider the event, environment, and desired effects.
- Before using the camera, make sure to read any instructions or warnings provided by the manufacturer.
- If your disposable camera has a built-in flash, look for an activation button or switch. Turn on the flash if needed, and remember that it may take a few seconds to charge between shots.
- Frame your shot using the viewfinder. Disposable cameras typically have a fixed focal length, so it’s important to ensure that your subject is within the appropriate focusing distance. Check the camera’s packaging or instruction manual for information on the optimal focusing distance.
- Hold the camera steady and press the shutter button to take your photo. The shutter button may be a soft-touch or lever-style button, depending on the camera model.
- Advance the film after each shot by winding the film advance wheel or pulling the film advance tab.
- Once you’ve finished the entire roll of film, follow the manufacturer’s instructions for rewinding and removing the film. Some disposable cameras require you to manually rewind the film, while others automatically rewind when the roll is finished.
- Take the exposed film to a photo lab or retail store that offers film processing. Make sure to specify whether you want prints, digital scans, or both.
Conclusion:
Disposable cameras are a fun and easy way to capture moments without the worry of damaging expensive equipment. There are various types available to suit different purposes, including basic cameras, waterproof versions, and those with specialized film or built-in flash. By following the instructions outlined in this guide, you’ll be ready to start creating memorable photos with your disposable camera.

Using a Disposable Camera
Step 1: Purchase a disposable camera
- Choose a disposable camera from a local store or online marketplace.
- Common options include the Fujifilm Quicksnap, Kodak FunSaver, or Ilford XP2.
- Consider factors such as the number of exposures (usually 24 or 36), film sensitivity (ISO rating), and whether it has a built-in flash.
Step 2: Remove the camera from its packaging
Carefully remove the disposable camera from its packaging. Be sure not to touch the lens or viewfinder to avoid leaving fingerprints.
Step 3: Load the film (if necessary)
Most disposable cameras come with pre-loaded film. However, if your camera requires manual loading, follow the instructions included with the camera. Typically, you will need to open the camera, insert the film cartridge, and manually wind the film onto the take-up spool.
Step 4: Familiarize yourself with the camera features
- Shutter button: This button is used to take a photo.
- Film advance wheel: This wheel, usually located on the top or back of the camera, is used to advance the film after taking a photo.
- Flash switch: Some disposable cameras have a built-in flash. The switch will either be a button or a slider, usually on the front of the camera, to turn the flash on or off.
- Frame counter: This small window on the back or side of the camera shows the remaining number of exposures available.
Step 5: Turn on the flash (if necessary)
If you need to use the flash, make sure it is turned on. Press the flash switch or button and wait for the flash indicator light (usually a small red or green light) to turn on. Keep in mind that the flash has a limited range, typically around 10 feet (3 meters).
Step 6: Compose your shot
Look through the viewfinder and frame your subject. Keep in mind that disposable cameras have a fixed focus lens, so it’s best to stay between 3 to 15 feet (1 to 5 meters) away from your subject for best results.
Step 7: Take the photo
Hold the camera steady and press the shutter button gently to take the photo. If your camera has a flash, wait for the flash to fire during the exposure.
Step 8: Wind the film
After taking a photo, use the film advance wheel to move the film to the next frame. You should feel some resistance as you wind the wheel, indicating that the film is advancing properly. Repeat the process of composing, taking a photo, and winding the film until you have used all of the available exposures.
Step 9: Unload the film (if necessary)
If your disposable camera requires you to manually rewind the film, follow the camera’s instructions. Otherwise, most disposable cameras are designed to be returned to a photo lab or store for processing.
Step 10: Get your photos developed
Take your disposable camera to a photo lab or store that offers film processing. Be sure to indicate whether you want prints, digital files, or both. It’s a good idea to make a note of the film’s ISO rating so the lab can process it correctly.
Note: Always keep in mind the limitations of disposable cameras. The image quality may not be as sharp as those from a modern digital camera, and the film’s sensitivity to light may result in underexposed or overexposed photos, depending on the lighting conditions. Additionally, be careful not to subject the camera to extreme temperatures or moisture, as this may damage the film or the camera’s internal components.
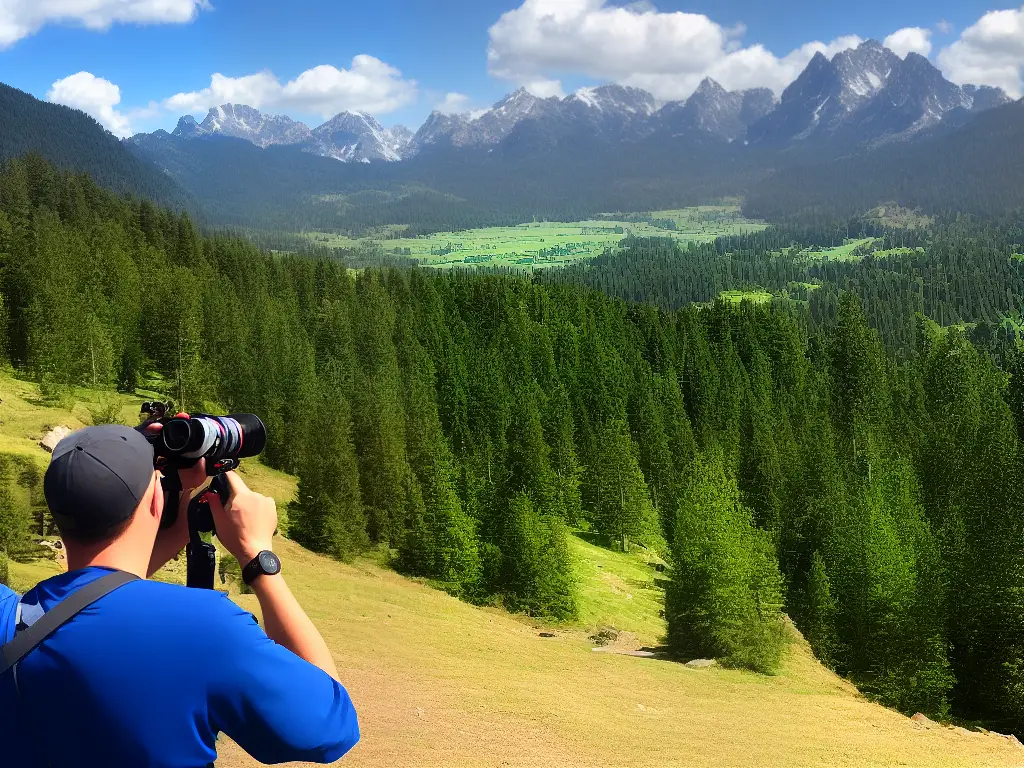
Taking Good Photos with a Disposable Camera
Disposable cameras are a fun and easy way to capture memories, especially on trips or special occasions. Although they might not have the same image quality as digital cameras, you can still create interesting and creative images using a disposable camera. In this guide, we will provide tips and techniques on how to take better photos with a disposable camera, from composition and lighting to working with the camera’s limitations.
Understand the limitations of a disposable camera:
Before you start taking pictures, it’s crucial to understand the limitations of a disposable camera. These cameras typically have a fixed focal length, limited exposure settings, and no option to preview the images. Keep these limitations in mind while composing your shots and try to position yourself at a distance that allows your subject to be in focus.
Make use of natural light:
Disposable cameras often struggle in low light situations, so take advantage of natural light whenever possible. Shoot outdoors during the day or near windows with good light. Make sure your subjects are well-lit by positioning them facing the light source or using a reflector to bounce light onto their faces.
Keep the flash in mind:
Most disposable cameras come with a built-in flash, but it can sometimes create harsh shadows or overexpose the image. Use the flash judiciously and avoid using it when you have ample natural light. When using the flash indoors, adjust your distance from the subject, as shooting too close may result in overexposure.
Compose your shots carefully:
Since you can’t preview your images, take your time with composition. Use the rule of thirds by dividing your frame into equal parts and placing your subject along the intersecting points to create a more balanced and visually appealing image. Also, make sure to keep the horizon line straight and eliminate any distractions in the background.
Capture candid moments:
Disposable cameras are great for capturing candid moments and spontaneous snapshots. Since they are small and unobtrusive, you can easily carry them around and quickly take a photo whenever you see an interesting scene. Don’t worry about getting every shot perfect; disposable cameras are meant for capturing raw and unfiltered memories.
Experiment with creative techniques:
With disposable cameras, you can try various creative techniques such as double exposures, shooting through a filter, or using colored gels over the flash for interesting effects. Remember that disposable cameras are meant for fun and experimentation, so don’t be afraid to try new things.
Plan your shots wisely:
Most disposable cameras come with a limited number of exposures, usually around 27 or 36. Plan your shots carefully to avoid running out of exposures too soon. At the same time, don’t hesitate to capture moments as they happen; after all, the beauty of disposable cameras lies in their simplicity and spontaneity.
By following these tips and techniques, you can make the most out of your disposable camera and capture interesting and creative images. Embrace its limitations and use them to your advantage, and you’ll be pleasantly surprised by the results. So go ahead, grab a disposable camera and start snapping away!
Developing Disposable Camera Film
Disposable cameras are a simple and affordable way to capture your memories without the need for a digital camera or smartphone. They are ideal for vacations, parties, or other events where you don’t want to risk losing or damaging your expensive camera equipment. Here is a step-by-step guide on how to use and develop the film from a disposable camera.
Using a Disposable Camera:
- Purchase a disposable camera: You can find disposable cameras at most drugstores, big-box chains, and online retailers. There are various types and brands available, so choose the one that suits your needs and budget.
- Remove packaging: Take the disposable camera out of its packaging and familiarize yourself with the various parts, such as the viewfinder, shutter button, film advance wheel, and flash switch (if applicable).
- Load the camera: Most disposable cameras come pre-loaded with film, but double-check to ensure the film is properly wound and ready to use.
- Turn on the flash (if available): If your camera has a built-in flash, make sure to turn it on if you are shooting in low light conditions. To do this, simply slide the flash switch on the camera, and a red light will indicate that the flash is ready to use.
- Frame your shot: Look through the viewfinder to compose your picture. Make sure to hold the camera steady with both hands to avoid camera shake and blurry photos.
- Press the shutter button: Press the shutter button gently to take your photo. A clicking sound will indicate that the shutter has been released.
- Advance the film: After taking a photo, turn the film advance wheel until it stops. This will move the exposed frame out of the way and prepare the camera for the next shot.
- Keep track of the number of shots taken: Most disposable cameras have a shot counter that shows how many photos you have taken. Keep an eye on this to know when you are nearing the end of the roll.
Developing Disposable Camera Film:
- Finish the roll: Take all the photos on your disposable camera roll. Most disposable cameras come with 24 or 27 exposures, so be sure to use them all before proceeding.
- Locate a film developing center: Find a local pharmacy, photography store, or retail chain that offers film developing services.
- Inquire about costs and turnaround time: Before handing over your disposable camera, ask about the processing fee, which often ranges from $5 to $15, depending on the location and available services. Additionally, check the turnaround time for film development, usually anywhere from 1 hour to a few days, depending on the store’s workload.
- Drop off your disposable camera: Give your disposable camera to the shop attendant, and they will give you a receipt and provide an estimated time for when your photos will be ready.
- Pick up your developed photos: Once your photos are ready, go back to the store to collect your photos and negatives. You may choose to have your photos printed, saved onto a CD, or sent to you electronically, depending on the options available at the shop.
- Share and enjoy your photos: Now that you have your developed photos, you can share them with friends and family or create photo albums to cherish those memories.

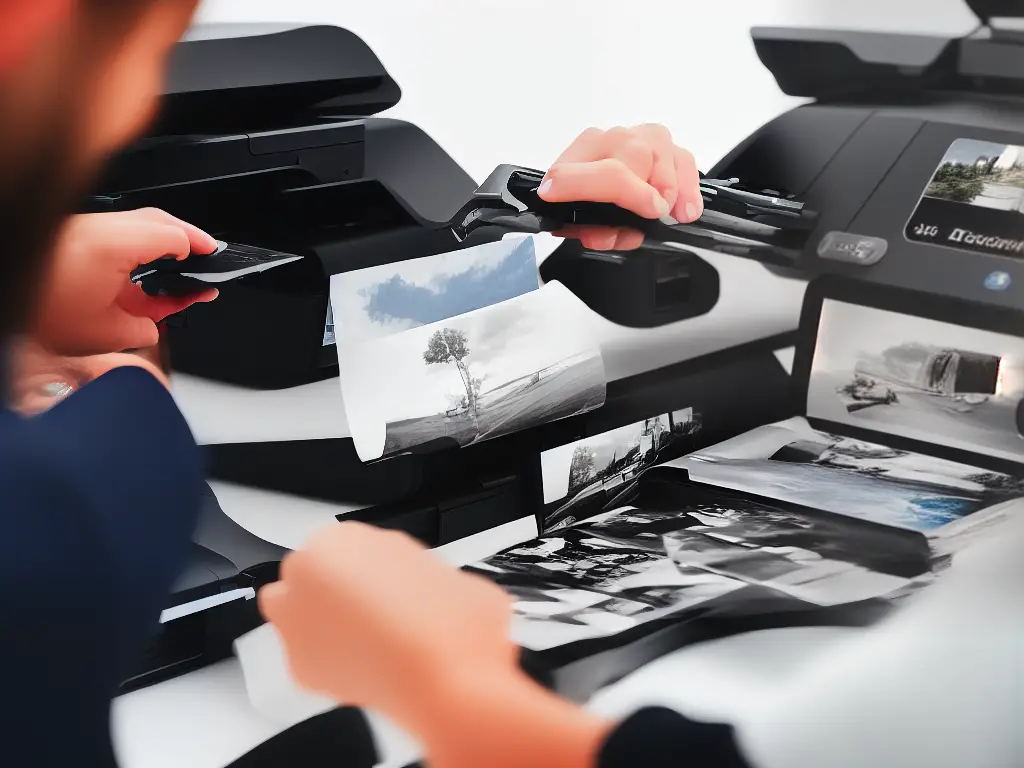
Scanning and Printing Photos from Disposable Cameras
Before scanning and printing photos from a disposable camera, you must first get the film developed. This can be done at a local photo lab, pharmacy, or retail store that offers film developing services. The process usually takes a few days, and you will receive your developed photos in the form of prints or as negatives, depending on the service you choose.
Scanning the Prints or Negatives
-
Choose a scanner: To digitize photos, you will need either a flatbed scanner or a dedicated film scanner. Flatbed scanners are generally cheaper and more versatile but might offer lower quality scans for film negatives. Dedicated film scanners often provide better results for negatives but may be more expensive.
-
Clean the scanner and photos: Use a microfiber cloth to gently clean the glass surface of the scanner and remove any dust from the photos or negatives before scanning.
-
Load the photos or negatives: If scanning prints, place them face down on the scanner glass. If scanning negatives, use the provided film holder to properly align and hold the negatives in place on the scanner.
-
Configure the scanning settings: Open the scanner software on your computer and select the appropriate settings for scanning photos or negatives. For negatives, select the color negative or black-and-white negative option, depending on the type of film.
-
Adjust resolution: For high-quality scans, set the resolution to at least 300 dpi for prints and 2400 dpi for negatives.
-
Edit if needed: Some scanner software will allow you to make basic adjustments to the scanned image, such as cropping, color correction, or removal of dust and scratches.
-
Save the scans: Scan each photo and save the digitized image as a JPEG or TIFF file on your computer.
Printing the Scanned Photos
-
Load photo paper: Purchase high-quality photo paper compatible with your printer, and load it into the paper tray according to the manufacturer’s instructions.
-
Choose print settings: Open the photo file on your computer and select the print option. In the print settings, choose the correct paper size, print quality, and any additional options such as borderless printing.
-
Print the photo: Ensure the printer is turned on and connected to your computer, then proceed to print the photo. Allow the printed photo to dry for a few minutes before handling.
With the digitized images now saved on your computer, you can easily share them online via social media, email, or cloud storage. Upload the files from your computer to your preferred platform and share them with friends and family.
By following these steps, you can scan, print, and share photos from disposable cameras, preserving your memories and making them accessible both in print and online.
Disposable Camera DIY Projects
Discover creative and fun do-it-yourself projects using disposable cameras. These projects will not only help you save and cherish your memories but also add a unique flair to your home décor. Dive into these DIY ideas featuring photo albums, wall art and more using your disposable camera photos.
1. DIY Disposable Camera Photo Album
Organize and decorate your disposable camera photos by making a photo album with this simple DIY project.
- Materials:
- Disposable camera photos
- Cardstock or album pages
- Decorative stickers, washi tape and embellishments
- Hole puncher
- Binder rings or ribbon
- Instructions:
- Develop your disposable camera photos at a local photo lab or online service.
- Organize your photos by events, dates or themes.
- Lay out your photos on the cardstock or album pages, leaving enough space for notes, captions or decorations.
- Decorate your pages with stickers, washi tape, and embellishments to add a personal touch and enhance your photos.
- Punch holes in the side of each page and use binder rings or ribbon to bind the pages together.
- Add a cover made of cardstock or decorative paper to complete your disposable camera photo album.
2. DIY Photo Wall Art Collage
Make an artistic statement with your disposable camera photos by creating a beautiful wall art collage with these easy-to-follow steps.
- Materials:
- Disposable camera photos
- Large frame or poster board
- Craft glue or double-sided tape
- Ruler and pencil
- Scissors or paper trimmer
- Instructions:
- Develop your disposable camera photos and carefully trim any white borders.
- Measure the dimensions of your frame or poster board and plan the layout of your photos, ensuring they fit within your chosen display area.
- Starting at the center, arrange your photos on the frame or poster board in a grid, spiral or organic layout, based on your preference.
- If desired, leave spaces to add quotes, stickers or notes.
- Use craft glue or double-sided tape to attach the photos to the frame or poster board.
- Hang or display your disposable camera photo wall art collage proudly in your home for everyone to see.
3. DIY Disposable Camera Mini Gallery
Make a mini gallery of your disposable camera photos with this easy to follow guide.
- Materials:
- Disposable camera photos
- Small, thin wooden dowels or craft sticks
- Twine or ribbon
- Mini clothespins or paper clips
- Wall hooks or nails
- Instructions:
- Develop your disposable camera photos and trim them as needed
- Cut the dowels or craft sticks to match the width of your photos
- Attach a length of twine or ribbon to each dowel or stick. This will serve as a way to hang the mini gallery from wall hooks or nails.
- Use mini clothespins or paper clips to clip each photo to the dowel or stick, lining up the top of the photo with the length of twine or ribbon.
- Hang your mini gallery on wall hooks or nails, and enjoy the display of your disposable camera photos.
4. DIY Disposable Camera Shadow Box
Create a unique and sentimental piece of art with your disposable camera photos using a shadow box frame.
- Materials:
- Disposable camera photos
- Shadow box frame
- Craft glue or double-sided tape
- Decorative elements (e.g., small trinkets, shells, dried flowers)
- Instructions:
- Develop your disposable camera photos and decide on a central theme or event for your shadow box.
- Choose a few photos and decorative elements that represent your chosen theme.
- Attach the photos and other elements to the back of the shadow box using craft glue or double-sided tape.
- Assemble the shadow box frame, following the manufacturer’s instructions.
- Display your disposable camera shadow box in your home as a stylish and sentimental piece of art.
With these DIY disposable camera projects, you can preserve your precious memories while adding a creative, personal touch to your home. Happy crafting!

Environmental Impact and Recycling Disposable Cameras
Disposable cameras are popular for capturing memories on special occasions or vacations. However, these devices have a significant environmental impact due to their single-use design. This guide explains the environmental impact of disposable cameras and how to recycle them responsibly.
1. Environmental Impact of Disposable Cameras
- Waste: Disposable cameras contribute to general waste as they are discarded after a single use and can’t be reused.
- Chemicals: These cameras contain film which uses chemicals like silver, and when disposed of improperly, it can pollute water supplies and negatively affect aquatic life and ecosystems.
- Resource consumption: The production of disposable cameras uses natural resources such as plastic, metal, and glass, leading to the exhaustion of these resources.
2. How to Recycle Disposable Cameras Responsibly
- Find a local recycling facility: Research and locate recycling facilities in your area that accept disposable cameras. Contact the facility directly to inquire about disposable camera recycling if you cannot find information on their website.
- Camera processing: Ensure that the film inside the camera is processed and developed before recycling. Photo processing centers including some pharmacy chains and photography studios can handle this task.
- Remove the battery: The batteries can’t be recycled, so it’s crucial to remove them for disposal separately according to local regulations or taking it to a designated collection point.
- Place the camera in a recycling bin: Once the film has been processed and the battery removed, dispose of the camera in an appropriate recycling bin or drop it off at a recycling facility. Check if your local recycling center has specific instructions or requirements for how to prepare disposable cameras for recycling.
By recycling disposable cameras responsibly, you can minimize their environmental footprint. As more people become aware of the impact of these devices, we can make better-informed choices about their use and disposal.

Now that you’ve gained a deeper understanding of disposable cameras and their various aspects, you’re ready to embark on your own photography journey. Embrace the unique charm and slight imperfections of disposable camera photos, and use these tips and techniques to capture meaningful moments that you’ll cherish for years to come. And remember, while disposable cameras may be a throwback to a simpler time, it’s important to be mindful of their environmental impact and dispose of them responsibly. Happy snapping!