Embarking on the journey of astrophotography can be an incredibly rewarding experience, especially when it comes to capturing the breathtaking grandeur of the Milky Way. This comprehensive guide will lead you through the essential principles and techniques involved in Milky Way astrophotography, from understanding your camera settings and selecting the right equipment to mastering composition and post-processing for spectacular results. Whether you’re a beginner or an experienced photographer, this guide has something for everyone who wants to capture the captivating beauty of our home galaxy.
Introduction to Astrophotography
Astrophotography is the art and science of capturing images of the night sky, including stars, galaxies, planets, and other celestial phenomena. One of the most stunning subjects in astrophotography is our own galaxy, the Milky Way. In this guide, you will learn the basic principles and techniques of astrophotography, with a focus on capturing stunning images of the Milky Way.
Equipment needed:
- A digital camera with manual exposure control (preferably a DSLR or mirrorless camera)
- A fast, wide-angle lens (with a low f-number)
- A sturdy tripod
- A remote shutter release or intervalometer (optional)
- A headlamp or flashlight with a red light setting for preserving night vision
Step 1: Finding the Milky Way
To photograph the Milky Way, you need a clear, dark sky away from city light pollution. You can use a smartphone app like PhotoPills, Sky Guide, or Stellarium to help locate the Milky Way’s position in the sky. The best time to photograph the Milky Way is during the new moon or as far from the full moon as possible, as the moonlight can wash out the fainter details of our galaxy.
Step 2: Camera settings
Set your camera to manual mode (M) to give you full control over your exposure settings. Use the lowest f-number on your lens, which allows the maximum amount of light to enter the camera. Set your ISO to a high value (1600-6400) – this will increase the camera’s sensitivity to light, capturing more starlight. For the shutter speed, start with 20 to 30 seconds as a baseline.
Step 3: Focus on the stars
One of the most important and challenging aspects of astrophotography is achieving proper focus on the stars. Autofocus will not work in low light, so you need to focus manually. Set your lens to manual focus and turn the focus ring to infinity (?). Most lenses, however, may not have perfect focus right at the infinity mark, so use your camera’s live view to zoom in on a bright star or planet and fine-tune the focus until the object is sharp and clear.
Step 4: Composition
Use the rule of thirds and include an interesting foreground element (like a tree, rock formation, or building) to create a more visually striking image. Set up your camera on the tripod, framing the scene, and making sure the tripod is level and secure. The wider your lens, the more of the Milky Way you can capture in a single image.
Step 5: Test shots
Before capturing the final image, take a few test shots to tweak your exposure settings and composition. Check each test shot for focus, exposure, and overall image quality. Adjust the shutter speed, ISO, and aperture as needed – just remember that too long of a shutter speed can cause star trails due to the Earth’s rotation.
Step 6: Post-processing
Import your images into software like Adobe Lightroom or Photoshop for post-processing. Adjust the exposure, contrast, and color balance, and remove any noise or aberrations that are common in astrophotography. You can also use specialized astrophotography software like DeepSkyStacker to stack multiple exposures or align images to create stunning panoramas of the Milky Way.
With practice and patience, you’ll be able to capture breathtaking images of the Milky Way, showcasing the awe-inspiring beauty of our home galaxy. Happy shooting!
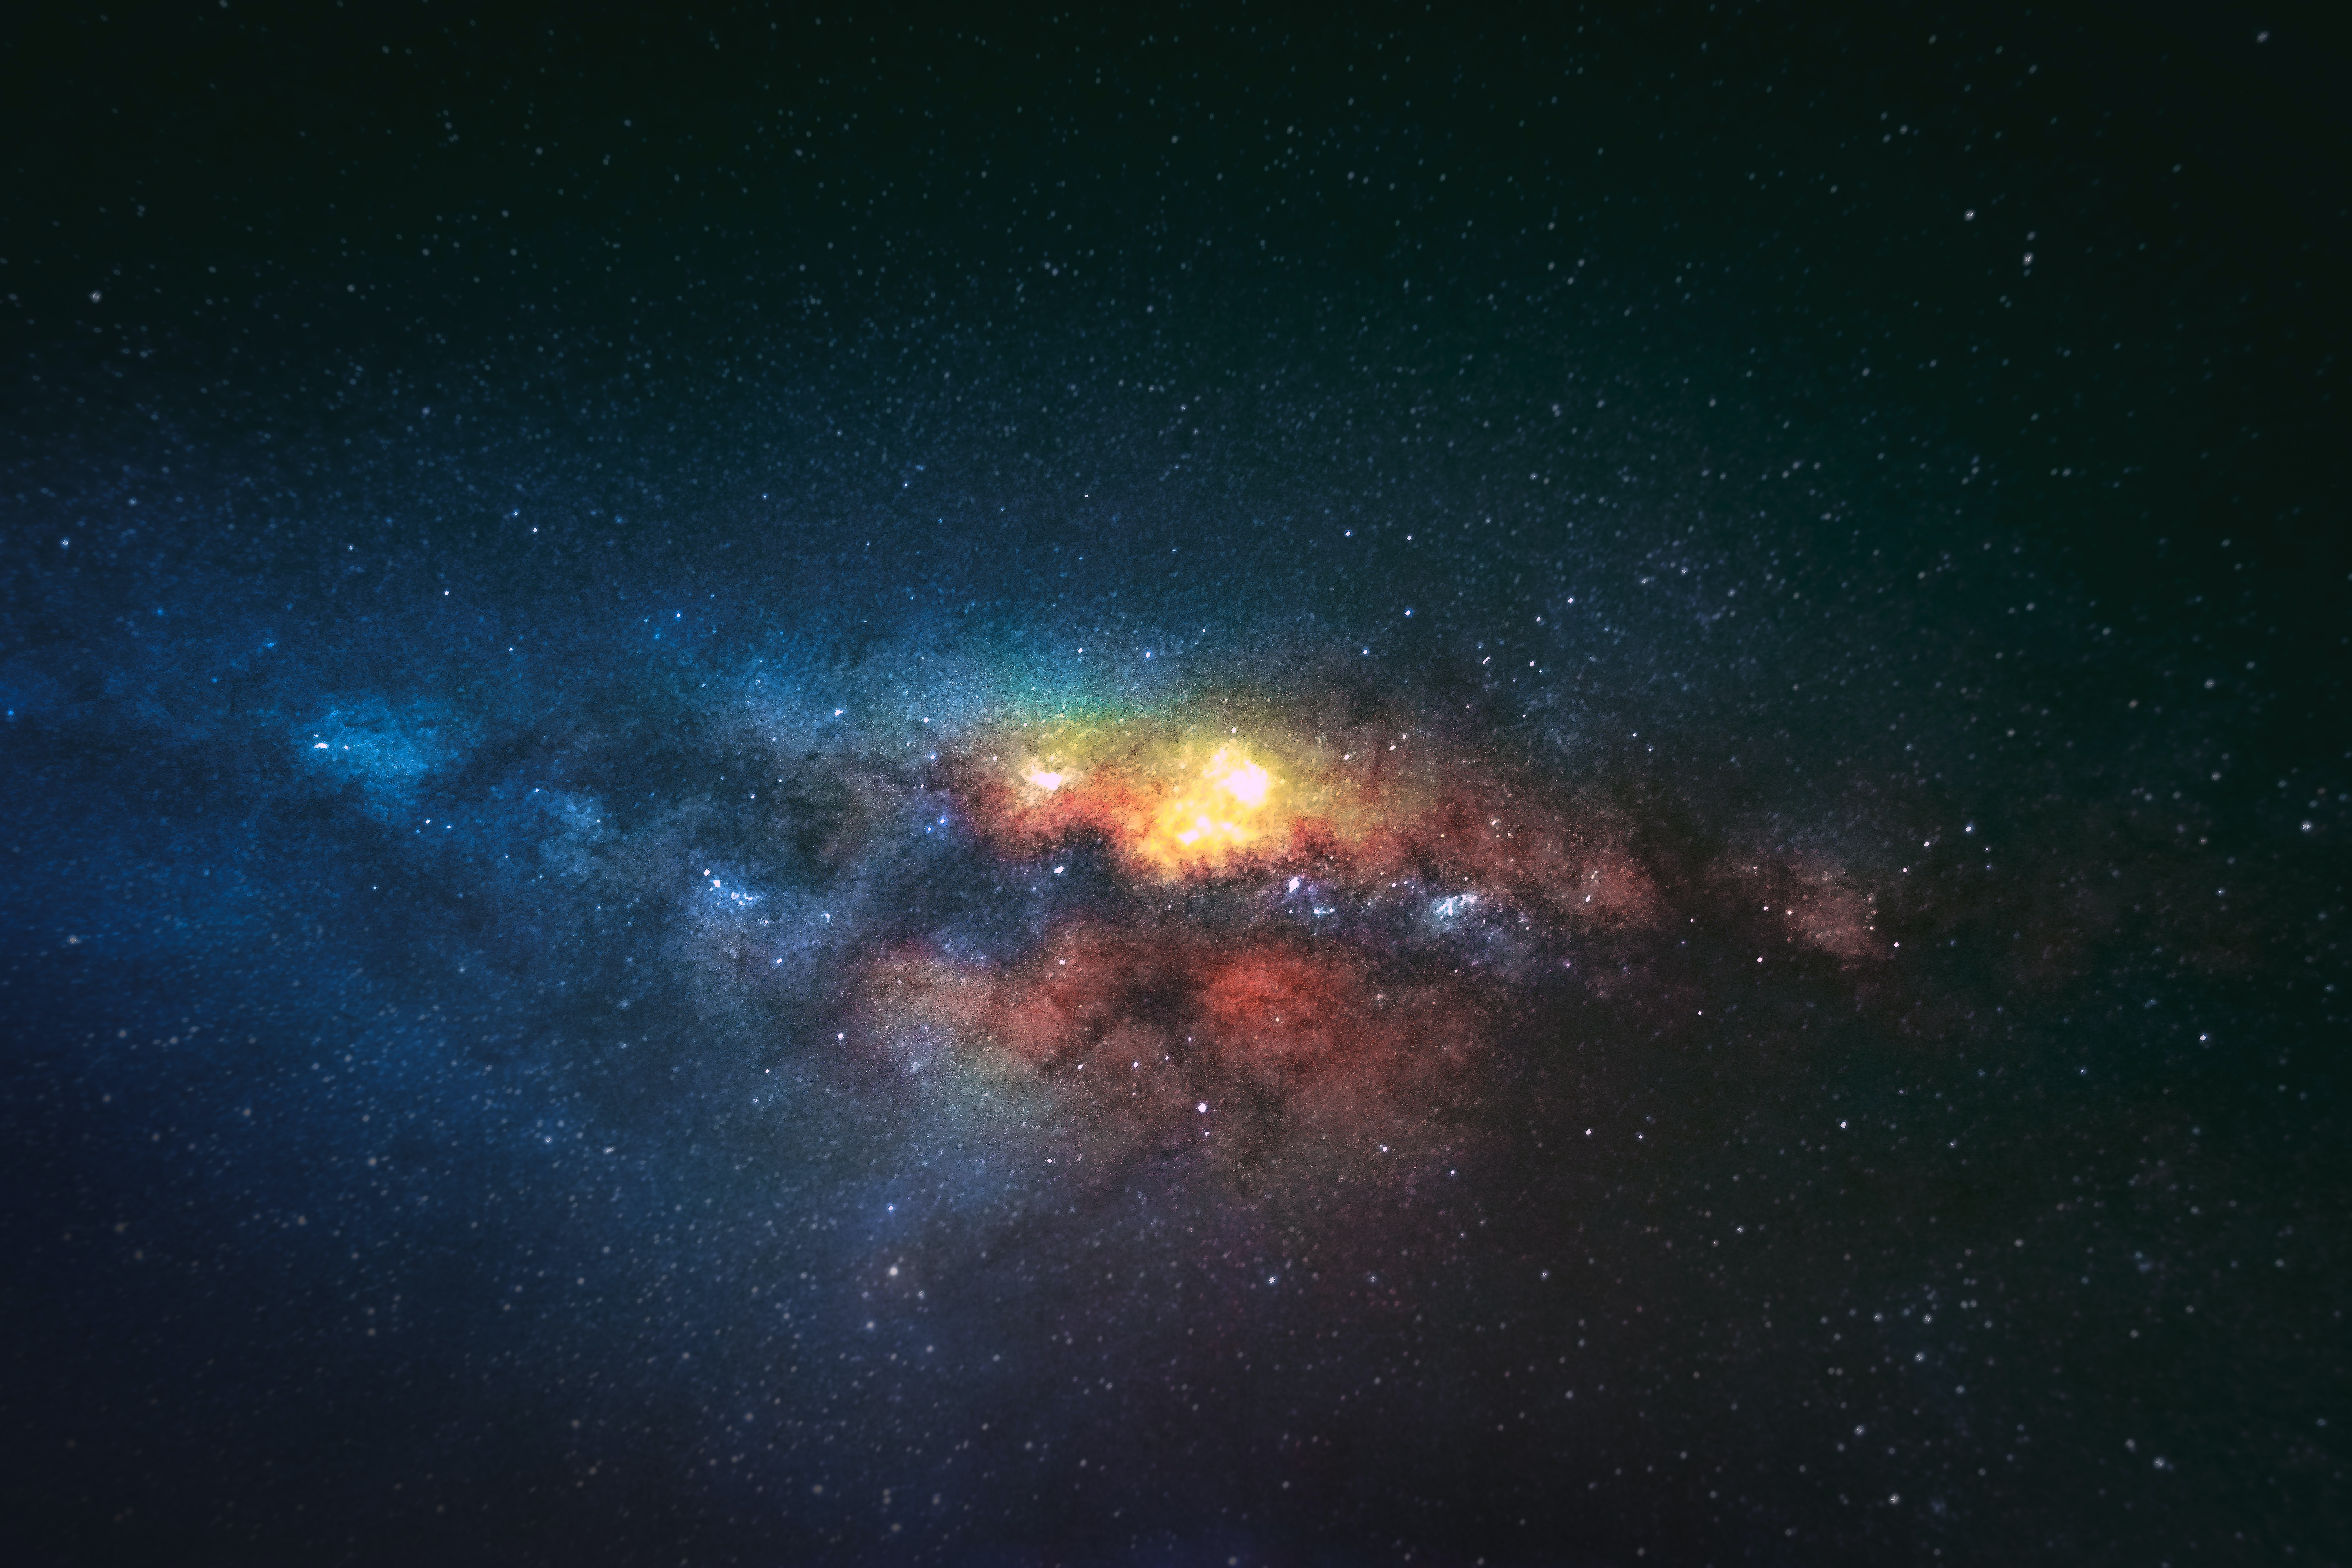
Photo by shotbycerqueira on Unsplash
Understanding Camera Settings
Title: Understanding Camera Settings for Milky Way Astrophotography
Introduction:
Capturing the beauty of the Milky Way requires specific knowledge of camera settings and techniques. In this guide, we will explore the essentials of adjusting your camera settings – namely ISO, aperture, shutter speed, and white balance – to achieve stunning Milky Way astrophotography.
1. ISO:
ISO is a measure of your camera’s sensitivity to light – the higher the ISO, the more sensitive your camera is to light. For Milky Way photography, you need a high ISO to capture the faint light of the stars and the galaxy.
- Set your ISO between 1600 and 6400, depending on the capabilities of your camera. Keep in mind that higher ISOs can introduce more noise to your photos. Some newer cameras are better at handling high ISOs with minimal noise, so feel free to experiment with your specific equipment.
- Start with a setting of ISO 3200 and take test shots. If the image appears too dark or too noisy, adjust accordingly.
2. Aperture:
The aperture determines the size of the opening in your camera’s lens that allows light to reach the sensor. A wider aperture will let more light in and is crucial for capturing the Milky Way’s faint details. Aperture settings are measured in f-stop numbers.
- Select the widest possible aperture for your lens; this is typically represented by the smallest f-stop number (e.g., f/2.8 or f/4).
- Prime lenses with an aperture of f/2.8 or wider are ideal for Milky Way photography but use whatever equipment is available and experiment with different settings.
3. Shutter Speed:
When capturing the stars, it is crucial to find the right balance between exposure time (longer shutter speeds) and avoiding star trails – meaning keeping the motion of the stars during exposure to a minimum.
- Use the “500 Rule” as a guideline to determine the ideal shutter speed: Divide 500 by the focal length of your lens. For example, if you have an 18mm lens (on a full-frame camera), the recommended shutter speed would be 500/18 = 27.8 seconds.
- Adjust for crop sensor cameras: multiply your focal length by the crop factor (usually 1.5 for APS-C cameras) before dividing it into 500.
- Keep your shutter speed as close to the calculated number from the “500 Rule” to minimize star trails while still allowing sufficient light exposure.
4. White Balance:
White balance refers to the adjustment of color temperature in a photograph. It is essential for creating a pleasing image and can significantly impact the overall feel of your Milky Way shots.
- Set your camera to a custom/manual white balance setting.
- Adjust color temperature based on your sky conditions and personal taste. Many photographers prefer a cooler temperature (around 3,800K to 4,200K) for nighttime sky photography, while others might use a warmer temperature (4,500K to 5,000K) to emphasize the warm tones in the Milky Way’s core. Experiment and see what looks best for your images.
- Always shoot in RAW format to allow for more flexibility in adjusting white balance during post-processing.
Conclusion:
Armed with these fundamental knowledge and tips for adjusting ISO, aperture, shutter speed, and white balance, you are now prepared to venture out and capture the stunning beauty of the Milky Way. Practice and experiment with different settings to find what works best for your specific equipment and location. Happy shooting!

Photo by shotbycerqueira on Unsplash
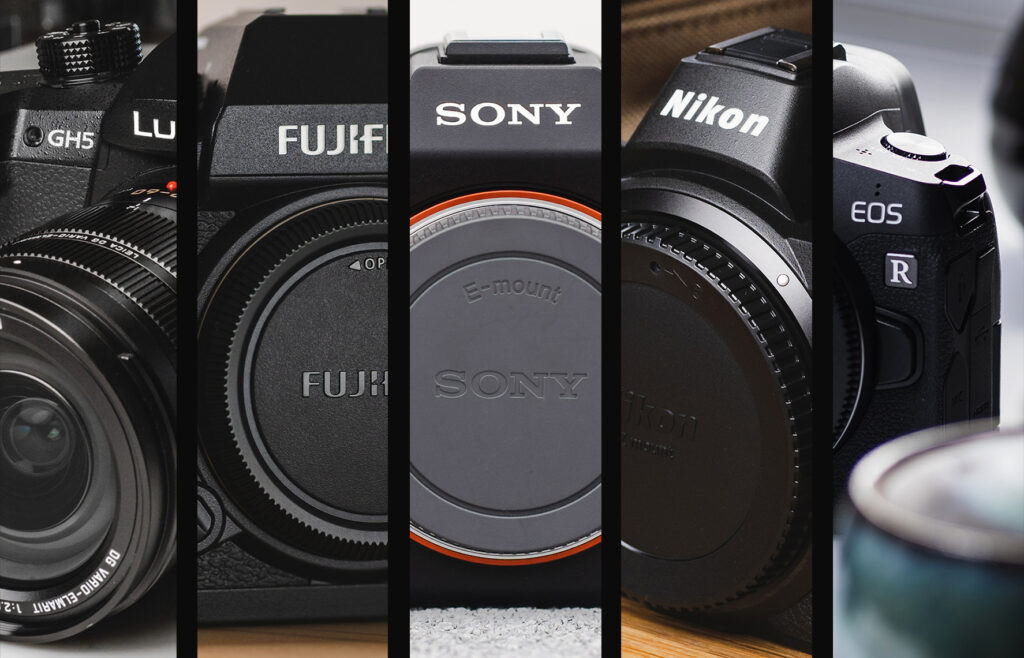
Selecting the Right Equipment
Title: Selecting the Right Equipment for Milky Way Astrophotography
Introduction: Capturing the beauty of the Milky Way through astrophotography can be an immensely rewarding experience. However, to effectively capture these stunning images, it’s essential to have the right photography equipment on hand. This guide will provide you with instructions for selecting the necessary equipment, including the camera, lenses, and tripod.
1. Choose a suitable camera:
- a. Know your options: There are two primary camera types for astrophotography – DSLR (Digital Single-Lens Reflex) and mirrorless cameras. Both have their pros and cons, but generally, a modern, high-quality DSLR or mirrorless camera will be sufficient for capturing the Milky Way.
- b. Consider a full-frame sensor: Cameras with full-frame sensors tend to perform better in low-light situations, which is crucial for astrophotography. They reduce noise and capture greater detail, but can be more expensive than cameras with cropped sensors.
- c. Investigate high ISO capabilities: The ability to shoot at high ISO levels without too much noise will improve your Milky Way images. Look for a camera with good noise performance at ISO 3200 or higher.
- d. Research long exposure capabilities: The camera should have the option for manual control over shutter speed and be able to handle long exposure times (typically 20-30 seconds) to capture the stars’ movement.
2. Select the right lens:
- a. Opt for a wide-angle lens: A wide-angle lens allows you to capture a larger portion of the night sky and is ideal for Milky Way photography. A focal length of 14-24mm for full-frame cameras or 10-16mm for cropped sensor cameras is recommended.
- b. Prioritize a fast aperture: To capture more light in a shorter amount of time, choose a lens with a fast aperture. Ideally, the lens should have an aperture of f/2.8 or faster.
- c. Consider manual focus capabilities: Accurate focusing is crucial for sharp astrophotography images. Lenses with manual focus and a distance scale can make achieving precise focus on the stars much easier.
3. Invest in a sturdy tripod:
- a. Ensure stability: A sturdy tripod is essential for long-exposure photography to eliminate any camera movement. Opt for a tripod made of carbon fiber or aluminum, with a decent maximum load capacity to support your camera and lens.
- b. Check maximum height: A tripod with a sufficient maximum height is important to help you better compose your shots and avoid uncomfortable shooting positions. Choose a tripod that extends to a height suitable for your needs.
- c. Evaluate locking mechanisms: Ensure the tripod has reliable locking mechanisms for both the legs and the head to keep your camera steady during long exposure shots.
- d. Look for added features: Tripods with built-in bubble levels and adjustable leg angles can make it easier to set up on uneven terrain.
Conclusion:
Capturing breathtaking images of the Milky Way requires the right equipment, including a suitable camera, lens, and tripod. By familiarizing yourself with the necessary equipment and making informed choices, you’re one step closer to unlocking the true potential of astrophotography and creating stunning images of the night sky.

Planning Your Astrophotography Shoot
Title: Planning Your Milky Way Astrophotography Shoot: A Comprehensive Guide
Introduction:
Capturing the beauty of the Milky Way is a rewarding and awe-inspiring experience for photographers. However, planning a successful astrophotography shoot requires patience, research, and an understanding of various factors. In this guide, we will outline the critical steps and considerations you need to follow to plan and execute a perfect Milky Way astrophotography shoot.
1. Understanding The Milky Way
The Milky Way is a barred spiral galaxy, which hosts our solar system. The visible part of the galaxy consists of a dense concentration of stars, gas, and dust that form a band of light, stretching across the night sky. Therefore, your main goal in astrophotography is to capture this spectacular band in all its glory.
2. Choose The Right Time Of Year
The Milky Way’s visibility varies throughout the year, and the best time to photograph the core is during the summer months (May through September in the Northern Hemisphere). During these months, the Milky Way core rises at night and is visible for a longer duration.
3. Time Your Shoot
Plan your shoot during the New Moon or close to it. The absence of moonlight offers the darkest skies, making it easier to capture the faint light of the Milky Way. Use a moon calendar or app to check when the New Moon is occurring and schedule your shoot accordingly.
4. Research And Choose Your Location
Picking the right location is one of the most critical aspects of Milky Way photography. Consider the following criteria when choosing your spot:
- a) Light Pollution: Avoid areas with significant light pollution, like cities and densely populated regions. Look for dark sky locations, such as remote rural areas, national parks, or designated dark sky reserves.
- b) Accessibility: Make sure your chosen location is easily accessible, safe, and preferably has nearby amenities like restrooms or parking.
- c) Visual Interest: Choose a location with fascinating foreground elements, such as mountains, boulders, trees, or abandoned structures, to create a stunning composition.
5. Monitor Weather Conditions
Clear skies are essential for Milky Way photography. Monitor weather forecasts and satellite imagery to ensure you’re not shooting under thick cloud cover. Also, consider potential atmospheric conditions like humidity, which can create haze or fog and impact visibility.
6. Calculate The Best Time For Shooting
Use astrophotography-specific tools and apps to help predict the timing and location of the Milky Way in the sky on your chosen date. Tools like PhotoPills, Stellarium, and SkySafari can help you determine the time, angle, and elevation of the Milky Way, so you know when to set up your camera and where to point it.
7. Prepare Your Gear
Ensure you have all the necessary equipment for your shoot. Essentials for Milky Way astrophotography include a DSLR or mirrorless camera, a wide-angle lens with a fast aperture (preferably f/2.8 or lower), a sturdy tripod, a remote shutter release, extra batteries, and a headlamp or flashlight for navigating in the dark.
8. Be Patient And Persistent
Astrophotography is challenging and requires patience. You may not get the perfect shot on your first attempt. However, with practice and persistence, you will gradually improve your skills and achieve stunning images of the Milky Way.
In conclusion
, planning a successful Milky Way astrophotography shoot requires careful consideration of several factors, such as timing, location, and weather conditions. By following this guide, you will be well-prepared to capture the breathtaking beauty of the Milky Way in your photographs.
Composition and Focusing Techniques
Introduction:
Milky Way astrophotography is a fascinating and rewarding hobby, where you capture stunning images of the night sky filled with stars, planets, and distant galaxies. To create truly captivating images, you need to master composition and focusing techniques. In this guide, we’ll discuss the importance of composition and focus in astrophotography and teach you how to apply these techniques for breathtaking Milky Way images.
Section 1: The Importance of Composition and Focusing in Astrophotography
1.1 Composition
- Composition is the arrangement of elements within a scene, which can make the difference between an ordinary photo and a truly captivating image.
- In astrophotography, a well-composed image should feature a compelling foreground element, a balanced arrangement of stars, and a clear view of the Milky Way.
1.2 Focusing
- Astrophotography requires accurate focusing to ensure that the stars and other celestial objects are sharp and well-defined in the final image.
- Due to the low-light conditions in which astrophotography is typically done, focusing can be challenging, but mastering this skill is crucial to producing high-quality images.
Section 2: Composition Techniques for Captivating Milky Way Images
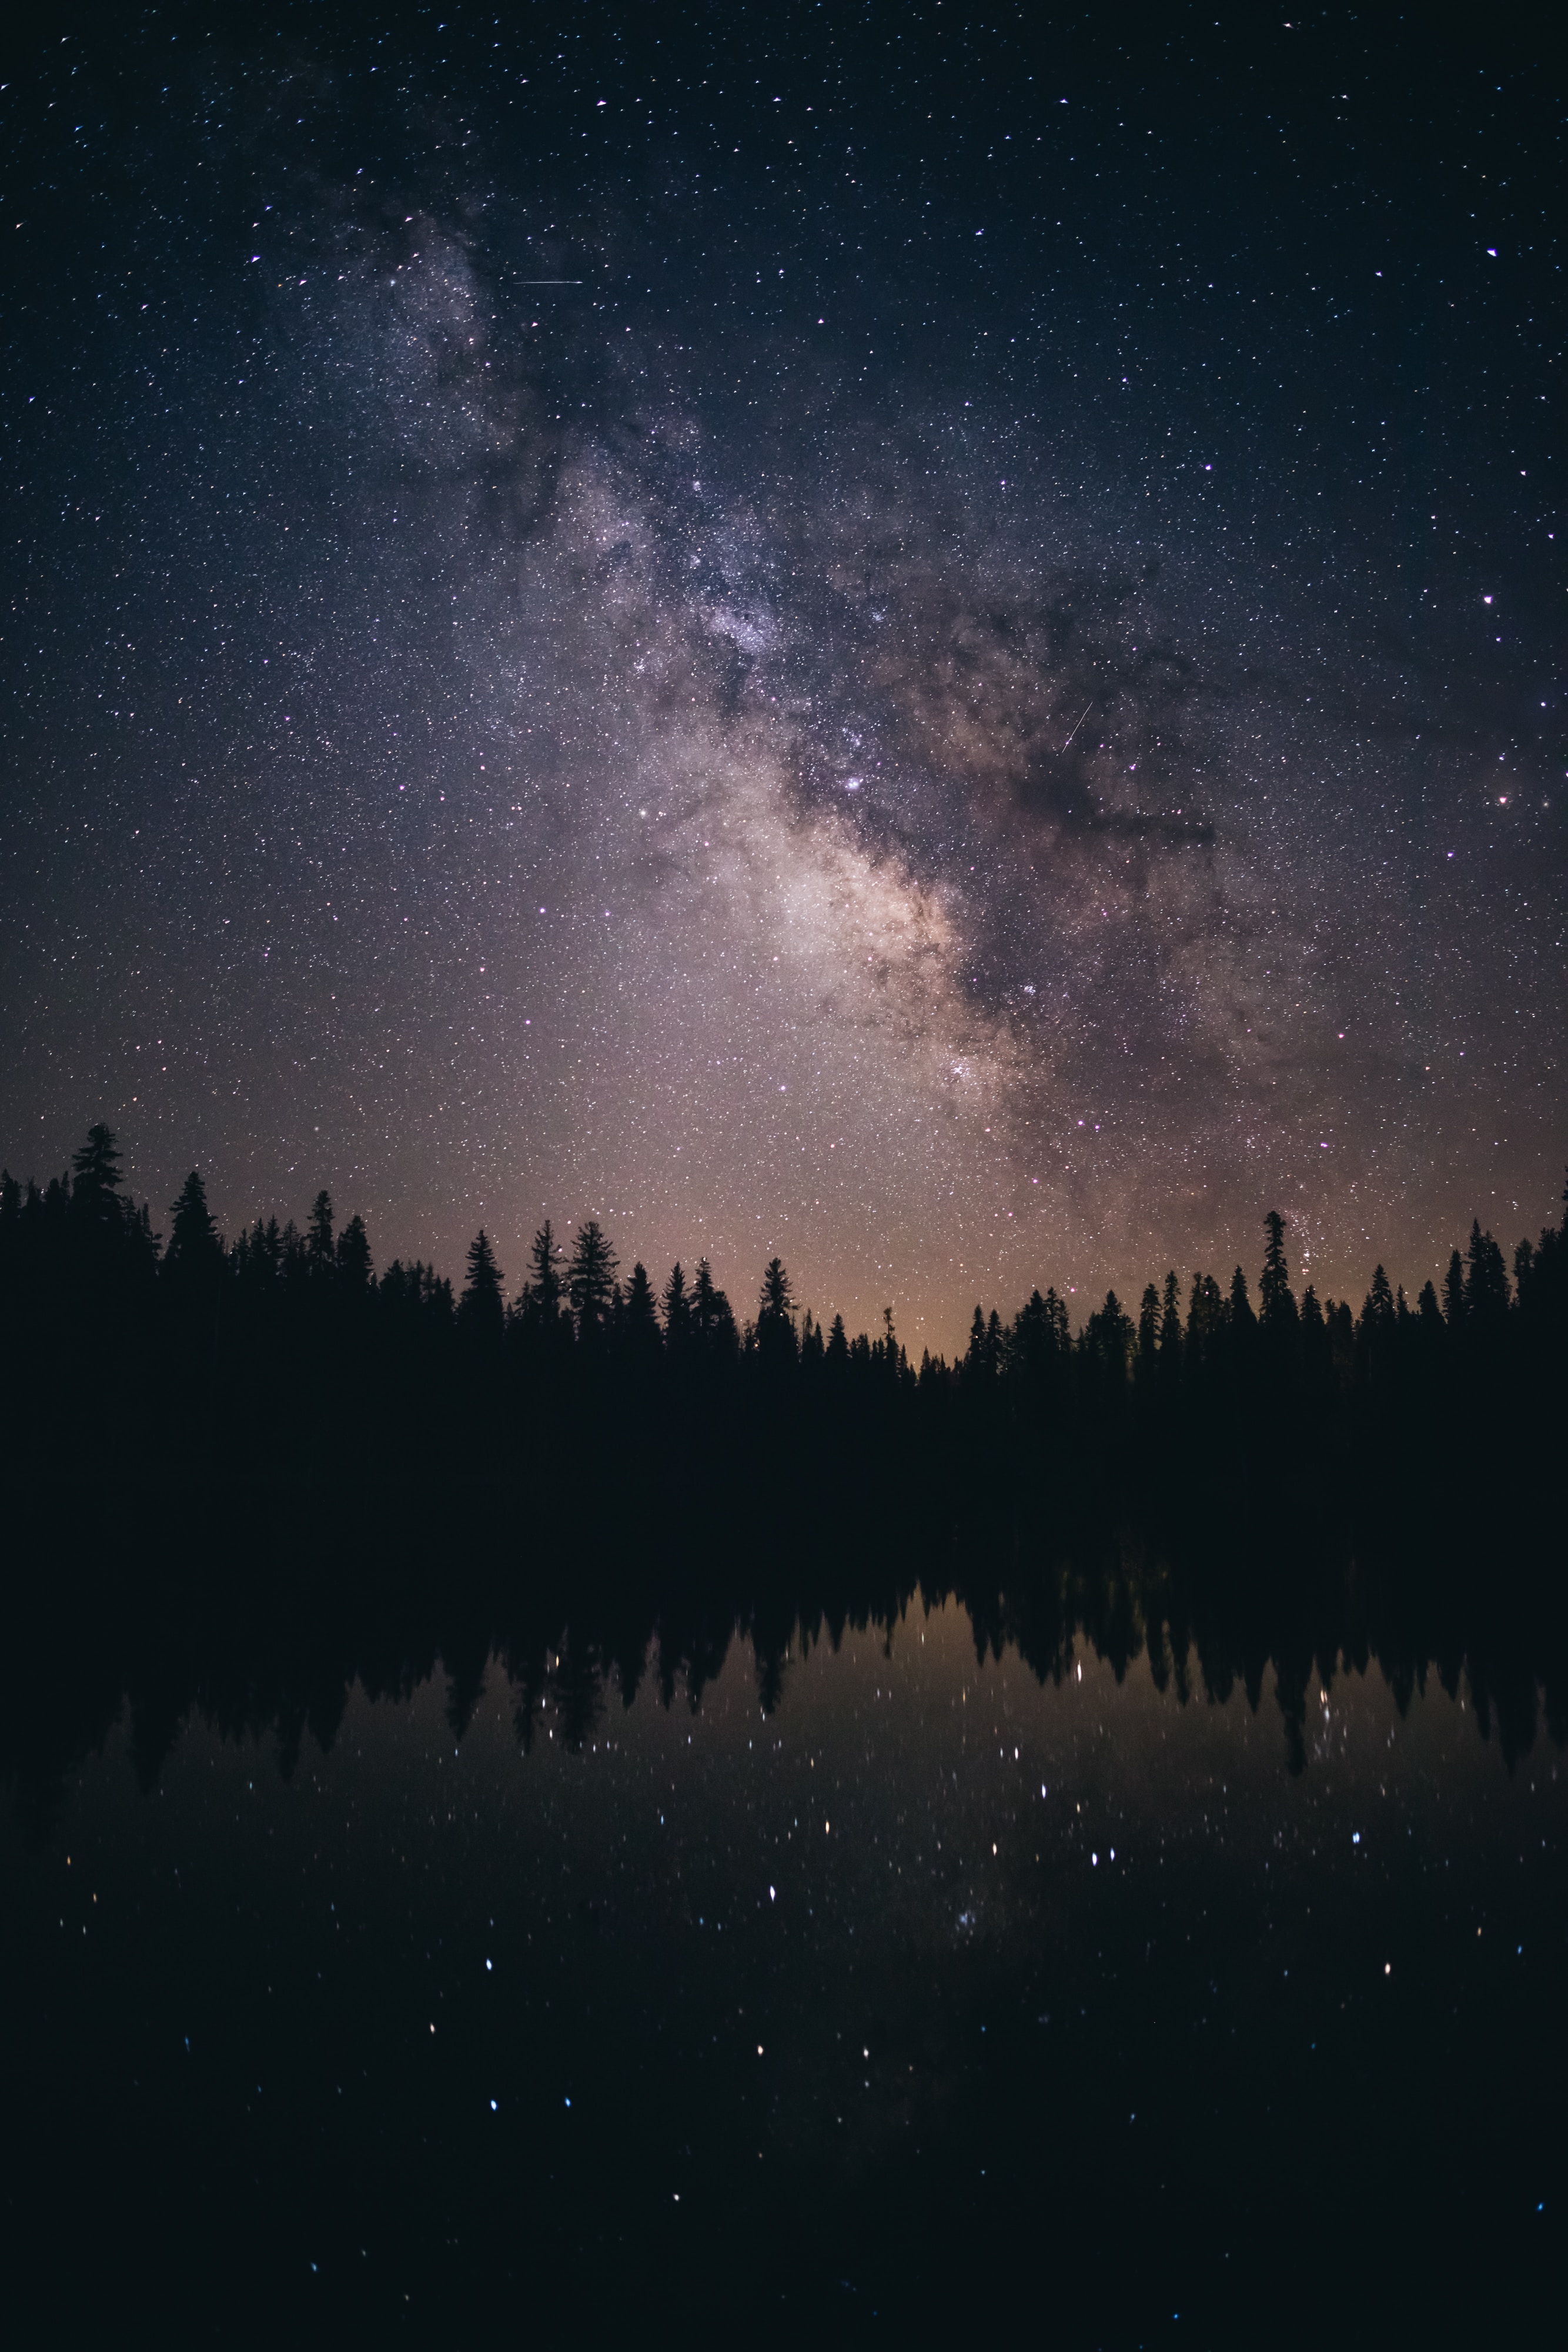
2.1 Foreground Elements
- Including a foreground element, such as a tree, a building, or a rock formation, can help provide a sense of scale and depth to your Milky Way images.
- To effectively include a foreground element, consider the rule of thirds, where you place the Milky Way in one third of the image and the foreground element in the remaining two thirds.
- Experiment with different perspectives and angles to find the most visually appealing composition.
2.2 Light Painting
- Light painting involves using a flashlight or another light source to softly illuminate a foreground element, adding a touch of drama to your composition.
- Carefully balance the light painting with the natural light of the stars to avoid overpowering the Milky Way.
2.3 Balancing the Image
- An image with too many bright stars can be overwhelming, so try to balance the celestial objects in your composition.
- Capture images during the new moon phase to minimize the impact of moonlight on the night sky, allowing the stars and the Milky Way to stand out more prominently.
Section 3: Focusing Techniques for Sharp Milky Way Images
3.1 Manual Focus
- Due to the low-light conditions, autofocus often struggles to lock onto the stars. Therefore, using manual focus is the best approach for astrophotography.
- Set your camera’s focus to infinity (?). However, always be attentive as not all lenses are precisely calibrated at infinity.
3.2 Live View Focusing
- Using your camera’s live view feature will help you visually confirm that the stars and Milky Way are in focus.
- Zoom in on a bright star using 5x to 10x live view magnification, then adjust the focus until the star is as sharp as possible.
3.3 Focus Stacking
- Focus stacking involves taking a series of images at different focus points and blending them together to create a single image with increased depth of field.
- This technique is particularly useful when you have a foreground element that needs to be in focus, in addition to the Milky Way.
Conclusion:
Mastering composition and focusing techniques is crucial for capturing breathtaking Milky Way images. Incorporate compelling foreground elements into your compositions and use live view focusing or focus stacking to ensure the sharpest possible images. With practice and attention to detail, you’ll be on your way to capturing stunning astrophotography images that showcase the mesmerizing beauty of the night sky.

Long Exposure and Noise Reduction
Title: Milky Way Astrophotography: Long Exposure and Noise Reduction Techniques
Milky Way astrophotography is the art of capturing stunning images of our galaxy through long exposure photography. It requires a combination of patience, technique, and skill to produce breathtaking results. In this guide, we will teach you how to manage long exposure times and utilize noise reduction techniques to capture stunning images of the Milky Way.
Materials you’ll need:
- A DSLR or mirrorless camera with manual mode capability
- A wide-angle lens (preferably fast, with an aperture of f/2.8 or wider)
- A sturdy tripod
- A cable release or remote shutter control (optional, but recommended for reducing camera shake)
- A headlamp or flashlight with a red light mode (for preserving night vision)
Step 1: Find a dark location
Choose a dark spot away from city lights and give yourself plenty of time for your eyes to adjust to the darkness. To find the right location, you can use dedicated dark sky maps and apps.
Step 2: Set up your equipment
Mount your camera on the tripod and attach the wide-angle lens. Set your camera to manual mode and make sure your cable release or remote shutter control is connected or enabled.
Step 3: Choose the right camera settings
Start with the following settings as a base and adjust as needed:
- Aperture: Set your lens to its widest aperture (e.g., f/2.8) to allow as much light as possible.
- Shutter speed: Begin with a 20-30 second exposure. This can be adjusted depending on the results you want, but exposures longer than 30 seconds may start to show star trails due to Earth’s rotation.
- ISO: Start at 1600 or 3200. Adjust as needed to find the right balance between light and noise.
- Focus: Set your lens to manual focus and adjust to infinity.
Step 4: Compose your shot
Use the live view on your camera to frame your shot, focusing on an interesting foreground element to add depth to the image. Use the rule of thirds to achieve a pleasing composition.
Step 5: Take a test shot
Take a test shot with your current settings. Review the image, paying close attention to the brightness and noise levels. Adjust your ISO, aperture, or shutter speed as needed and retake the test shot until you’re happy with the settings.
Step 6: Utilize Noise Reduction Techniques
There are three main ways to reduce noise in your Milky Way astrophotography:
- In-camera Noise Reduction: Many cameras have a built-in noise reduction feature called "Long Exposure Noise Reduction" (LENR). When enabled, the camera takes a second exposure of equal length with the shutter closed to record the noise pattern and subtracts it from the original image. Note that this will double your exposure time.
- Shoot in RAW format: Shooting in RAW format allows for greater flexibility during post-processing. This will enable you to better correct and reduce noise without degrading image quality.
- Stacking multiple exposures: By taking multiple exposures and stacking them in software dedicated to astrophotography (such as DeepSkyStacker or Sequator), you can significantly reduce noise by averaging the images. Make sure to take at least 10-20 exposures for optimal results.
Step 7: Capture the final image
Once you’re satisfied with the test shots and utilized your preferred noise reduction technique, use your cable release or remote shutter control to take the final exposure. Remember to stay patient, as astrophotography can be a time-consuming process.
Step 8: Post-processing
Load your images into an editing software (such as Adobe Lightroom or Photoshop) and fine-tune the exposure, contrast, colors, and noise levels to bring out the best in your Milky Way astrophotography.
Conclusion:
With practice, patience, and the right techniques, you’ll be well on your way to capturing stunning images of the Milky Way. Remember to experiment with different settings and noise reduction methods to find what works best for you and your equipment. Happy shooting!
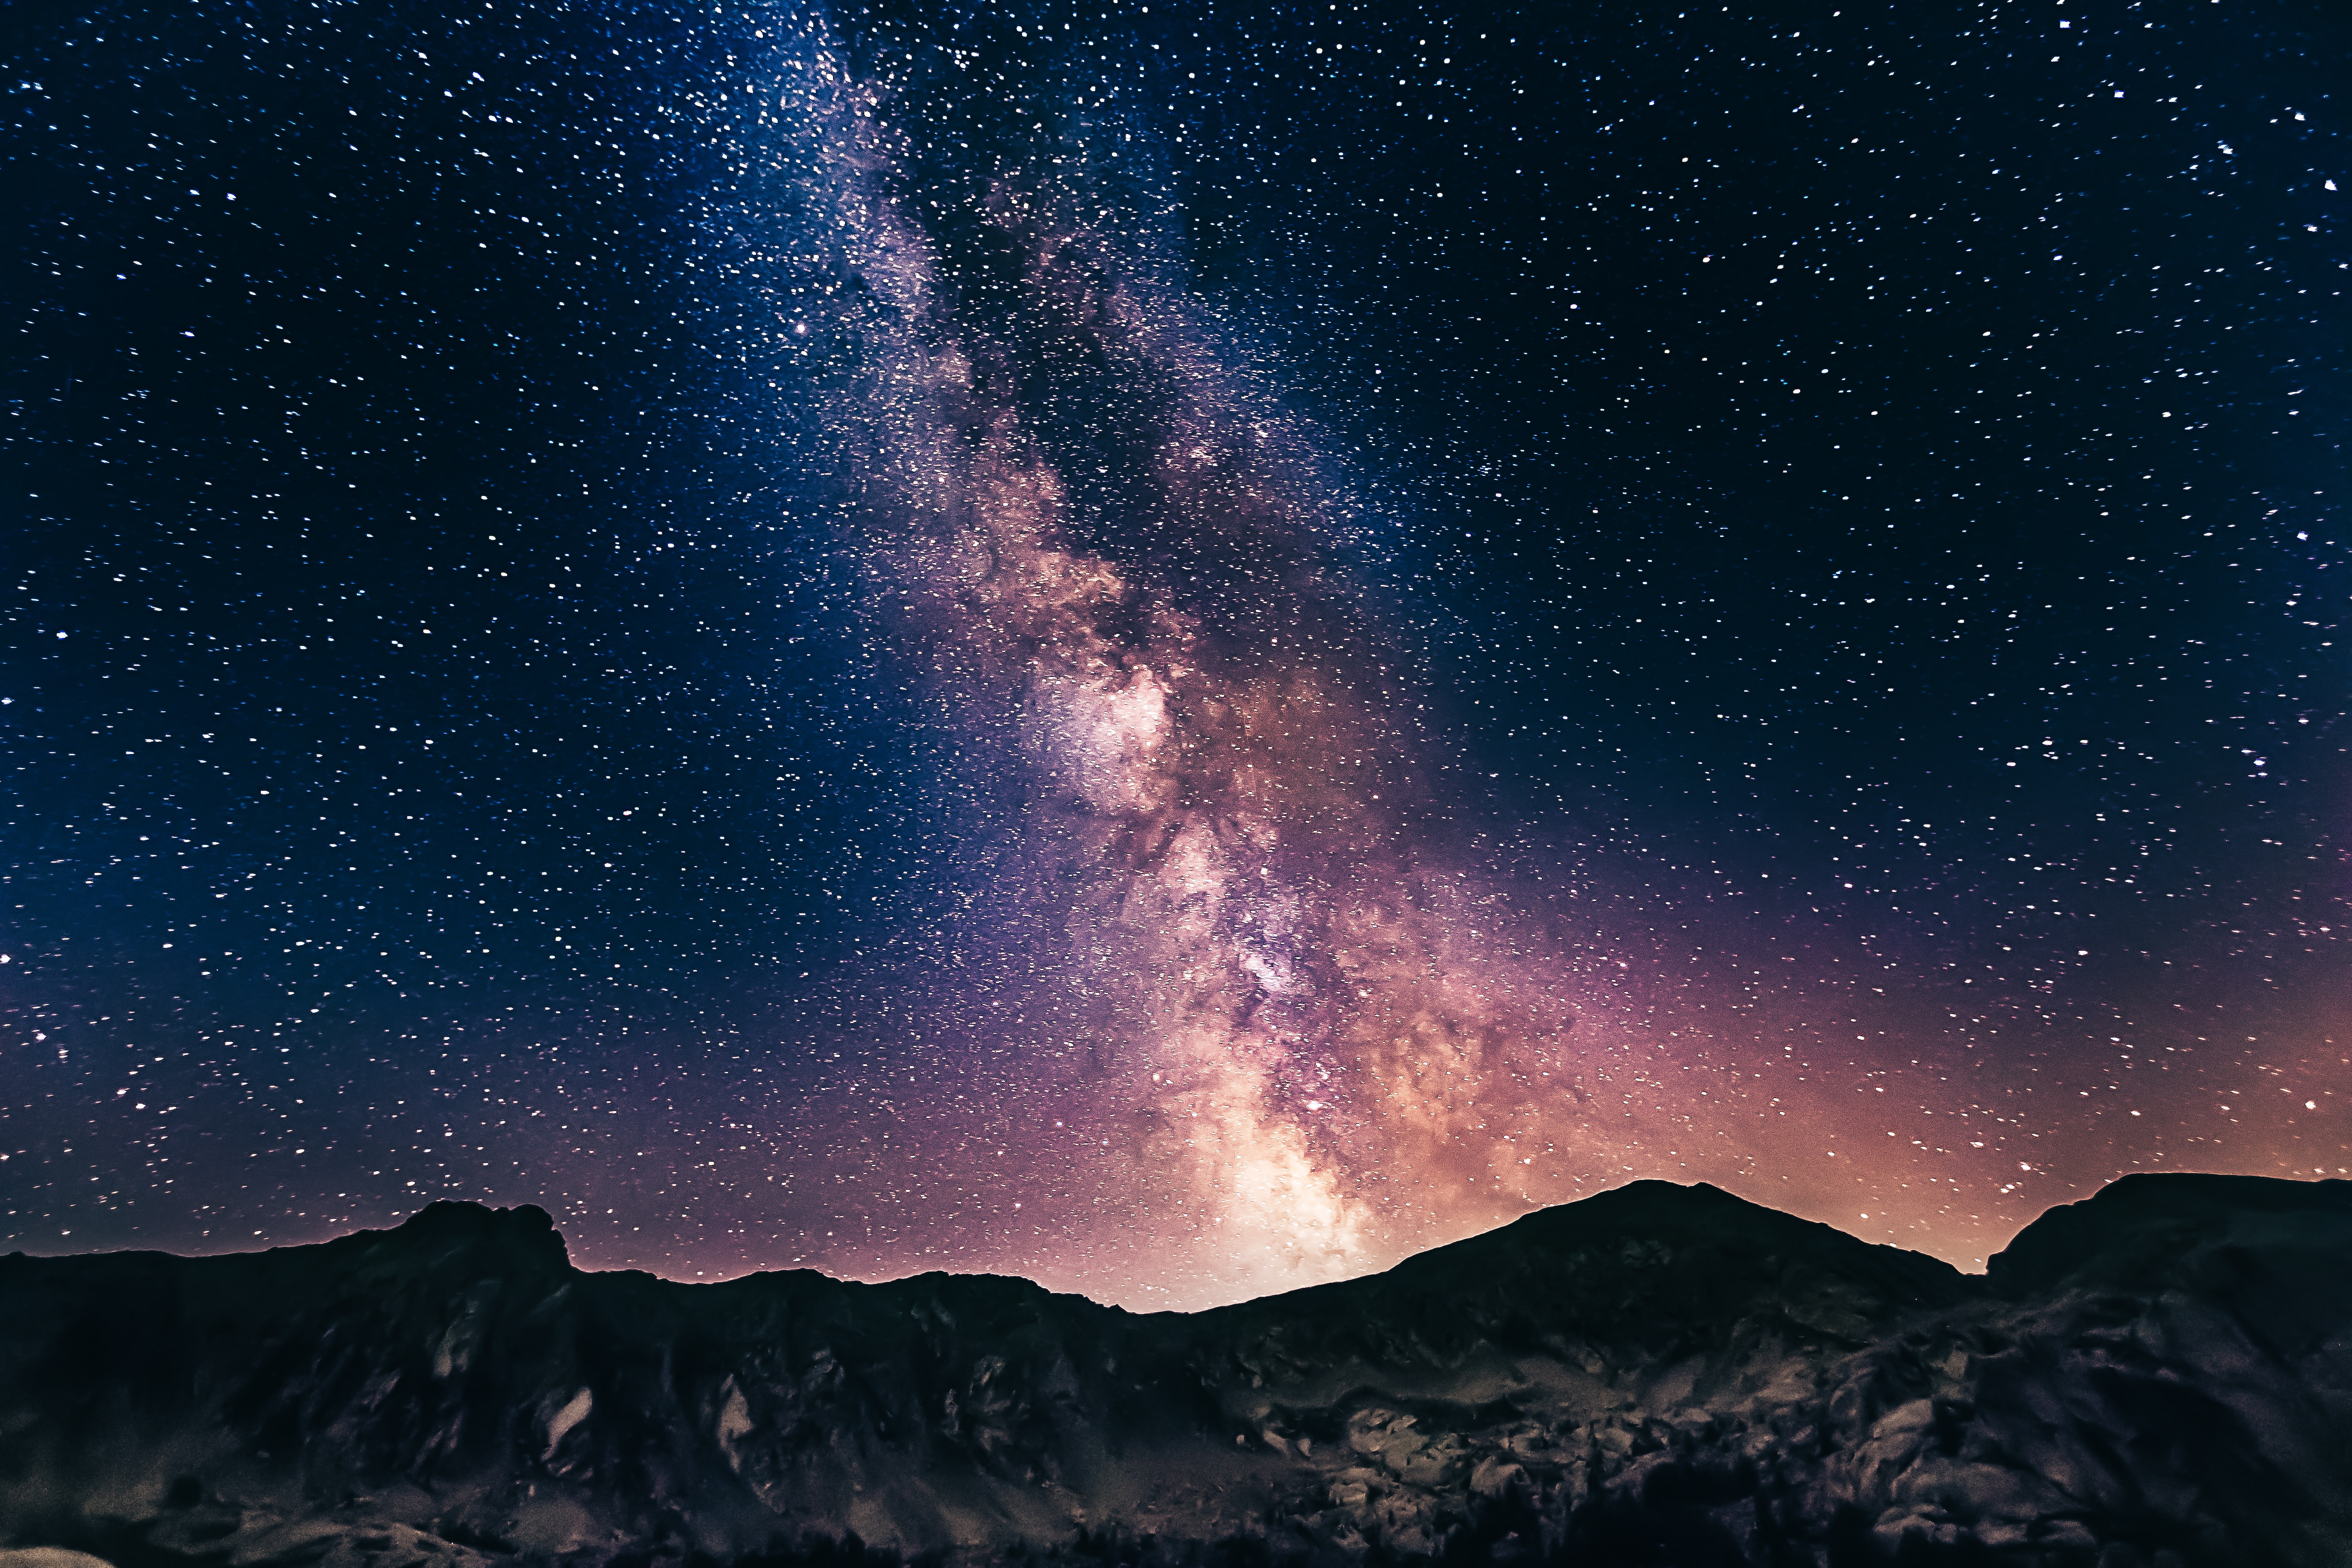
Photo by denisdegioanni on Unsplash
Stacking and Image Processing
Title: Stacking and Image Processing for Milky Way Astrophotography
Introduction:
Astrophotography is the art and science of capturing the beauty of our galaxy through photography. Stacking and image processing are essential techniques to produce stunning images of the Milky Way. In this tutorial, you’ll learn how to stack multiple images of the Milky Way and process them using Adobe Lightroom and Photoshop.
1. Equipment and Preparation
To capture the Milky Way images, you’ll need the following equipment:
– DSLR or Mirrorless camera
– Wide-angle lens (preferably with a fast aperture, such as f/2.8)
– Sturdy tripod
– Intervalometer or remote shutter release
– Blanket or chair for comfort during long exposure times
Location:
Choose a dark location, away from city lights, and under clear skies. Check weather conditions and the moon phase before planning a trip.
2. Capture Milky Way Images
a. Camera Settings:
– Use manual mode to control Aperture, Shutter Speed, and ISO.
– Set Aperture to its widest setting (f/2.8 or lower if possible)
– Set Shutter Speed to 15-30 seconds
– Set ISO to 1600-3200
– Enable Long Exposure Noise Reduction
– Shoot in RAW format for better flexibility while post-processing
b. Composition:
– Use the camera’s Live View to frame the Milky Way and include interesting foreground elements.
– Use a bubble level on the tripod to help with the alignment of the horizon.
– Focus on a bright star using manual focus and live view.
c. Capture Multiple Images:
– Set up the intervalometer or remote shutter release with a 2-second delay to avoid camera shake.
– Take at least 15-20 images to have enough data for stacking.
– Also, take some dark frames (images with the lens cap on and the same settings) to help reduce noise during stacking.
3. Stacking Images
a. Adobe Lightroom Preliminary Editing:
– Import your images into Adobe Lightroom.
– Apply basic adjustments such as lens correction, chromatic aberration correction, and noise reduction.
– Synchronize settings to apply them to all the images.
– Export images as 16-bit TIFF files.
b. Stacking Using Sequator or DeepSkyStacker:
– Open one of these free software options: Sequator (Windows) or DeepSkyStacker (Windows or Mac with Wine).
– Load the images and dark frames into the software.
– Select alignment and stacking settings, such as using “auto stars” for alignment and “median kappa-sigma clipping” for the stacking method.
– Start the stacking process and save the stacked image as a 16-bit TIFF file.
4. Final Image Processing in Photoshop
a. Open the Stacked Image:
– Open the stacked TIFF file in Adobe Photoshop.
b. Levels and Curves Adjustment:
– Adjust the levels and curves to increase contrast and bring out the details in the Milky Way.
– Use layer masks to apply adjustments selectively.
c. Enhance Colors:
– Adjust the color balance to neutralize any color cast in the image.
– Boost saturation to enhance the colors of the Milky Way, using masks to isolate specific areas.
d. Noise Reduction and Sharpening:
– Apply noise reduction using the Camera Raw filter, focusing on the noisy areas.
– Apply a gentle High Pass filter to sharpen the image without increasing noise.
e. Any additional edits to enhance the overall image, such as increasing the vibrancy, adding contrast, or dodging/burning specific areas.
5. Save and Share
Save your final Milky Way astrophotography masterpiece as a high-resolution JPEG and share it with friends, or print it for display.
Conclusion:
Stacking and image processing are essential techniques for creating breathtaking Milky Way astrophotography images. By following these steps and practicing, you’ll be on your way to capturing the beauty of our galaxy. Be patient and persistent, and above all, enjoy the process!
Advanced Techniques and Equipment
Title: Advanced Techniques and Equipment for Milky Way Astrophotography
Introduction: Milky Way astrophotography offers the chance to capture stunning images of the night sky with our own galaxy as the main subject. As you progress in your astrophotography journey, you might be interested in exploring advanced techniques and additional equipment to enhance your Milky Way images further. In this guide, we will discuss various advanced techniques and equipment, including star trackers and filters, to help you take your Milky Way astrophotography to the next level.
1. Planning and Preparation
- A. Research the best time and location:
- i. Use apps like PhotoPills, Stellarium, or SkySafari to find optimal times and dates for Milky Way photography.
- ii. Search for dark sky locations to avoid light pollution, which can hinder the visibility of the Milky Way.
- B. Check the weather forecast:
- i. Clear skies with minimal clouds provide the best conditions for astrophotography.
- ii. Moon phases: Aim for a new moon or crescent moon as the reduced light will better reveal the Milky Way’s details.
2. Advanced Equipment
- A. Star Trackers:
- i. These devices help counteract the Earth’s rotation by moving the camera in sync with the stars, allowing for longer exposures without star trails.
- ii. Star trackers require accurate polar alignment; refer to the device manual or online tutorials for guidance.
- B. Filters:
- i. Light pollution filters: Helpful for photographers in areas with moderate light pollution, these filters help to reduce the impact of artificial lights on your images.
- ii. Hydrogen-alpha filters: These filters enhance the visibility of hydrogen-alpha emissions, commonly found in nebulae, and can add more depth to your Milky Way images.
3. Camera Settings and Techniques
- A. Exposure time:
- i. With a star tracker, you can extend your exposure times—anywhere from 2-5 minutes is common and will help capture more detail and color in your images.
- B. Focus stacking:
- i. To ensure sharp images, consider taking several shots of the Milky Way with different focus points (foreground, mid-ground, and stars) and merging them in post-processing.
- C. Bracketing exposures:
- i. Take several exposures at different settings (i.e., various shutter speeds, ISO, and apertures) and blend the images in post-processing for a well-balanced final image.
4. Post-processing
- A. Image stacking:
- i. Use software like DeepSkyStacker, Sequator, or Starry Landscape Stacker to stack multiple images taken with the same settings. This technique reduces noise and improves image quality.
- B. Image editing software:
- i. Use Adobe Lightroom or Photoshop to process your images. Make adjustments to exposure, contrast, saturation, noise reduction, and sharpening to enhance the final result.
Conclusion:
Pushing your Milky Way astrophotography to new heights requires a combination of planning, advanced equipment, and refined techniques. With these steps, you can create stunning images of our galaxy. Remember, practice makes perfect—continue experimenting with different settings and techniques to find what works best for you and your equipment.

Photo by designhorf on Unsplash
Post-Processing and Editing
Title: Post-Processing and Editing Milky Way Astrophotography: Enhancing Your Stellar Shots
Introduction:
Milky Way astrophotography is a captivating branch of photography that focuses on capturing the magnificent beauty of our galaxy. To truly bring out the glory of the Milky Way in your photos, post-processing and editing are essential. In this tutorial, we will guide you through various post-processing techniques and tools that can help you enhance and finalize your Milky Way photos for the desired results.
Step 1: Choose the right editing software
First, you need to select an appropriate photo editing software for processing your Milky Way shots. Some popular ones are Adobe Lightroom, Adobe Photoshop, and Capture One. While Lightroom is widely used for its user-friendly interface and adequate tools, Photoshop offers more advanced techniques for those who want to dive deeper into astrophotography editing.
Step 2: Import and organize your photos
Import your raw files into your chosen editing software, and organize them in a systematic manner. This may include creating folders or collections to keep track of your different Milky Way shots and their progress through the editing process.
Step 3: Basic adjustments
Start with basic adjustments to your Milky Way photos:
1. Adjust the temperature and tint sliders to achieve a natural color balance that highlights the color contrast between the core, stars, and surrounding sky.
2. Increase the exposure to brighten your image without significantly affecting the noise levels. Work with the contrast slider to achieve the desired amount of depth and separation between the stars and the dark sky.
3. Apply adjustments to highlights, shadows, whites, and blacks sliders to bring out the details in your image. Be cautious not to overdo it and introduce noise or unnatural effects.
4. Increase clarity and/or dehaze sliders to enhance the overall sharpness and reduce the haze in your images, making the Milky Way stand out more.
5. Use the noise reduction sliders to minimize the noise in your image due to high ISO values or long exposure times.
Step 4: Lens corrections and chromatic aberration
Make sure to enable lens corrections in your editing software, which will help correct any vignetting or distortion caused by your camera lens. Also, remove any chromatic aberration (color fringing) present around bright stars in your image by locating the chromatic aberration correction tool in your software.
Step 5: Local adjustments for the Milky Way core
To make the Milky Way core stand out, use local adjustment tools such as radial filters, adjustment brushes, or masks. Apply these tools selectively to the core area to increase contrast, saturation, and clarity, making the dust lanes and star colors more prominent.
Step 6: Enhance the star colors and details
Using an editing software like Photoshop, you can perform advanced editing techniques like star reduction, selective color adjustments, and sharpening with high-pass filters to emphasize the details and colors of the individual stars in your image.
Step 7: Export and share
After completing all the post-processing adjustments, export your edited Milky Way image in the desired format (such as JPEG or TIFF) and share your stunning creation with your friends, family, and on social media platforms.
Conclusion:
Post-processing and editing are crucial for bringing out the true beauty of your Milky Way astrophotography shots. By understanding and applying the techniques and tools mentioned in this guide, you can greatly enhance and finalize your photos for jaw-dropping results. Happy shooting and editing!

Photo by denisdegioanni on Unsplash
By following this comprehensive guide, you will be well-equipped to hone your skills in Milky Way astrophotography and create striking images of the starry night sky. Happy stargazing, and may your photographic exploration of the cosmos continue to inspire and amaze you.
Originally posted 2023-05-24 23:46:25.